DIFFERENTIAL OIL SEAL (for RH Side) REPLACEMENT

-
REMOVE AUTOMATIC TRANSAXLE ASSEMBLY
Tech Tips
See the steps from "Remove Engine Assembly with Transaxle" through "Remove Automatic Transaxle Assembly" Click here.
-
REMOVE TRANSFER ASSEMBLY
-
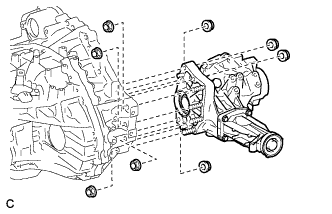
Remove the 8 nuts.
-
Using a plastic hammer, remove the transfer assembly from the transaxle assembly.
Note
-
Remove the transfer assembly from the transaxle assembly without tilting it.
-
During removal, do not hold the transfer assembly by the oil seals on either side of the assembly.
-
-
Remove the 4 transfer and transaxle setting stud bolts.
-
-
REMOVE FRONT TRANSAXLE CASE OIL SEAL
-
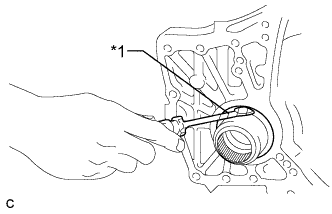
Text in Illustration *1 Vinyl Tape for Outside:
-
Using a screwdriver with its tip wrapped with vinyl tape, remove the front transaxle case oil seal.
Note
Be careful not to damage the housing.
-
-
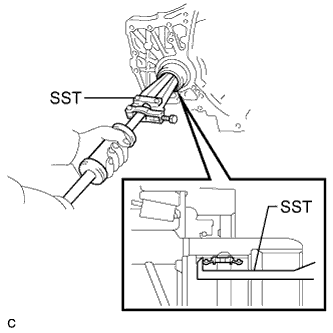
for Inside:
-
Using SST, tap out the front transaxle case oil seal.
- SST
- 09308-00010
Note
Be careful not to damage the housing.
-
-
-
INSTALL FRONT TRANSAXLE CASE OIL SEAL
-
for Inside:
-
Coat the lip of a new front transaxle case oil seal with MP grease.
-
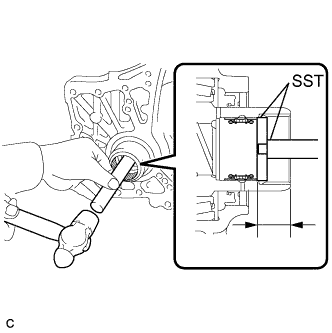
Using SST and a hammer, tap in the front transaxle case oil seal.
- SST
- 09950-60010 ( 09951-00410 )
- 09950-70010 ( 09951-07200 )
Oil seal driven in depth 21.5 to 22.5 mm (0.846 to 0.886 in.)
-
-

for Outside:
-
Coat the lip of a new front transaxle case oil seal with MP grease.
-
Using SST and a hammer, tap in the front transaxle case oil seal.
- SST
- 09649-17010
- 09950-70010 ( 09951-07200 )
Oil seal driven in depth 5.5 to 6.5 mm (0.217 to 0.256 in.) Note
Check that the oil seal is installed in the correct direction.
-
-
-
INSTALL TRANSFER ASSEMBLY
-
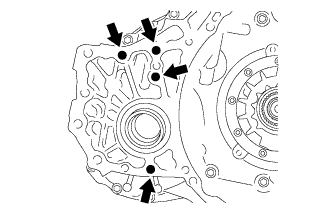
Install the 4 new transfer and transaxle setting stud bolts to the transaxle case positions shown in the illustration.
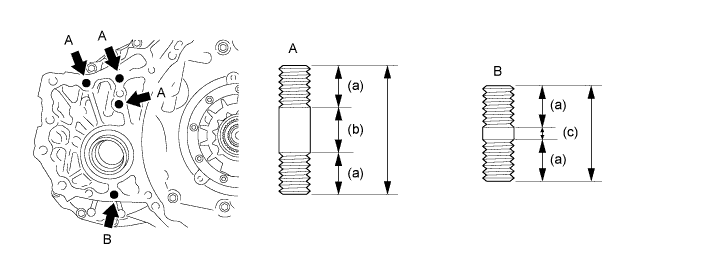
Stud bolt length a 22 mm (0.866 in.) b 25 mm (0.984 in.) c 5 mm (0.197 in.) - Torque:
- 39 N*m { 400 kgf*cm, 29 ft.*lbf }
Note
Install the sealed side of the stud bolt to the transaxle assembly.
-
Install the transfer assembly to the transaxle assembly with the 8 nuts.
- Torque:
- 69 N*m { 700 kgf*cm, 51 ft.*lbf }
Note
-
Install the transfer assembly to the transaxle assembly horizontally.
-
Do not touch the transfer assembly oil seals during installation.
-
-
INSTALL AUTOMATIC TRANSAXLE ASSEMBLY
Tech Tips
See the steps from "Install Automatic Transaxle Assembly" through "Install Engine Assembly with Transaxle" Click here.