RADIATOR REMOVAL

-
PRECAUTION (w/ Navigation System for HDD)
Note
After the engine switch is turned off, the display and navigation module display (HDD navigation system) records various types of memory and settings. As a result, after turning the engine switch off, make sure to wait for the time specified in the following table before disconnecting the cable from the negative (-) battery terminal.
Waiting Time before Disconnecting Cable from Negative (-) Battery Terminal Specification Waiting Time w/o Telematics transceiver 60 sec. w/ Telematics transceiver 120 sec. -
REMOVE NO. 1 ENGINE UNDER COVER
-
REMOVE FRONT BUMPER ASSEMBLY (for Sport Package)
-
REMOVE FRONT BUMPER ASSEMBLY (for Standard)
-
DISCONNECT CABLE FROM NEGATIVE BATTERY TERMINAL
Note
When disconnecting the cable, some systems need to be initialized after the cable is reconnected Click here.
-
DRAIN ENGINE COOLANT
-
Loosen the radiator drain cock and drain the coolant.
CAUTION:
Do not remove the radiator cap and radiator drain cock while the engine and radiator are still hot. Pressurized, hot engine coolant and steam may be released and cause serious burns.
Tech Tips
Collect the coolant in a container and dispose of it according to the regulations in your area.
-
Loosen the air drain valve.
-
Remove the radiator cap from the radiator assembly.
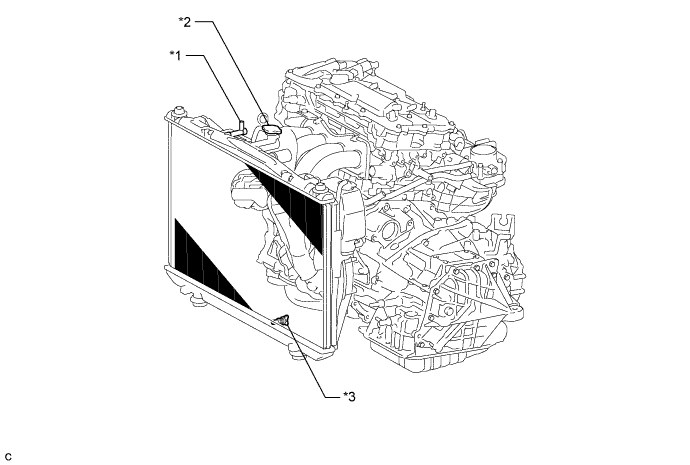
Text in Illustration *1 Air Drain valve *2 Radiator Cap Sub-assembly *3 Radiator Drain Cock - -
-
-
REMOVE NO. 2 AIR CLEANER INLET
-
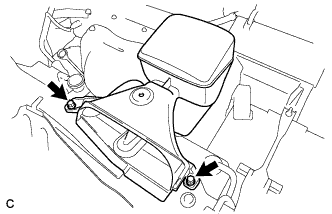
Remove the 2 bolts and No. 2 air cleaner inlet.
-
-
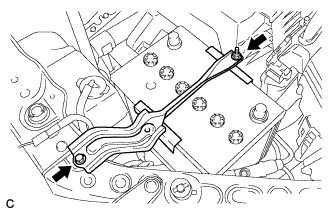
REMOVE NO. 1 AIR CLEANER INLET
-
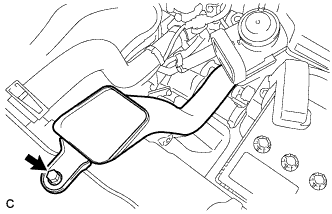
Remove the bolt and No. 1 air cleaner inlet.
-
-
REMOVE BATTERY
-
Disconnect the positive (+) cable from the positive (+) battery terminal.
-
Loosen the nut, and remove the bolt from the battery clamp.
-
Remove the battery and battery tray.
-
-
REMOVE RADIATOR RESERVE TANK ASSEMBLY
-

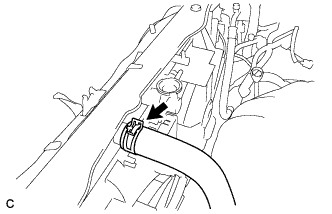
Disconnect the radiator reserve tank hose from the radiator.
-

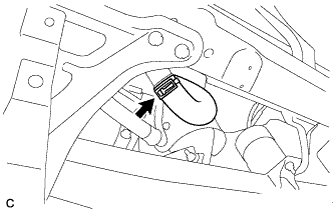
Disconnect the 2 clamps and remove the bolt and radiator reserve tank from the radiator.
-
-
DISCONNECT NO. 1 RADIATOR HOSE
-
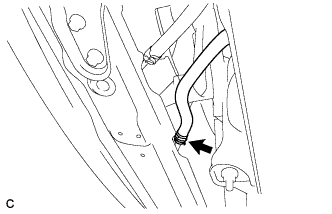
Disconnect the No. 1 radiator hose from the radiator.
-
-
DISCONNECT NO. 2 RADIATOR HOSE
-
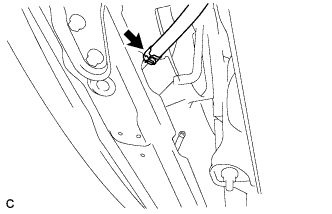
Disconnect the No. 2 radiator hose from the radiator.
-
-
DISCONNECT INLET OIL COOLER HOSE
-
Disconnect the inlet oil cooler hose.
-
-
DISCONNECT OUTLET OIL COOLER HOSE
-
Disconnect the outlet oil cooler hose.
-
-
REMOVE HIGH PITCHED HORN ASSEMBLY (for RHD)
-

Disconnect the connector.
-
Remove the bolt and high pitched horn assembly.
-
-
REMOVE LOW PITCHED HORN ASSEMBLY (for LHD)
-

Disconnect the connector.
-
Remove the bolt and low pitched horn assembly.
-
-
REMOVE SMOG VENTILATION SENSOR (w/ Smog Ventilation Sensor)
-

Disconnect the connector.
-
Remove the bolt
-
Disengage the guide and remove the smog ventilation sensor.
-
-
REMOVE HOOD LOCK CONTROL CABLE COVER
Tech Tips
-
Remove Hood Lock Control Cable Cover (for LHD) Click here.
-
Remove Hood Lock Control Cable Cover (for RHD) Click here.
-
-
REMOVE HOOD LOCK ASSEMBLY
Tech Tips
-
Remove Hood Lock Assembly (for LHD) Click here.
-
Remove Hood Lock Assembly (for RHD) Click here.
-
-
REMOVE UPPER RADIATOR SUPPORT
-
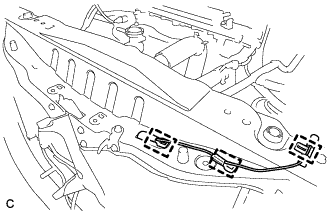
Disconnect the 3 clamps and wire harness. (for LHD)
-

Disconnect the 4 clamps and wire harness. (for RHD)
-
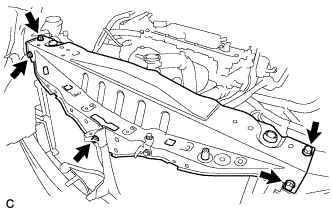
Remove the 5 bolts and upper radiator support.
-
-
REMOVE RADIATOR ASSEMBLY
-
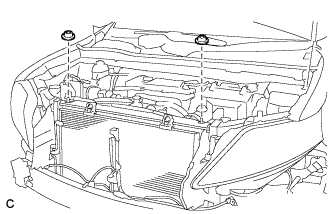
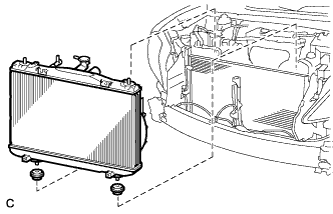
Remove the 2 radiator support cushions from the radiator.
-
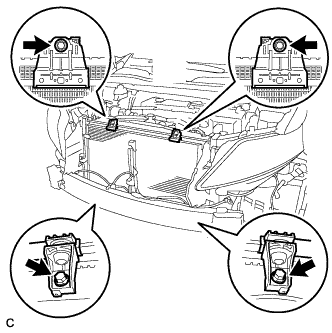
Remove the 4 bolts, 4 cooler brackets and radiator assembly.
-
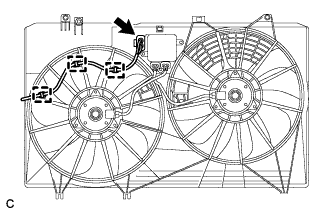
Disconnect the 3 wire harness clamps and connector.
-
Remove the radiator assembly and fan assembly with motor.
Note
Do not apply any excessive force to the cooler condenser assembly or pipe when removing the radiator assembly.
-
Remove the 2 lower radiator supports from the radiator.
-
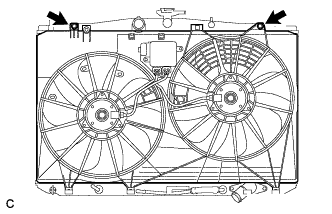
Remove the 2 bolts.
-
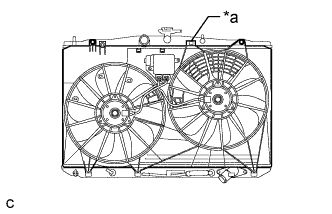
Text in Illustration *a Claw Release the claw and pull up the fan assembly with motor from the radiator assembly to remove the fan assembly with motor.
-