CANISTER INSTALLATION

-
INSTALL CHARCOAL CANISTER ASSEMBLY
-
Install the charcoal canister assembly with the 3 nuts and 2 clips.
- Torque:
- 5.5 N*m { 56 kgf*cm, 49 in.*lbf }
-
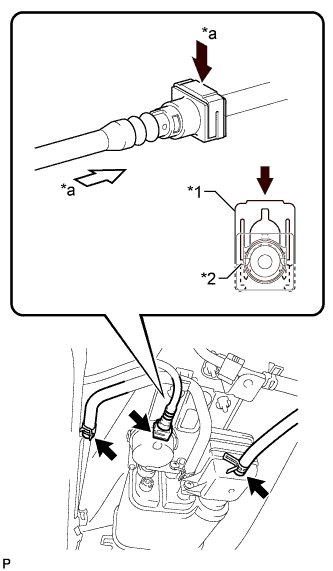
Text in Illustration *1 Retainer *2 Claw *a Push Connect the vent line tube.
-
Line up the two parts of the port to be connected, and fully push the vent line tube connector and port together until they are fully seated. Next, push the retainer into the connector until its claws lock.
-
After connecting the tube, check that the port and connector are securely connected by pulling on them.
-
-
Connect the purge line hose.
-
Connect the air inlet line hose.
-
-
INSTALL CHARCOAL CANISTER PROTECTOR
-
Install the charcoal canister protector with the 3 bolts.
- Torque:
- 5.5 N*m { 56 kgf*cm, 49 in.*lbf }
-
-
INSTALL TAIL EXHAUST PIPE ASSEMBLY
-
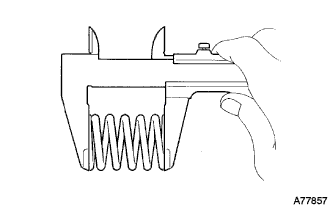
Using a vernier caliper, measure the free length of the compression springs.
Minimum 41.5 mm (1.64 in.) Tech Tips
If the free length is less than minimum, replace the compression spring.
-
Fully insert a new gasket to the center exhaust pipe assembly.
-
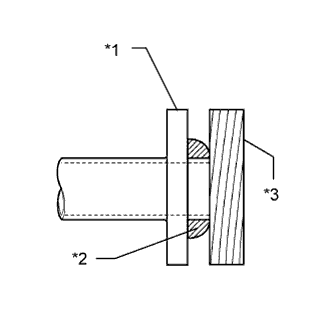
Text in Illustration *1 Center Exhaust Pipe Assembly *2 Gasket *3 Wooden Block Using a plastic hammer and wooden block, tap in the new gasket until its surface is flush with the center exhaust pipe assembly.
Note
-
Be careful with the installation direction of the gasket.
-
Do not reuse the gasket.
-
Do not damage the gasket.
-
Do not push in the gasket by using the exhaust pipe when connecting it.
-
-
Connect the tail exhaust pipe assembly to the 4 exhaust pipe supports.
-
Install the tail exhaust pipe assembly with the 2 bolts and 2 compression springs.
- Torque:
- 43 N*m { 440 kgf*cm, 32 ft.*lbf }
-
-
CONNECT CABLE TO NEGATIVE BATTERY TERMINAL
Note
When disconnecting the cable, some systems need to be initialized after the cable is reconnected Click here.