ACCELERATOR PEDAL INSTALLATION

-
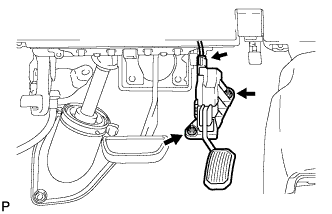
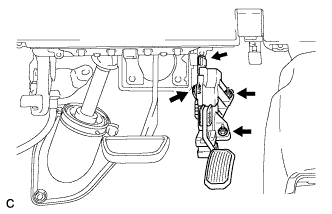
INSTALL ACCELERATOR PEDAL ASSEMBLY (for LHD)
Note
-
Avoid physical shock to the accelerator pedal assembly.
-
Do not disassemble the accelerator pedal assembly.
-
The accelerator pedal assembly does not require lubrication.
-
Do not apply oil or other lubricants to the accelerator pedal assembly. If applied, the accelerator pedal assembly must be replaced.
-
Install the accelerator pedal assembly. (w/o Kick Down)
-
Install the accelerator pedal assembly with the 2 nuts.
- Torque:
- 5.4 N*m { 55 kgf*cm, 48 in.*lbf }
-
Connect the accelerator pedal assembly connector.
-
-
Install the accelerator pedal assembly. (w/ Kick Down)
-
Install the accelerator pedal assembly with the 3 nuts.
- Torque:
- 5.4 N*m { 55 kgf*cm, 48 in.*lbf }
-
Connect the accelerator pedal assembly connector.
-
-
-
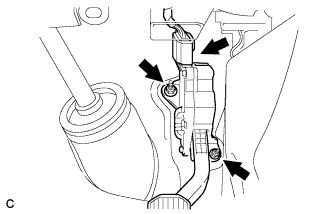
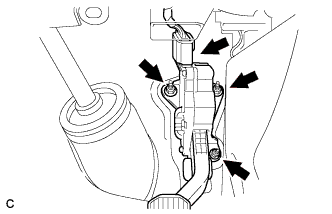
INSTALL ACCELERATOR PEDAL ASSEMBLY (for RHD)
Note
-
Avoid physical shock to the accelerator pedal assembly.
-
Do not disassemble the accelerator pedal assembly.
-
The accelerator pedal assembly does not require lubrication.
-
Do not apply oil or other lubricants to the accelerator pedal assembly. If applied, the accelerator pedal assembly must be replaced.
-
Install the accelerator pedal assembly. (w/o Kick Down)
-
Install the accelerator pedal assembly with the 2 nuts.
- Torque:
- 5.4 N*m { 55 kgf*cm, 48 in.*lbf }
-
Connect the accelerator pedal assembly connector.
-
-
Install the accelerator pedal assembly. (w/ Kick Down)
-
Install the accelerator pedal assembly with the 3 nuts.
- Torque:
- 5.4 N*m { 55 kgf*cm, 48 in.*lbf }
-
Connect the accelerator pedal assembly connector.
-
-
-
INSTALL NO. 1 INSTRUMENT PANEL UNDER COVER SUB-ASSEMBLY (for LHD)
-
Engage each clamp.
-
Connect each connector.
-
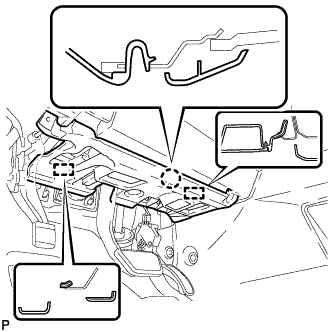
Engage the claw and 2 guides.
-
Install the No. 1 instrument panel under cover sub- assembly with the 2 screws <D>.
-
-
INSTALL NO. 1 INSTRUMENT PANEL UNDER COVER SUB-ASSEMBLY (for RHD)
-
Engage each clamp.
-
Connect each connector.
-
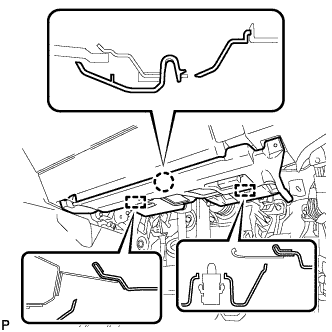
Engage the claw and 2 guides.
-
Install the No. 1 instrument panel under cover sub- assembly with the 2 screws <D>.
-