CONDENSER REASSEMBLY

-
INSTALL COOLER DRYER
-
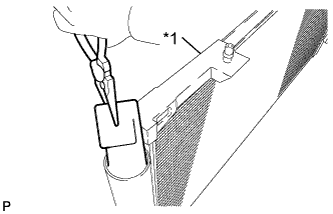
Text in Illustration *1 Bracket Using pliers, install a new cooler dryer to the modulator.
Note
-
Due to the potential of damaging the bracket, do not hold or support the bracket by hand when installing the cooler drier.
-
When storing the condenser, do not put the brackets facing down (toward the ground) because this may cause damage to the brackets.
-
-
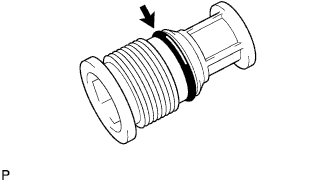
Sufficiently apply compressor oil to a new O-ring and the fitting surfaces of the cap.
Compressor oil ND-OIL 8 or equivalent -
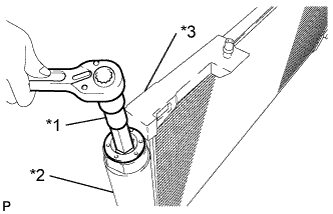
Text in Illustration *1 14 mm Straight Hexagon Wrench *2 Modulator *3 Bracket Using a 14 mm straight hexagon wrench, install the cap to the cooler condenser core.
Note
Keep the O-ring and O-ring fitting surfaces clean from dirt or any foreign objects.
- Torque:
- 2.9 N*m { 30 kgf*cm, 26 in.*lbf }
Note
-
Due to the potential of damaging the bracket, do not hold or support the bracket by hand when installing the cooler drier cap.
-
When storing the condenser, do not put the brackets facing down (toward the ground) because this may cause damage to the brackets.
-
-
INSTALL NO. 1 COOLER CONDENSER CUSHION
-
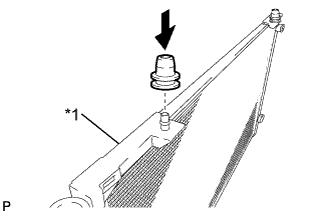
Text in Illustration *1 Bracket Install the 2 No. 1 cooler condenser cushions as shown in the illustration.
Note
-
Due to the potential of damaging the bracket, do not hold or support the bracket by hand when installing the No. 1 cooler condenser cushion.
-
When storing the condenser, do not put the brackets facing down (toward the ground) because this may cause damage to the brackets.
-
-