РАДИАТОР СНЯТИЕ
-
REMOVE FRONT BUMPER COVER
-
for Sport Package Click here
-
except Sport Package Click here
-
-
REMOVE MILLIMETER WAVE RADAR SENSOR ASSEMBLY (w/ Dynamic Radar Cruise Control System)
-
REMOVE NO. 1 ENGINE COVER SUB-ASSEMBLY
-
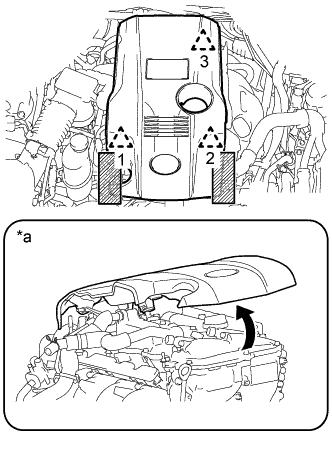
Обозначения на рисунке *a При отсоединении фиксатора с задней стороны крышки 
Зоны, подлежащие захвату при подъеме крышки двигателя № 1 в сборе Поместите обе руки с любой стороны крышки двигателя № 1 в сборе, как показано на рисунке, чтобы отсоединить левый и правый фиксаторы (1 и 2) рядом с передней частью крышки. Затем поднимите крышку, чтобы отсоединить фиксатор (3) с задней стороны, и снимите крышку.
Note
-
Если левая и правая стороны, а также передняя и задняя стороны крышки будут подниматься одновременно, крышка может быть повреждена.
-
Если не будет в точности соблюдаться порядок выполнения действий, фиксатор с задней стороны крышки может быть поврежден.
-
При попытке снять крышку, открепив только один из передних фиксаторов, крышка может быть повреждена.
-
-
-
REMOVE NO. 1 AIR CLEANER INLET
-
Выверните болт и снимите входной патрубок воздушного фильтра № 1.
-
-
REMOVE AIR CLEANER CAP WITH NO. 2 AIR CLEANER HOSE
-
Disconnect the mass air flow meter sub-assembly connector.
-
Disconnect the wire harness clamp from the air cleaner cap with No. 2 air cleaner hose.
-
Detach the 4 clamps.
-
Loosen the hose clamp to remove the air cleaner cap with No. 2 air cleaner hose.
-
-
REMOVE ENGINE UNDER COVER
-
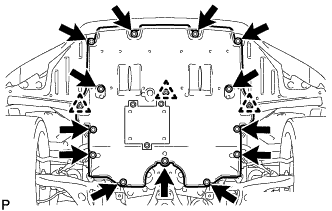
Выверните 13 винтов, расцепите 3 фиксатора и снимите защиту картера двигателя.
-
-
DRAIN ENGINE COOLANT
CAUTION:
Никогда не снимайте крышку водоналивной горловины в сборе и крышку расширительного бачка, пока двигатель и радиатор в сборе не остынут. Выброс под давлением горячей охлаждающей жидкости и пара может стать причиной серьезных ожогов.
-
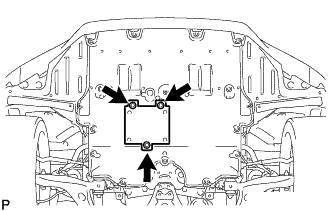
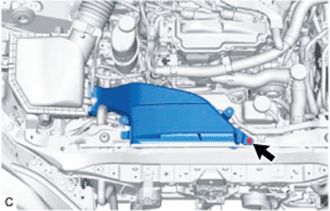
Выверните 3 винта и снимите центральную защиту картера двигателя № 4.
-

Обозначения на рисунке *1 Защита картера двигателя *a Виниловая трубка Установите виниловую трубку на сливной кран радиатора со стороны радиатора.
-
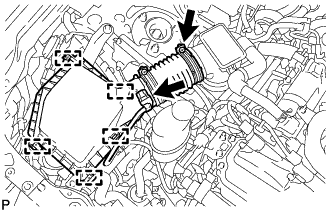
Ослабьте сливной кран радиатора в сборе.
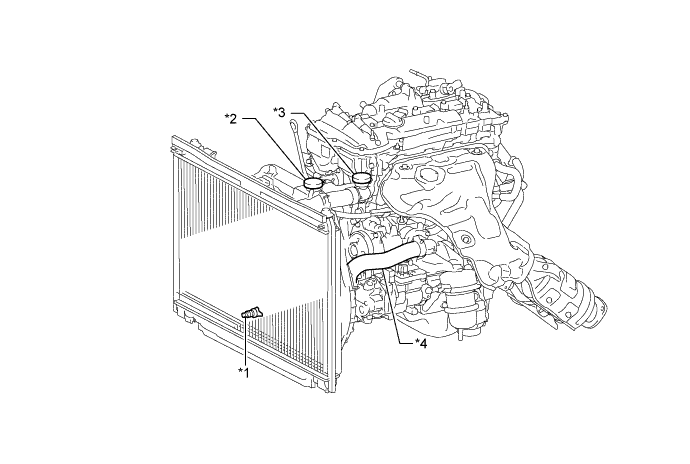
Обозначения на рисунке *1 Сливной кран радиатора в сборе *2 Крышка расширительного бачка *3 Крышка водоналивной горловины в сборе *4 Патрубок радиатора № 2 в сборе -
Снимите крышку расширительного бачка и крышку водоналивной горловины в сборе. Затем слейте охлаждающую жидкость двигателя.
Tech Tips
Слейте охлаждающую жидкость двигателя в резервуар и утилизируйте ее в соответствии с местными требованиями.
-
-
REMOVE HOOD LOCK RELEASE LEVER PROTECTOR
-
Отсоедините разъем и освободите 2 зажима.
-
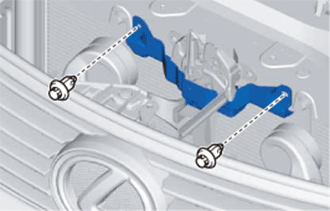
Снимите 2 фиксатора и захвата и защитный элемент рычага разблокировки замка капота.
-
-
DISCONNECT HOOD LOCK CONTROL CABLE ASSEMBLY
-
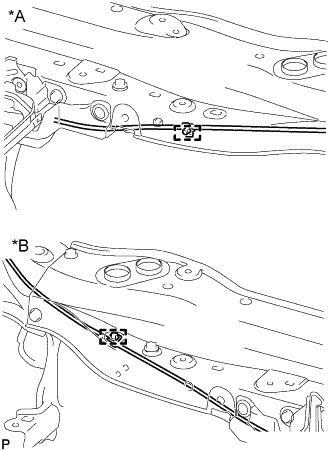
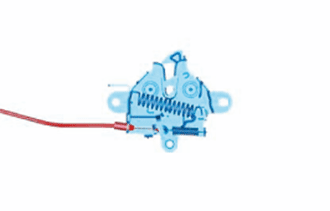
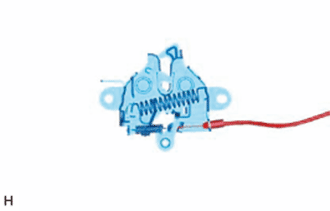
Text in Illustration *A for LHD *B for RHD Detach the clamp to disconnect the hood lock control cable assembly.
-
-
REMOVE HOOD LOCK ASSEMBLY (for LHD)
-

Выверните 3 болта.
-
Отсоедините трос управления замком капота от замка капота в сборе.
-
-
REMOVE HOOD LOCK ASSEMBLY (for RHD)
-

Выверните 3 болта.
-
Отсоедините трос управления замком капота от замка капота в сборе.
-
-
REMOVE RADIATOR HOSE SUB-ASSEMBLY
-
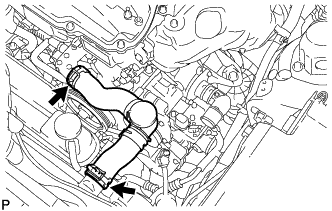
Slide the 2 clamps and remove the radiator hose sub-assembly from the water outlet sub-assembly and radiator assembly.
-
-
REMOVE RADIATOR RESERVOIR TANK ASSEMBLY
-
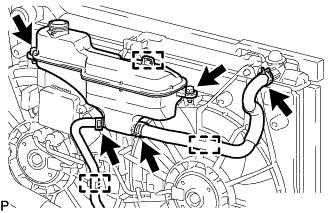
Detach the clamp to disconnect the radiator reservoir tank hose from the fan shroud.
-
Slide the 2 clamps and remove the radiator reservoir tank hose from the radiator reservoir tank assembly and radiator assembly.
-
Detach the clamp to disconnect the reservoir tank outlet hose from the fan shroud.
-
Slide the clamp and disconnect the reservoir tank outlet hose from the radiator reservoir tank assembly.
-
Detach the clamp to disconnect the No. 2 engine room wire from the radiator reservoir tank assembly.
-
Remove the 2 bolts and radiator reservoir tank assembly.
-
-
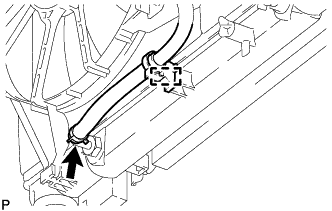
DISCONNECT NO. 2 RADIATOR HOSE SUB-ASSEMBLY
-
Detach the clamp to disconnect the reservoir tank outlet hose from the fan shroud.
-
Detach the No. 2 radiator hose clamp to disconnect the No. 2 radiator hose sub-assembly from fan shroud.
-
Slide the clamp and disconnect the No. 2 radiator hose sub-assembly from the radiator assembly.
-
Remove the bolt to disconnect the No. 2 radiator hose sub-assembly from the fan shroud.
-
Remove the No. 2 radiator hose clamp.
-
-
DISCONNECT NO. 2 OIL COOLER OUTLET HOSE
-
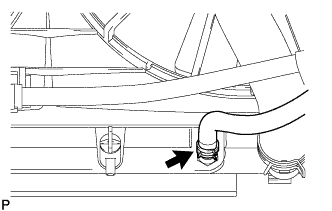
Slide the clamp and disconnect the No. 2 oil cooler outlet hose from the radiator assembly.
-
-
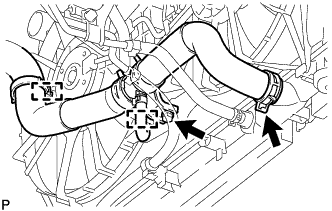
DISCONNECT NO. 2 OIL COOLER INLET HOSE
-
Disengage the clamp and disconnect the No. 2 oil cooler inlet hose from the No. 1 flexible hose clamp.
-
Remove the No. 1 flexible hose clamp from the radiator assembly.
-
Slide the clamp and disconnect the No. 2 oil cooler inlet hose from the radiator assembly.
-
-
DISCONNECT NO. 2 ENGINE ROOM WIRE
-
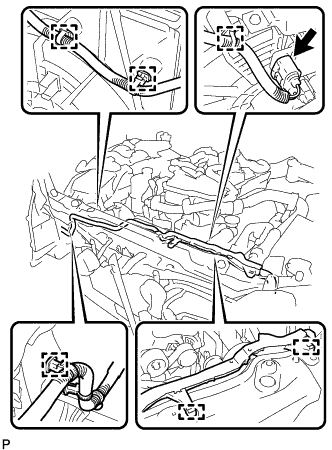
Disconnect the cooling fan ECU connector.
-
Detach the 6 wire harness clamps to disconnect the No. 2 engine room wire.
-
-
DISCONNECT HOOD LOCK CONTROL CABLE COVER (w/ Cover)
-
Detach the claw and remove the 2 screws to disconnect the hood lock control cable cover.
-
-
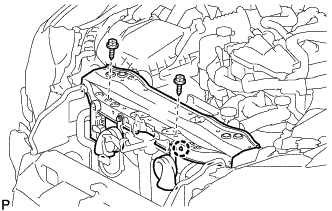
REMOVE UPPER RADIATOR SUPPORT
-

Disconnect the 3 connectors.
-
Detach the 5 wire harness clamps to disconnect the wire harness from the upper radiator support.
-
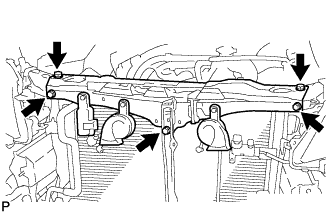
Remove the 5 bolts and upper radiator support.
-
-
REMOVE HOOD LOCK CONTROL CABLE COVER (w/ Cover)
-
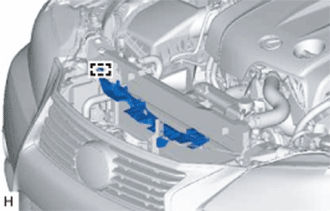
Освободите направляющую и снимите крышку троса управления замком капота.
-
-
SEPARATE COOLER CONDENSER ASSEMBLY
-
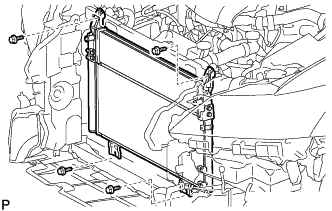
Remove the 4 bolts to separate the cooler condenser assembly from the radiator assembly.
-
-
REMOVE RADIATOR ASSEMBLY
-
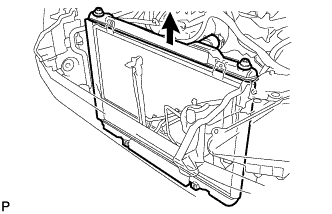
Remove the radiator assembly from the vehicle together with the fan shroud.
Note
Do not allow the radiator assembly to interfere with other parts.
-
Remove the 2 radiator support cushions and 2 lower radiator supports from the radiator assembly.
-
-
REMOVE FAN SHROUD
-
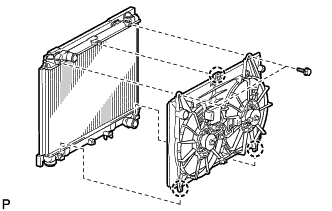
Remove the 2 bolts and detach the claw on the upper part of the fan shroud.
-
Detach the 2 claws on the lower part of the fan shroud to remove the fan shroud.
-