ГИДРАВЛИЧЕСКИЙ КЛАПАН ИЗМЕНЕНИЯ ФАЗ СНЯТИЕ
-
REMOVE NO. 1 ENGINE COVER SUB-ASSEMBLY
-
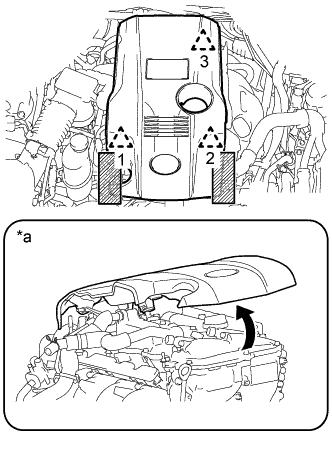
Обозначения на рисунке *a При отсоединении фиксатора с задней стороны крышки 
Зоны, подлежащие захвату при подъеме крышки двигателя № 1 в сборе Поместите обе руки с любой стороны крышки двигателя № 1 в сборе, как показано на рисунке, чтобы отсоединить левый и правый фиксаторы (1 и 2) рядом с передней частью крышки. Затем поднимите крышку, чтобы отсоединить фиксатор (3) с задней стороны, и снимите крышку.
Note
-
Если левая и правая стороны, а также передняя и задняя стороны крышки будут подниматься одновременно, крышка может быть повреждена.
-
Если не будет в точности соблюдаться порядок выполнения действий, фиксатор с задней стороны крышки может быть поврежден.
-
При попытке снять крышку, открепив только один из передних фиксаторов, крышка может быть повреждена.
-
-
-
REMOVE CAMSHAFT TIMING OIL CONTROL VALVE ASSEMBLY
-
for Exhaust Side:
-
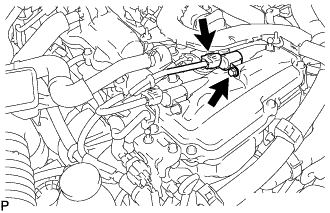
Disconnect the camshaft timing oil control valve assembly connector.
-
Remove the bolt and camshaft timing oil control valve assembly from the cylinder head cover sub-assembly.
Note
Do not allow foreign matter to contact the oil seal face of the camshaft timing oil control valve assembly (connecting surface with the cylinder head cover sub-assembly).
-
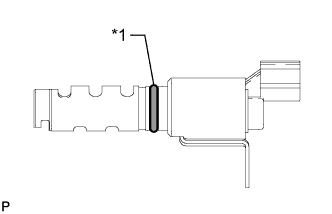
Text in Illustration *1 O-ring Remove the O-ring from the camshaft timing oil control valve assembly.
-
-
for Intake Side:
-
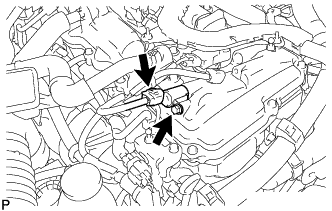
Disconnect the camshaft timing oil control valve assembly connector.
-
Remove the bolt and camshaft timing oil control valve assembly from the cylinder head cover sub-assembly.
Note
Do not allow foreign matter to contact the oil seal face of the camshaft timing oil control valve assembly (connecting surface with the cylinder head cover sub-assembly).
-
Text in Illustration *1 O-ring Remove the O-ring from the camshaft timing oil control valve assembly.
-
-