FUEL LID LOCK CONTROL CABLE ASSEMBLY(for LHD) REMOVAL
PROCEDURE
-
REMOVE FRONT DOOR SCUFF PLATE LH (for LH Side)
-
REMOVE FRONT DOOR SCUFF PLATE RH (for RH Side)
Tech Tips
Use the same procedure as for the LH side.
-
DISCONNECT FRONT DOOR OPENING TRIM WEATHERSTRIP LH
Tech Tips
Disconnect the front door opening trim weatherstrip to the extent that allows the removal of the luggage compartment trim cover LH.
-
DISCONNECT FRONT DOOR OPENING TRIM WEATHERSTRIP RH
Tech Tips
Use the same procedure as for the LH side.
-
REMOVE FRONT SEAT ASSEMBLY
-
REMOVE SEPARATE TYPE REAR SEAT CUSHION ASSEMBLY LH
-
REMOVE SEPARATE TYPE REAR SEAT CUSHION ASSEMBLY RH
Tech Tips
Use the same procedure as for the LH side.
-
REMOVE LUGGAGE COMPARTMENT FLOOR MAT
-
REMOVE REAR FLOOR FINISH PLATE
-
REMOVE LUGGAGE COMPARTMENT INNER TRIM COVER RH
-
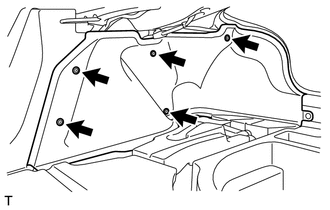
Disengage the 5 clips and remove the luggage compartment inner trim cover RH.
-
-
REMOVE LUGGAGE COMPARTMENT INNER TRIM COVER LH (w/ Side Marker Light)
-
REMOVE LUGGAGE COMPARTMENT INNER TRIM COVER LH (w/o Side Marker Light)
-
REMOVE LUGGAGE COMPARTMENT TRIM COVER LH
-
REMOVE LUGGAGE COMPARTMENT TRIM COVER RH
Tech Tips
Use the same procedure as for the LH side.
-
REMOVE NO. 2 PACKAGE TRAY TRIM SPACER
-

Using a clip remover, remove the 3 clips and the No. 2 package tray trim spacer.
-
-
REMOVE HANDLE COVER
-
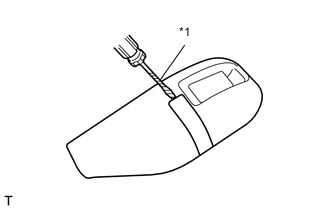
Text in Illustration *1 Protective Tape Using a screwdriver with its tip wrapped in protective tape, disengage the claw.
-
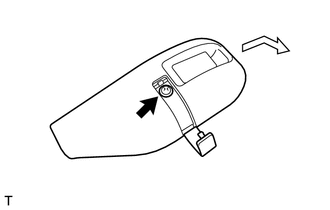
Remove the screw.
-
Remove the handle cover as shown in the illustration.
-
-
REMOVE FUEL LID LOCK OPEN LEVER SUB-ASSEMBLY
-
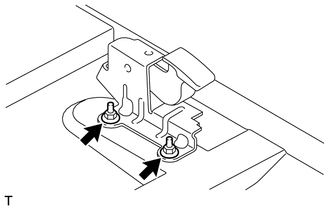
Peel back the floor carpet.
-
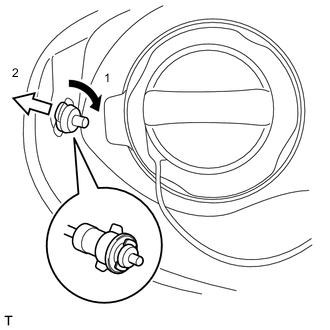
Remove the 2 nuts and the fuel lid lock open lever sub-assembly.
-
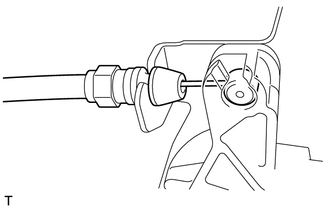
Disconnect the fuel lid lock control cable sub-assembly.
-
-
REMOVE FUEL LID LOCK CONTROL CABLE SUB-ASSEMBLY
-
Remove the fuel lid lock control cable sub-assembly as indicated by the arrows, in the order shown in the illustration.
-
Using a screwdriver with its tip wrapped in protective tape, disengage the 11 clamps and remove the fuel lid lock control cable sub-assembly.
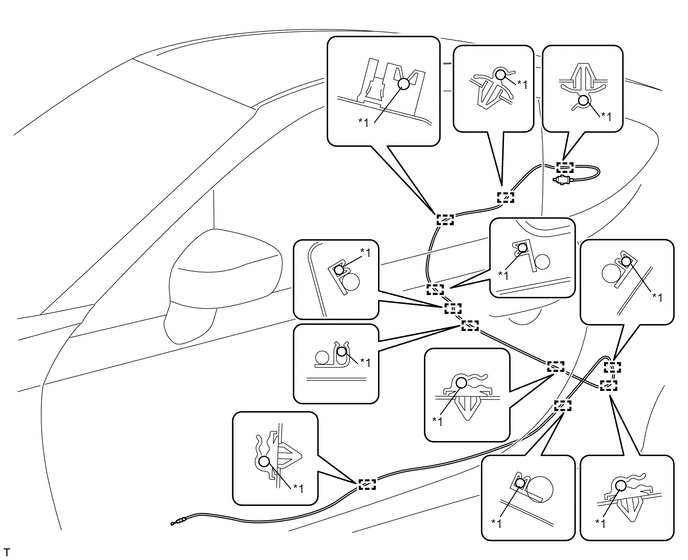
Text in Illustration *1 Fuel Lid Lock Control Cable Sub-Assembly - -
-