ROOF HEADLINING REMOVAL
PROCEDURE
-
PRECAUTION
Note
After turning the ignition switch off, waiting time may be required before disconnecting the cable from the negative (-) battery terminal. Therefore, make sure to read the disconnecting the cable from the negative (-) battery terminal notices before proceeding with work Click here.
-
DISCONNECT CABLE FROM NEGATIVE BATTERY TERMINAL
-
REMOVE NO. 2 INSTRUMENT PANEL SPEAKER PANEL SUB-ASSEMBLY
-
REMOVE NO. 1 INSTRUMENT PANEL SPEAKER PANEL SUB-ASSEMBLY
-
REMOVE FRONT PILLAR GARNISH LH
-
REMOVE FRONT PILLAR GARNISH RH
-
REMOVE FRONT DOOR SCUFF PLATE LH
-

Disengage the 6 claws and remove the front door scuff plate LH.
-
-
REMOVE FRONT DOOR SCUFF PLATE RH
Tech Tips
Use the same procedure described for the LH side.
-
REMOVE FRONT DOOR OPENING TRIM WEATHERSTRIP LH
-
Remove the front door opening trim weatherstrip LH.
-
-
REMOVE FRONT DOOR OPENING TRIM WEATHERSTRIP RH
Tech Tips
Use the same procedure described for the LH side.
-
REMOVE COWL SIDE TRIM BOARD LH
-
Remove the clip.
-
Disengage the 2 clips and remove the cowl side trim board LH.
-
-
REMOVE COWL SIDE TRIM BOARD RH
Tech Tips
Use the same procedure described for the LH side.
-
SEPARATE FRONT SEAT OUTER BELT ASSEMBLY LH
-
SEPARATE FRONT SEAT OUTER BELT ASSEMBLY RH
Tech Tips
Use the same procedure described for the LH side.
-
REMOVE SEPARATE TYPE REAR SEAT CUSHION ASSEMBLY LH
-
REMOVE SEPARATE TYPE REAR SEAT CUSHION ASSEMBLY RH
-
REMOVE LUGGAGE COMPARTMENT INNER TRIM COVER LH
-
Fold down the bench type rear seatback assembly.
-
Disengage the 2 clips and disconnect the luggage compartment inner trim cover LH.
-
-
REMOVE LUGGAGE COMPARTMENT INNER TRIM COVER RH
Tech Tips
Use the same procedure described for the LH side.
-
REMOVE LUGGAGE COMPARTMENT TRIM COVER LH
-
Pull up the rear seatback assembly.
-
Remove the clip.
-
Disengage the 8 clips and remove the luggage compartment trim cover LH.
-
-
REMOVE LUGGAGE COMPARTMENT TRIM COVER RH
Tech Tips
Use the same procedure described for the LH side.
-
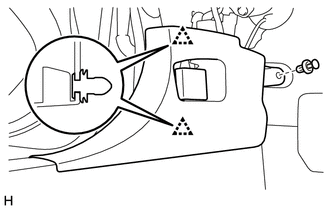
REMOVE QUARTER TRIM LID SUB-ASSEMBLY LH
-
Along the arrow in the illustration, disengage the 6 claws.
-
Disengage the 2 clips and 2 guides.
Tech Tips
Make the quarter trim lid sub-assembly LH hang down from the lid cover clip.
-
Text in Illustration *1 Lid Cover Clip Push the lid cover clip knobs in the direction of the arrow to remove the 2 lid cover clips along with the quarter trim lid sub-assembly LH.
-
Remove the 2 lid cover clips from the lid cover LH.
Note
If there is any damage, be sure to replace the lid cover clip with a new one.
-
-
REMOVE QUARTER TRIM LID SUB-ASSEMBLY RH
Tech Tips
Use the same procedure described for the LH side.
-
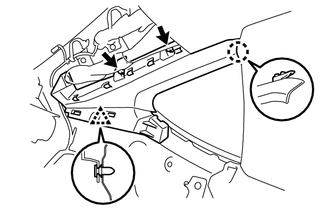
REMOVE REAR WINDOW SIDE GARNISH LH
-
Remove the bolt.
-
Disengage the 2 clips and guide remove the rear window side garnish LH.
-
-
REMOVE REAR WINDOW SIDE GARNISH RH
Tech Tips
Use the same procedure described for the LH side.
-
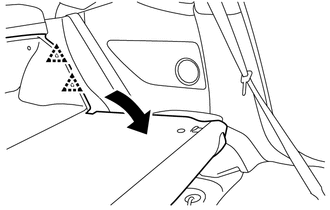
REMOVE REAR QUARTER TRIM GARNISH FRONT LH
-
Remove the 2 bolts.
-
Disengage the clip and claw remove the rear quarter trim front garnish LH.
-
-
REMOVE REAR QUARTER TRIM FRONT GARNISH RH
Tech Tips
Use the same procedure described for the LH side.
-
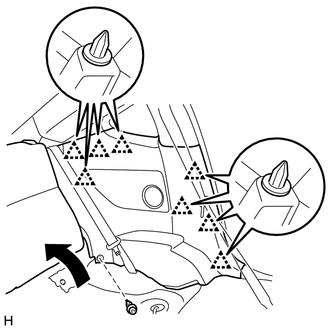
REMOVE CENTER PILLAR GARNISH LH
-
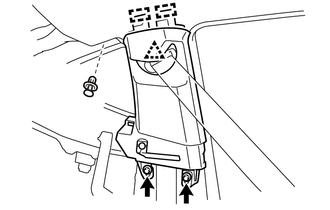
Remove the 2 bolts and clip.
-
Disengage the clips and 2 guides to remove the center pillar garnish LH.
-
-
REMOVE CENTER PILLAR GARNISH RH
Tech Tips
Use the same procedure described for the LH side.
-
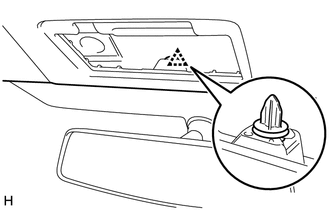
REMOVE MAP LIGHT ASSEMBLY
-
REMOVE VISOR ASSEMBLY LH
-
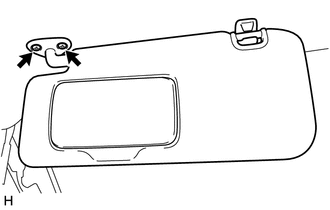
Remove the 2 screws.
-
Disconnect the connector and remove the visor assembly LH (w/ Illumination).
-
-
REMOVE VISOR ASSEMBLY RH
Tech Tips
Use the same procedure described for the LH side.
-
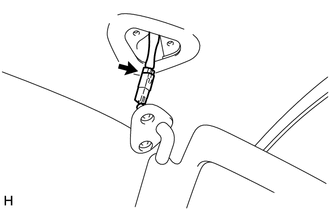
REMOVE VISOR HOLDER
-
Disengage the 2 claws remove the 2 visor holders.
-
-
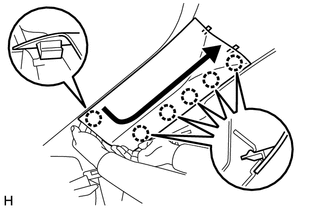
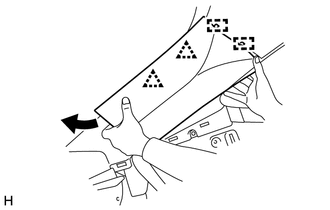
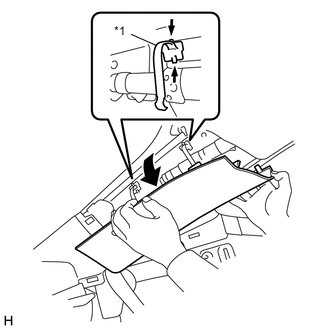
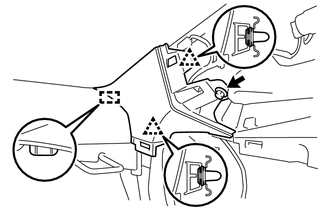
REMOVE ROOF HEADLINING ASSEMBLY
-
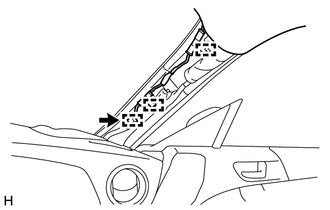
Disengage the 3 clamps and disconnect the connector from the front pillar RH.
-
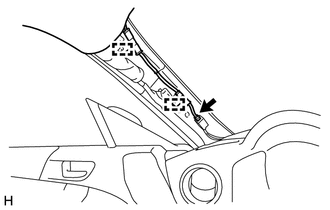
Disengage the 2 clamps and disconnect the connector from the front pillar LH.
-

Remove the 3 clips at the rear of the roof headlining.
-
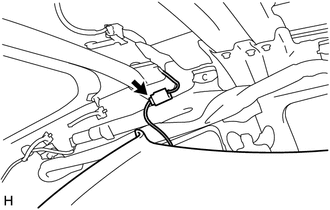
Disconnect the antenna cord sub-assembly connector.
-
Disengage the clip at the front of the roof headlining, and remove the roof headlining assembly.
-
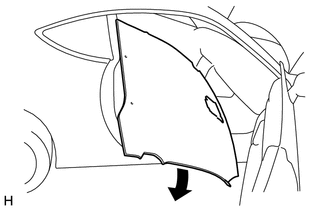
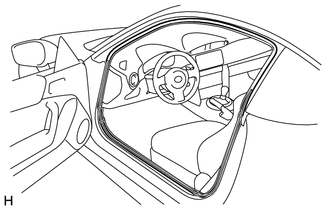
Remove the roof headlining assembly from the vehicle through the front passenger side door.
Note
Do not damage the roof headlining assembly or body interior.
-