FRONT CONSOLE BOX REMOVAL
PROCEDURE
-
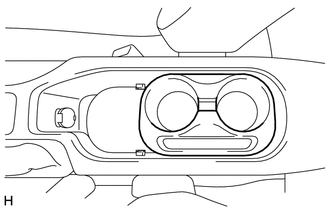
REMOVE FRONT CONSOLE BOX COVER (w/ Entry and Start System)
-
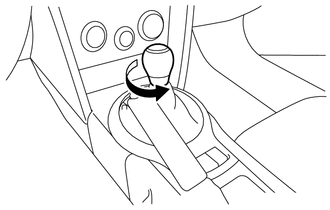
Move the shift lever to N.
-
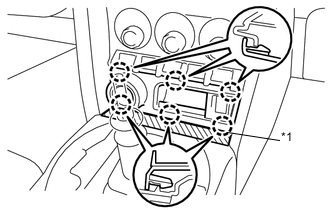
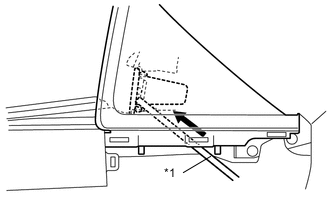
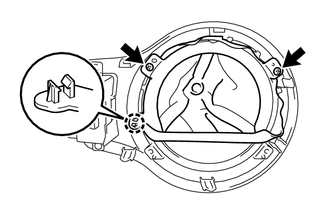
Text in Illustration *1 Protective Tape Apply protective tape to the area shown in the illustration.
-
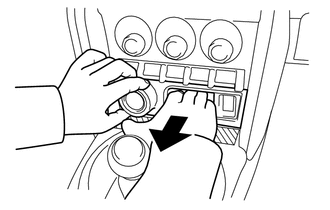
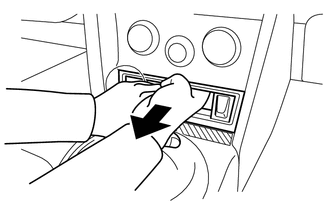
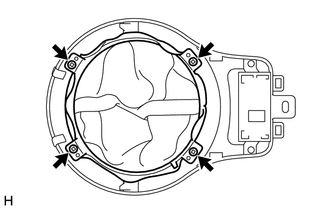
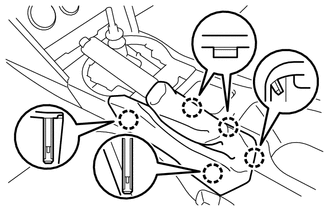
Disengage the 6 claws and remove the front console box cover.
Tech Tips
Hold the engine switch area and the inside of the pocket with your hand, and pull off the front console box cover.
Tech Tips
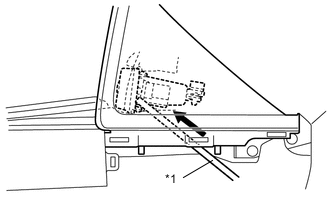
Remove the instrument panel finish panel end RH, and then push the reverse side of the front console box cover with a bar (tool handle, etc.) to remove it.
Text in Illustration *1 Bar Note
Do not push the switches or the antenna with the bar (tool handle, etc.).
-
Disconnect each connector.
-
-
REMOVE PUSH START SWITCH (w/ Entry and Start System)
-
REMOVE INDOOR ELECTRICAL KEY OSCILLATOR (w/ Entry and Start System)
-
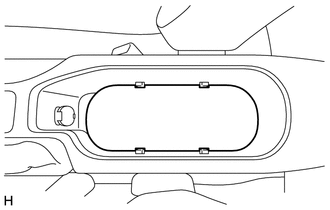
REMOVE FRONT CONSOLE BOX COVER (w/o Entry and Start System)
-
Move the shift lever to N.
-
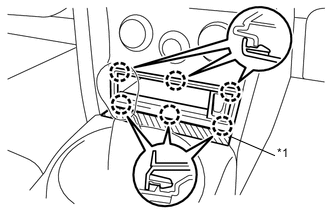
Text in Illustration *1 Protective Tape Apply protective tape to the area shown in the illustration.
-
Disengage the 6 claws and remove the front console box cover.
Tech Tips
Hold the inside of the pocket with your hand, and pull off the front console box cover.
Tech Tips
Remove the instrument panel finish panel end RH, and then push the reverse side of the front console box cover with a bar (tool handle, etc.) to remove it.
Text in Illustration *1 Bar Note
Do not push the switches or the antenna with the bar (tool handle, etc.).
-
-
REMOVE NO. 1 STEREO JACK ADAPTER ASSEMBLY (w/ Stereo Jack Adapter)
-
REMOVE SHIFT LEVER KNOB SUB-ASSEMBLY (for Automatic Transmission)
-
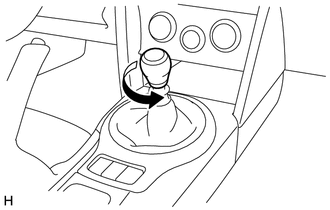
Turn the knob counterclockwise and remove the shift lever knob sub-assembly.
-
-
REMOVE UPPER CONSOLE PANEL SUB-ASSEMBLY (for Automatic Transmission)
-

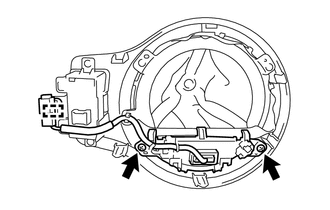
Disengage the 2 clips and 4 claws.
-
Disconnect each connector and remove the upper console panel sub-assembly.
-
-
REMOVE SHIFT POSITION INDICATOR (for Automatic Transmission)
-
Remove the 2 screws.
-
Disengage the clamp to remove the shift position indicator.
-
-
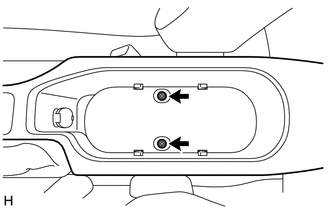
REMOVE SHIFTING HOLE COVER SUB-ASSEMBLY (for Automatic Transmission)
-
Remove the 2 screws.
-
Disengage the claw to remove the shifting hole cover sub-assembly.
-
-
REMOVE PATTERN SELECT SWITCH ASSEMBLY (for Automatic Transmission)
-
REMOVE SHIFT LEVER KNOB SUB-ASSEMBLY (for Manual Transmission)
-
Turn the knob counterclockwise and remove the shift lever knob sub-assembly.
-
-
REMOVE UPPER CONSOLE PANEL SUB-ASSEMBLY (for Manual Transmission)
-
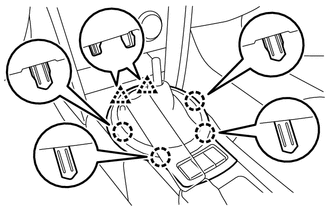
Disengage the 2 clips and 4 claws.
-
Disconnect each connector and remove the upper console panel sub-assembly.
-
-
REMOVE SHIFTING HOLE COVER SUB-ASSEMBLY (for Manual Transmission)
-
Remove the 4 screws and the shifting hole cover sub-assembly.
-
-
REMOVE PATTERN SELECT SWITCH ASSEMBLY (for Manual Transmission)
-
REMOVE NO. 1 ASH RECEPTACLE SUB-ASSEMBLY (w/ Ashtray)
-
Remove the No. 1 ash receptacle sub-assembly.
-
-
REMOVE INSTRUMENT PANEL CUP HOLDER
-
Remove the instrument panel cup holder.
-
-
REMOVE CUP HOLDER CUSHION
-
Remove the cup holder cushion.
-
-
REMOVE PARKING BRAKE HOLE COVER
-
Disengage the 5 claws to remove the parking brake hole cover.
Note
Remove the parking brake hole cover by pulling straight it up to disengage the claws, If not claws may be broken.
-
-
REMOVE INSTRUMENT PANEL FINISH PANEL END LH
-
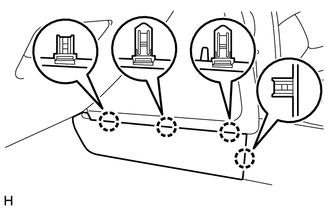
Disengage the 4 claws to remove the instrument panel finish panel end LH.
-
-
REMOVE INSTRUMENT PANEL FINISH PANEL END RH
Tech Tips
Use the same procedure described for the LH side.
-
REMOVE CONSOLE BOX ASSEMBLY
-
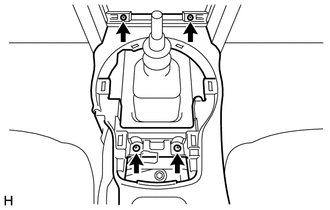
Remove the 4 screws.
-
Remove the 2 bolts.
-
Disconnect each connector and remove the console box assembly.
-