LIGHT CONTROL RHEOSTAT REMOVAL
CAUTION / NOTICE / HINT
Tech Tips
-
Use the same procedure for RHD and LHD vehicles.
-
The procedure listed below is for LHD vehicles.
PROCEDURE
-
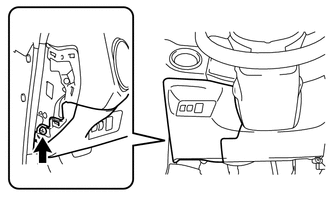
REMOVE INSTRUMENT SIDE PANEL LH
-
REMOVE NO. 1 INSTRUMENT PANEL UNDER COVER SUB-ASSEMBLY (w/o Knee Airbag)
-
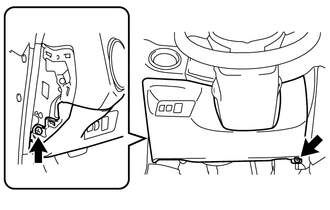
Remove the 2 screws.
-
Disengage the 4 clips.
-
Disengage the 4 claws and separate the No. 1 instrument panel under cover sub-assembly.
-
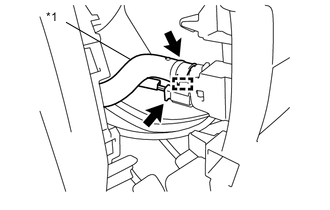
w/ Automatic Air Conditioning System for RHD:
-
Disengage the guide and disconnect the aspirator hose.
-
Disconnect the connector.
-
-
Disconnect each connector and remove the No. 1 instrument panel under cover sub-assembly.
Text in Illustration *1 Aspirator Hose
-
-
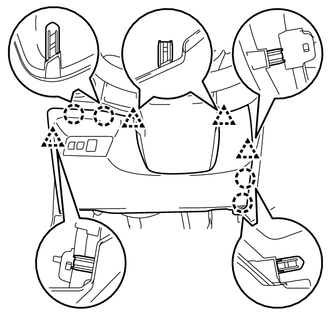
REMOVE NO. 1 INSTRUMENT PANEL UNDER COVER SUB-ASSEMBLY (w/ Knee Airbag)
-
Remove the screw.
-
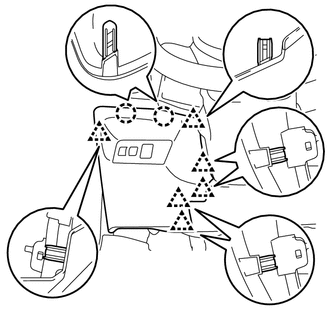
Disengage the 6 clips.
-
Disengage the 2 claws and separate the No. 1 instrument panel under cover sub-assembly.
-
Disconnect each connector and remove the No. 1 instrument panel under cover sub-assembly.
-
-
REMOVE SWITCH BASE
-
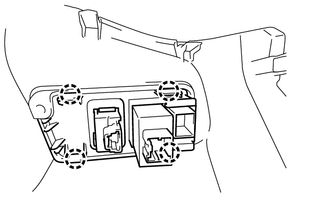
Disengage the 4 claws and remove the switch base.
-
-
REMOVE LIGHT CONTROL RHEOSTAT
-
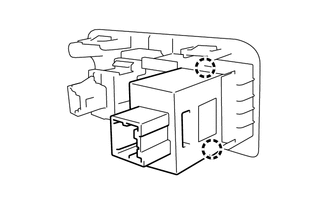
Disengage the 2 claws to remove the light control rheostat.
-