BRAKE BOOSTER(for LHD) REMOVAL
PROCEDURE
-
REMOVE INSTRUMENT SIDE PANEL LH (w/o Knee Airbag)
Tech Tips
Use the same procedure for the LH side as for the RH side Click here.
-
REMOVE NO. 1 INSTRUMENT PANEL UNDER COVER SUB-ASSEMBLY (w/o Knee Airbag)
-
REMOVE LOWER NO. 1 INSTRUMENT FANEL AIRBAG ASSEMBLY (w/ Knee Airbag)
-
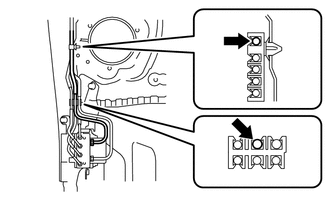
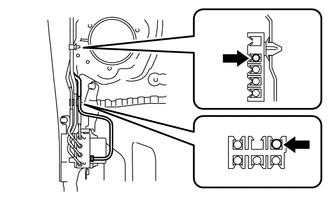
REMOVE TCM (for Automatic Transmission)
-
REMOVE BRAKE MASTER CYLINDER SUB-ASSEMBLY
-
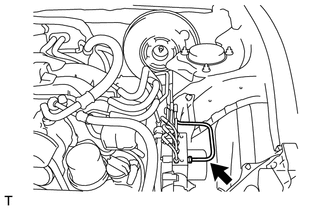
DISCONNECT VACUUM TUBE CONNECTOR HOSE
-
Slide the clip and disconnect the vacuum tube connector hose from the brake booster assembly.
-
-
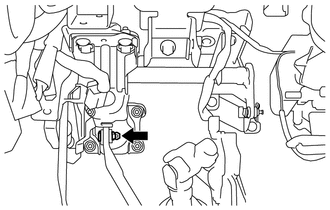
REMOVE FRONT NO. 1 BRAKE TUBE
-

Using a union nut wrench 12 mm, disconnect the front No. 1 brake tube from the brake actuator.
-
Disconnect 2 clips and remove the front No. 1 brake tube.
-
-
REMOVE FRONT NO. 2 BRAKE TUBE
-
Using a union nut wrench 12 mm, disconnect the front No. 2 brake tube from the brake actuator.
-
Disconnect 2 clips and remove the front No. 2 brake tube.
-
-
REMOVE BRAKE BOOSTER ASSEMBLY
-
Loosen the push rod clevis lock nut.
-
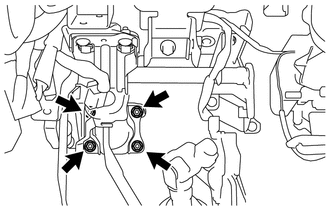
Remove the 4 nuts.
-
Remove the push rod clevis pin.
-
Remove the brake booster assembly.
-
-
REMOVE BRAKE MASTER CYLINDER PUSH ROD CLEVIS
-
Remove the brake master cylinder push rod clevis and lock nut.
-