FRONT BRAKE(for Opposed Type Caliper) INSTALLATION
CAUTION / NOTICE / HINT
Tech Tips
-
Use the same procedure for RH and LH sides.
-
The procedure listed below is for LH side.
PROCEDURE
-
INSTALL FRONT DISC
-
When reusing the disc
-
Align the matchmarks placed when removing, and install the front disc to the axle hub.
-
-
When replacing the front disc
-
Install a new front disc to the axle hub and measure the disc runout Click here.
-
-
Temporarily tighten the hub nuts and fix the front disc to the axle hub.
-
-
INSTALL FRONT DISC BRAKE CYLINDER SUB-ASSEMBLY
-
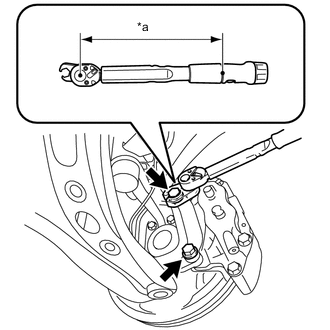
*a Torque Wrench Fulcrum Length Install the front disc brake cylinder assembly and front disc brake cylinder mounting with the 2 bolts.
Note
When installing the front disc brake cylinder assembly and front disc brake cylinder mounting, hand-tighten the 2 bolts temporarily until they cannot be turned further, and tighten them to the specified torque.
- Torque:
- 120 N*m { 1224 kgf*cm, 89 ft.*lbf }
Tech Tips
-
When tightening the upper bolt, use a union nut wrench 17 mm.
-
Calculate the torque wrench reading when changing the fulcrum length of the torque wrench.
-
When using a union nut wrench (fulcrum length of 30 mm (1.18 in.)) + torque wrench (fulcrum length of 400 mm (15.7 in.)): 111.6 N*m (1138 kgf*cm, 82 ft.*lbf)
-
-
INSTALL FRONT DISC BRAKE CYLINDER SUB-ASSEMBLY
-
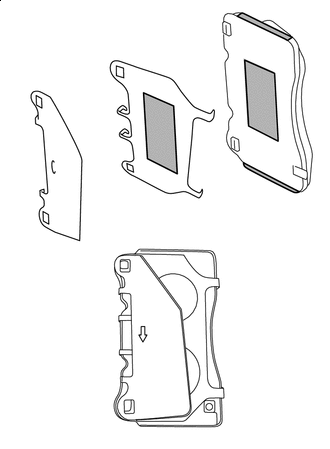

Disc Brake Grease Apply disc brake grease to the front disc brake pad and No. 1 anti-squeal sim.
-
Install the No. 2 anti-squeal sim to each front disc brake pad.
Tech Tips
Install the No. 2 anti-squeal sim so that the arrow on the No. 2 anti-squeal sim faces down.
-
Install the No. 1 front disc brake pad support plate, 2 front disc brake cylinder slide pins and 2 pin hold clips to the front disk brake cylinder assembly.
-
-
CONNECT FRONT NO. 1 FLEXIBLE HOSE
-
Install the No. 1 front flexible hose to the disc brake cylinder assembly with 2 new gaskets and a new union bolt.
- Torque:
- 26 N*m { 265 kgf*cm, 19 ft.*lbf }
-
-
ADD BRAKE FLUID
-
BLEED BRAKE LINE
-
INSPECT FOR BRAKE FLUID LEAK
-
INSPECT FLUID LEVEL
-
INSTALL FRONT WHEEL
- Torque:
- 120 N*m { 1224 kgf*cm, 89 ft.*lbf }