FRONT BUMPER (for Sport Package) REMOVAL

-
REMOVE ENGINE ROOM SIDE COVER
-
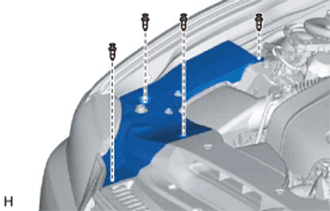
Remove the 4 clips and engine room side cover.
-
-
REMOVE COOL AIR INTAKE DUCT SEAL
-
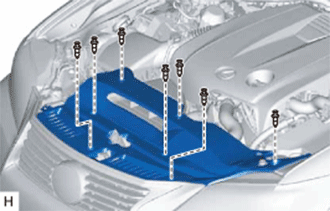
Remove the 7 clips and cool air intake duct seal.
-
-
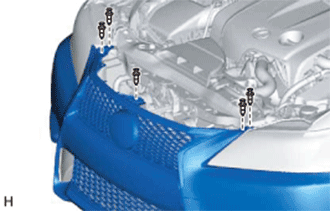
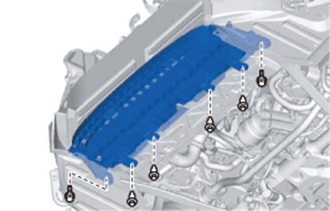
REMOVE FRONT BUMPER COVER
-
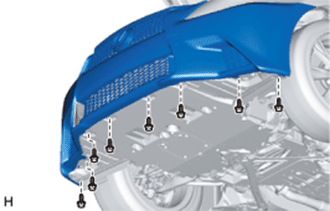
Remove the 8 screws.
-
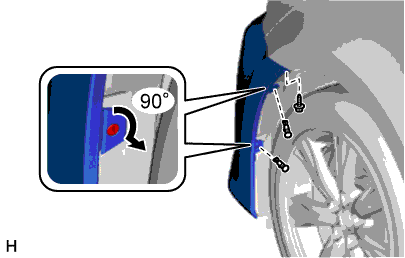
Using a screwdriver, turn the 2 pin hold clips 90° and remove the pin hold clips and screw.
Tech Tips
Use the same procedure for the pin hold clips and screw on the other side.
-
Remove the 5 clips.
-
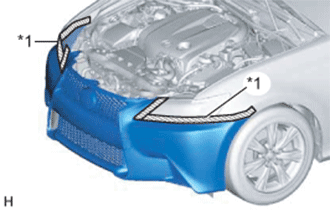
Text in Illustration *1 Protective Tape Put protective tape around the front bumper cover.
-
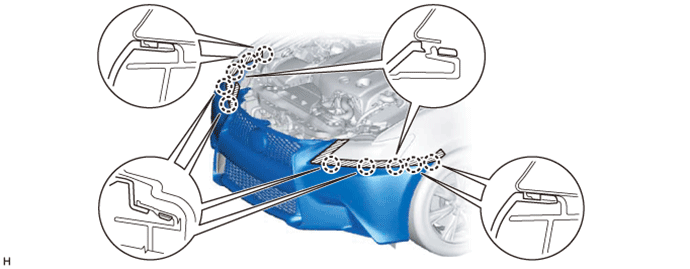
Detach the 10 claws and remove the front bumper cover.
-
w/ Fog Light:
-
Disconnect the 2 fog light connectors.
-
-
w/ Headlight Cleaner System:
-
Disconnect the 2 headlight washer hoses and then drain the washer fluid.
Tech Tips
Use a container to collect the washer fluid.
-
-
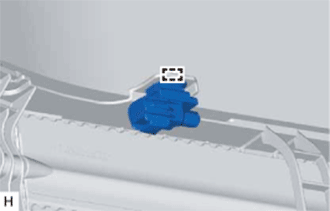
w/ LEXUS Parking Assist-sensor System:
-
Disconnect the No. 4 engine room wire.
-
-
-
REMOVE FRONT BUMPER ENERGY ABSORBER
-
Remove the front bumper energy absorber.

Text in Illustration *A for Type A *B for Type B
-
-
REMOVE ENGINE UNDER COVER (w/ Grille Shutter)
-
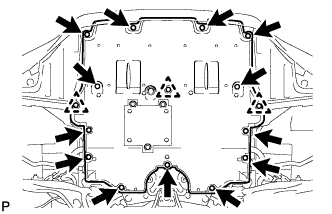
Remove the 13 screws, 3 clips and engine under cover.
-
-
REMOVE RADIATOR SUPPORT OPENING COVER (w/ Grille Shutter)
-
Remove the 4 clips, 2 bolts and radiator support opening cover.
-
-
REMOVE RADIATOR SHUTTER SUB-ASSEMBLY (w/ Grille Shutter)
-
Close the radiator shutter sub-assembly.
-
Connect the GTS to the DLC3 and turn the power switch on (IG).
-
Enter the following menus: Body Electrical / Grille Shutter / Active Test / Shutter Closing Operation Lock Detection. Then, perform Close or OFF.
Note
The radiator shutter sub-assembly cannot be removed if it has not been closed.
-
Check that the radiator shutter sub-assembly is closed and disconnect the radiator shutter sub-assembly connector.
-
Turn the power switch off.
-
-
Using a clip remover, detach the clamp and remove the thermistor.
-
Remove the 4 bolts.
-

Using a clip remover, detach the 2 clips and remove the radiator shutter.
-
-
REMOVE HEADLIGHT WASHER HOSE (w/ Headlight Cleaner System)
-
Disconnect the headlight washer hose from the headlight washer tank.
-
Detach the 4 clamps and remove the headlight washer hose.
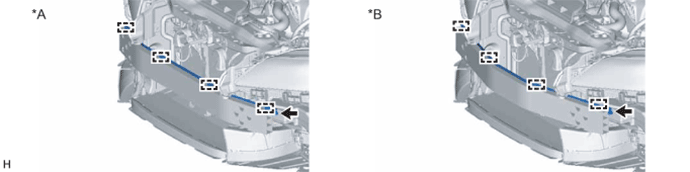
Text in Illustration *A for Type A *B for Type B
-
-
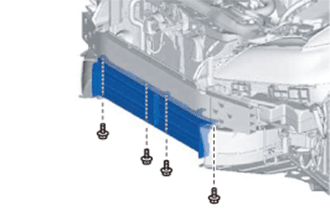
REMOVE FRONT BUMPER REINFORCEMENT
-
w/ Grille Shutter:
Using a clip remover, detach the clamp and remove the thermistor.
-
Remove the 2 clips.
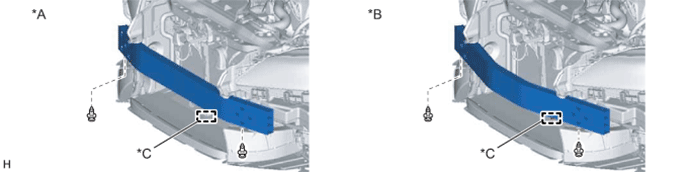
Text in Illustration *A for Type A *B for Type B *C w/ Grille Shutter - - -
Remove the 6 bolts and front bumper reinforcement.
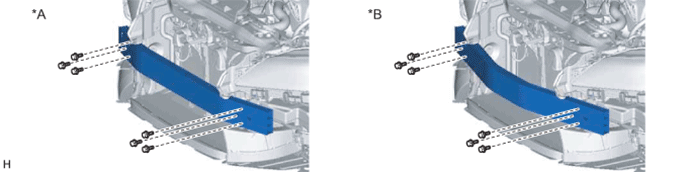
Text in Illustration *A for Type A *B for Type B
-
-
REMOVE FRONT BUMPER SIDE RETAINER LH
-
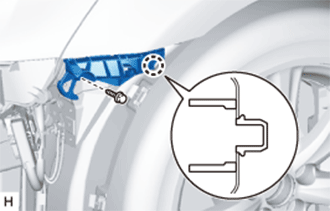
Remove the screw.
-
Detach the claw and remove the front bumper side retainer.
-
-
REMOVE FRONT BUMPER SIDE RETAINER RH
Tech Tips
Use the same procedure described for the LH side.
-
REMOVE FRONT WHEEL OPENING EXTENSION PAD LH
-
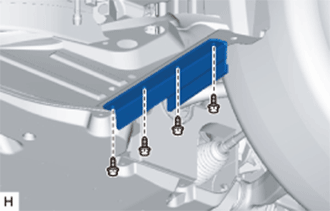
Remove the 4 screws and front wheel extension pad.
-
-
REMOVE FRONT WHEEL OPENING EXTENSION PAD RH
Tech Tips
Use the same procedure described for the LH side.