WIPER SWITCH INSTALLATION

Tech Tips
-
Use the same procedure for RHD and LHD vehicles.
-
The procedure listed below is for LHD vehicles.
-
Use the same procedure for the RH and LH sides.
-
INSTALL WINDSHIELD WIPER SWITCH ASSEMBLY
-
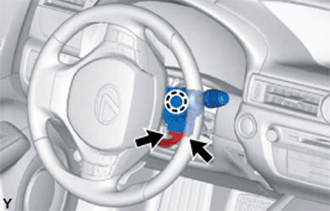
Engage the claw to install the windshield wiper switch assembly as shown in the illustration.
-
Connect each connector.
-
-
INSTALL STEERING COLUMN COVER
Note
If the lower steering column cover is installed in the incorrect order, it will not be possible to assemble the steering column cover.
-
Engage the 2 claws to install the upper steering column cover.
-
w/ Driver Monitor Camera:
-
Connect the connector.
-
-
Engage the 4 clips and 2 guides to install the instrument panel cluster finish panel to the upper steering column cover.
-
Engage the 2 claws.
-
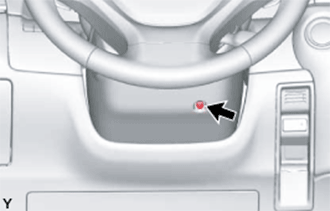
Install the screw as shown in the illustration.
- Torque:
- 2.0 N*m { 20 kgf*cm, 18 in.*lbf }
-
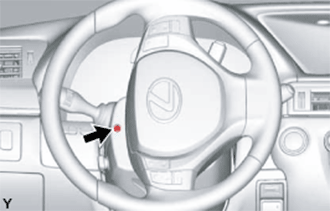
Turn the steering wheel assembly to the left to install the screw.
- Torque:
- 2.0 N*m { 20 kgf*cm, 18 in.*lbf }
-
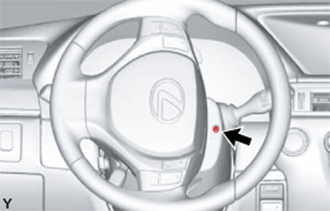
Turn the steering wheel assembly to the right to install the screw.
- Torque:
- 2.0 N*m { 20 kgf*cm, 18 in.*lbf }
-
-
CONNECT CABLE TO AUXILIARY BATTERY NEGATIVE TERMINAL
Note
-
Reset the auto away/return function setting to the previous condition by changing the customize parameter Click here.
-
When disconnecting the cable, some systems need to be initialized after the cable is reconnected Click here.
-
-
INSTALL LUGGAGE COMPARTMENT TRIM COVER LH
-
Install the luggage compartment trim cover.
-
-
INSTALL LUGGAGE COMPARTMENT FLOOR MAT
-
Install the luggage compartment floor mat.
-