ION GENERATOR INSTALLATION

Tech Tips
-
Use the same procedure for RHD and LHD vehicles.
-
The procedure listed below is for LHD vehicles.
-
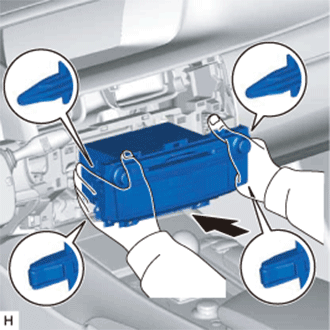
INSTALL AIR DUCT SUB-ASSEMBLY
-
Attach the 2 claws to install the air duct sub-assembly.
-
Install the clip.
-
-
INSTALL NO. 1 ION GENERATOR SUB-ASSEMBLY
-
Attach the 2 claws to install the rear air duct sub-assembly.
-
Install the No. 1 ion generator sub-assembly with the 2 screws.
-
Attach the clamp.
-
-
INSTALL NO. 2 INSTRUMENT PANEL REGISTER ASSEMBLY
-
Connect the connectors.
-
Attach the 7 clips to install the No. 2 instrument panel register assembly.
-
-
INSTALL MULTI-MEDIA MODULE RECEIVER ASSEMBLY
-
Connect the connectors.
-
Insert the multi-media module receiver assembly.
Note
When inserting the multi-media module receiver assembly, do not press the knobs on it.
-
Attach the 2 claws and 2 clips.
-
Install the multi-media module receiver assembly with the 2 bolts.
-
-
INSTALL CENTER INSTRUMENT CLUSTER FINISH PANEL
-
Connect the connector.
-
Attach the 9 clips and guide to install the center instrument cluster finish panel.
-
-
CONNECT CABLE TO AUXILIARY BATTERY NEGATIVE TERMINAL
Note
When disconnecting the cable, some systems need to be initialized after the cable is reconnected Click here.