HUMIDITY SENSOR INSTALLATION

-
INSTALL AIR CONDITIONING THERMISTOR ASSEMBLY
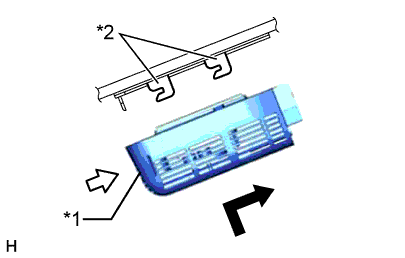
Text in Illustration *1 Bracket *2 Stopper
-
Attach the 2 brackets, and carefully install the air conditioning thermistor assembly (humidity sensor) to the glass surface to prevent air bubbles from forming between the contact surfaces.
-
Push in the stopper.
-
Connect the connector.
-
-
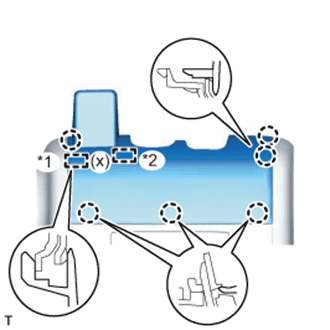
INSTALL FRONT ROOF TOP GARNISH
-
w/ Night View System:
-
While being careful not to apply force to the camera, attach the 6 claws, guide and fastener to install the front roof top garnish.
Text in Illustration *1 Guide *2 Fastener Note
When removing and installing the front roof top garnish, do not apply force to the camera sensor located at (x).
-
-
w/o Night View System:
-
While being careful not to apply force to the camera (for vehicles with the lane keeping assist system), attach the 6 claws and guide to install the front roof top garnish.
Note
w/ Lane Keeping Assist System:
When removing and installing the front roof top garnish, do not apply force to the camera sensor located at (x).
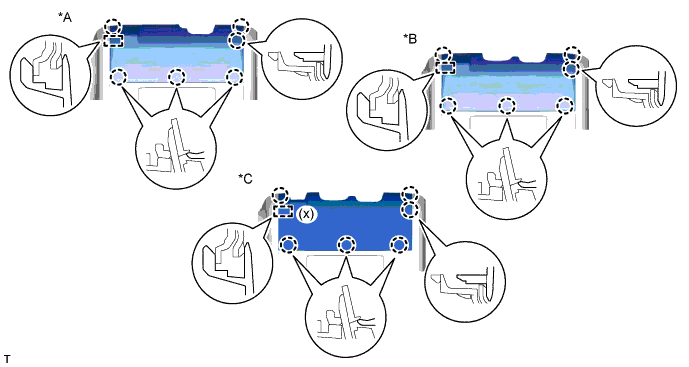
Text in Illustration *A for Standard *B w/ Rain Sensor *C w/ Lane Keeping Assist System - -
-
-