COMPRESSOR (for 2AR-FSE) REMOVAL

-
REMOVE ENGINE ROOM SIDE COVER
-
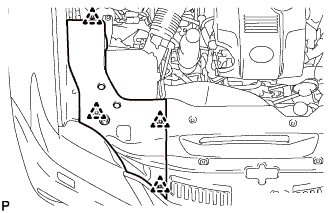
Remove the 4 clips and engine room side cover.
-
-
REMOVE COOL AIR INTAKE DUCT SEAL
-
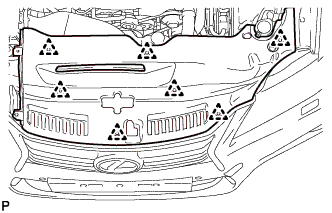
Remove the 7 clips and cool air intake duct seal.
-
-
RECOVER REFRIGERANT FROM AIR CONDITIONING SYSTEM
-
Turn the power switch on (READY).
-
Turn the A/C switch on.
-
Operate the air conditioning with a set temperature of 25°C (77°F) and the blower at low for 10 minutes to circulate the refrigerant. This causes most of the compressor oil from the various components of the air conditioning system to collect in the air conditioning compressor.
-
Turn the power switch off.
-
Recover the refrigerant from the air conditioning system using a refrigerant recovery unit.
-
-
REMOVE SERVICE PLUG GRIP
-
REMOVE ENGINE UNDER COVER
-
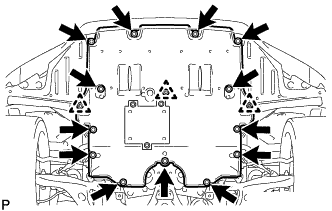
Remove the 13 screws, 3 clips and engine under cover.
-
-
REMOVE REAR ENGINE UNDER COVER LH
-
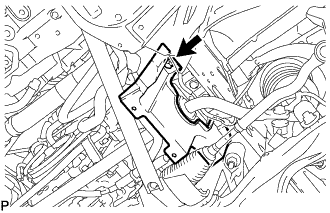
Remove the screw and rear engine under cover LH.
-
-
DISCONNECT SUCTION HOSE
-

Remove the bolt and disconnect the suction hose from the compressor with motor assembly.
-
Remove the O-ring from the suction hose.
Note
Seal the openings of the disconnected parts using vinyl tape to prevent moisture and foreign matter from entering them.
-
-
DISCONNECT NO. 1 COOLER REFRIGERANT DISCHARGE HOSE
-
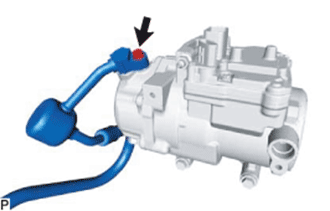
Remove the bolt and disconnect the No. 1 cooler refrigerant discharge hose from the compressor with motor assembly.
-
Remove the O-ring from the No. 1 cooler refrigerant discharge hose.
Note
Seal the openings of the disconnected parts using vinyl tape to prevent moisture and foreign matter from entering them.
-
-
DISCONNECT NO. 1 HYBRID WATER PUMP OUTLET PIPE
-
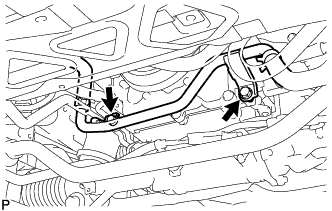
Remove the 2 bolts and disconnect the No. 1 hybrid water outlet pipe from the engine.
-
-
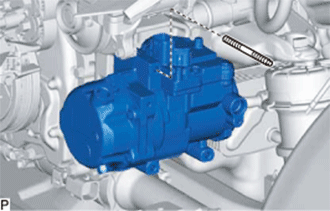
REMOVE COMPRESSOR WITH MOTOR ASSEMBLY
-
Disconnect the motor control connector.
-
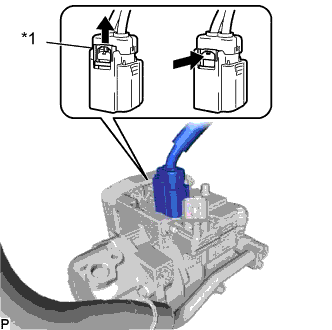
Text in Illustration *1 Connector Lock Disconnect the motor drive connector.
-
Using a screwdriver, pull out the connector lock shown in the illustration.
-
Push the release button and disconnect the connector.
CAUTION:
Make sure to wear insulating gloves.
Note
Insulate the removed terminals and connector with insulating tape.
-
-
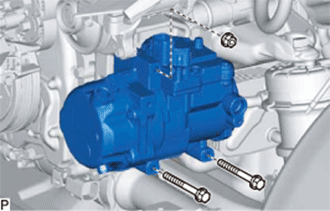
Remove the 2 bolts and nut.
-
Using an E8 ''TORX'' socket wrench, remove the stud bolt and compressor with motor assembly.
-