CLOCK REMOVAL

Tech Tips
-
Use the same procedure for RHD and LHD vehicles.
-
The procedure listed below is for LHD vehicles.
-
REMOVE CENTER INSTRUMENT CLUSTER FINISH PANEL
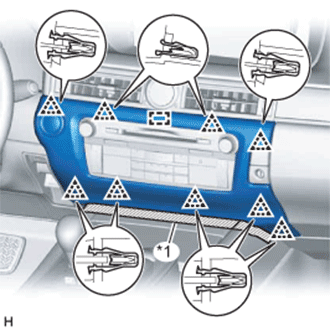
Text in Illustration *1 Protective Tape
-
Put protective tape around the center instrument cluster finish panel.
-
Detach the 9 clips and guide.
-
Disconnect the connector and remove the center instrument cluster finish panel.
-
-
REMOVE MULTI-MEDIA MODULE RECEIVER ASSEMBLY
-
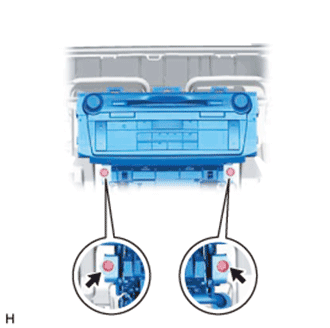
Remove the 2 bolts.
-
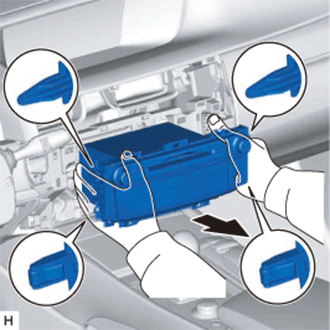
Detach the 2 claws and 2 clips.
-
Pull out the multi-media module receiver assembly.
-
Disconnect the connectors and remove the multi-media module receiver assembly.
-
-
REMOVE NO. 2 INSTRUMENT PANEL REGISTER ASSEMBLY
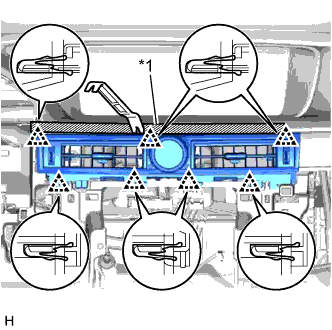
Text in Illustration *1 Protective Tape
-
Put protective tape around the No. 2 instrument panel register assembly.
-
Using a moulding remover, detach the 7 clips.
-
Disconnect the connectors and remove the No. 2 instrument panel register assembly.
-
-
REMOVE CLOCK ASSEMBLY
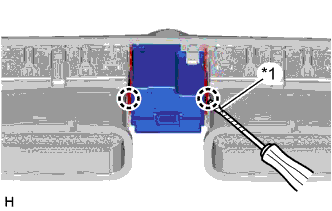
Text in Illustration *1 Protective Tape
-
Using a screwdriver, detach the 2 claws and remove the clock assembly.
Tech Tips
Tape the screwdriver tip before use.
-