NIGHT VIEW CAMERA REMOVAL

Note
-
Do not touch the camera lens or the front windshield glass in front of the camera.
-
Do not use a camera which has been dropped or subjected to an impact. Do not drop the camera or subject it to an impact.
-
REMOVE INNER REAR VIEW MIRROR ASSEMBLY
-
REMOVE MAP LIGHT ASSEMBLY
-
REMOVE VISOR BRACKET COVER

Text in Illustration *1 Protective Tape Tech Tips
Use the same procedure for both visor bracket covers.
-
Using a screwdriver, detach the 4 claws and remove the visor bracket cover.
-
-
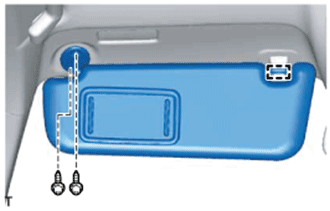
REMOVE VISOR ASSEMBLY LH
-
Detach the guide.
-
Remove the 2 screws and visor assembly LH.
-
-
REMOVE VISOR ASSEMBLY RH
Tech Tips
Use the same procedure described for the LH side.
-
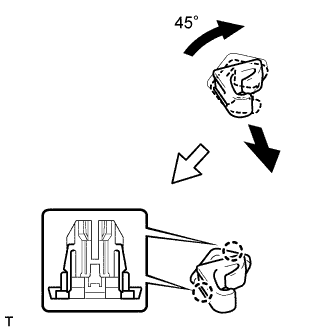
REMOVE VISOR HOLDER
Tech Tips
Use the same procedure for both visor holders.
-
Turn the visor holder clockwise approximately 45° and pull it out as shown in the illustration.
-
Detach the 2 claws and remove the visor holder.
-
-
REMOVE NIGHT VIEW CAMERA ASSEMBLY
Note
Do not drop or subject the camera to strong shocks.
-
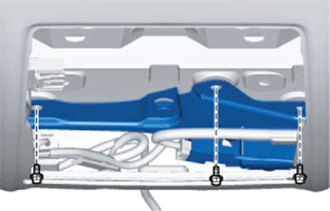
Remove the 3 bolts.
-
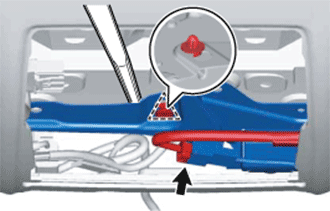
Using a moulding remover, detach the clip and remove the night view camera assembly.
Note
Do not touch the lens of the camera sensor during removal.
-
Disconnect the connector.
-