REMOTE TOUCH REASSEMBLY

-
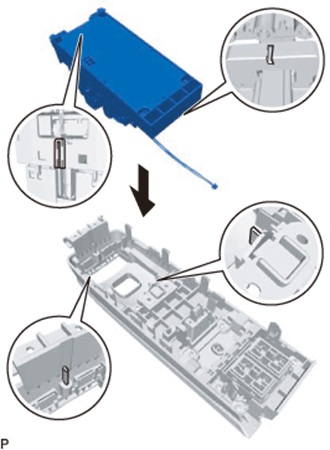
INSTALL REMOTE OPERATION SWITCH
-
Connect the connector and install the remote operation switch to the remote operation board.
Note
Do not damage the rod when installing the remote operation switch.
-
Install the remote operation switch with the 5 screws.
-
Attach the wire harness to the 2 claws.
-
-
INSTALL RH COVER ASSEMBLY
-
Attach the 4 claws to install the 2 switches.
Tech Tips
A switch hole cover is installed if there is no switch.
-
-
INSTALL INTEGRATION PANEL SUB-ASSEMBLY
-
Attach the 4 claws.
-
Install the 4 screws.
-
Install the 2 screws.
-
Install the integration panel sub-assembly with the 2 screws.
-
-
INSTALL REMOTE OPERATION BOARD
-
Align the guides of the remote operation board with the guides of the integration panel sub-assembly and install the remote operation board.
-
Attach the claw to install the wire harness and connect the connector.
-
Install the 2 screws.
-
Install the remote operation board with the 2 screws.
-
-
INSTALL SWITCH KNOB
-
Push on the switch knob to install it.
Tech Tips
Make sure the orientation of the switch knob is correct when installing it.
-
-
INSTALL COVER
-
Attach the 2 clips to install the cover.
-