FRONT SEAT ASSEMBLY (for Sports Seat Type) REMOVAL

CAUTION:
Wear protective gloves. Sharp areas on the parts may injure your hands.
Tech Tips
-
Use the same procedure for RHD and LHD vehicles.
-
The procedure listed below is for LHD vehicles.
-
Use the same procedure for the RH and LH sides.
-
The procedure listed below is for the LH side.
-
PRECAUTION
CAUTION:
Be sure to read Precaution thoroughly before servicing Click here.
Note
-
After turning the power switch off, waiting time may be required before disconnecting the cable from the auxiliary battery terminal. Therefore, make sure to read the disconnecting the cable from the auxiliary battery terminal notice before proceeding with work Click here.
-
If the side airbag has deployed, replace the front seat airbag assembly, front seatback frame sub-assembly, separate type front seatback pad and separate type front seatback cover with the necessary parts in accordance with the extent of the collision damage.
-
-
REMOVE LUGGAGE COMPARTMENT FLOOR MAT
-
Remove the luggage compartment floor mat.
-
-
REMOVE LUGGAGE COMPARTMENT TRIM COVER LH
-
Remove the luggage compartment trim cover LH.
-
-
REMOVE FRONT SEAT HEADREST ASSEMBLY
-
Remove the front seat headrest assembly.
-
-
REMOVE SEAT BELT ANCHOR COVER CAP LH
-
Detach the 6 hooks and remove the seat belt anchor cover cap LH.
-
-
DISCONNECT FRONT SEAT OUTER BELT ASSEMBLY LH
-
Operate the power seat switch assembly and move the front seat assembly so that the nut for the anchor of the front seat outer belt assembly LH can be removed.
-
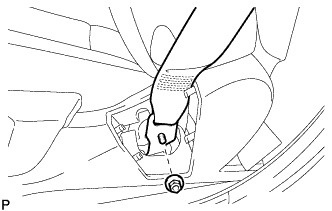
Remove the nut and disconnect the anchor of the front seat outer belt assembly LH.
-
-
REMOVE FRONT SEAT OUTER TRACK BRACKET COVER LH
-
Operate the power seat slide switch and move the front seat assembly to the rearmost position.
-

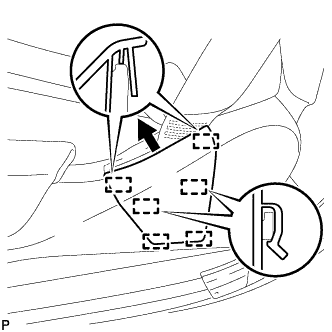
Text in Illustration *1 Hook *2 Guide Detach the 2 claws and 2 hooks.
-
Detach the 2 guides and remove the front seat outer track bracket cover LH.
-
-
REMOVE FRONT SEAT INNER TRACK BRACKET COVER LH
-
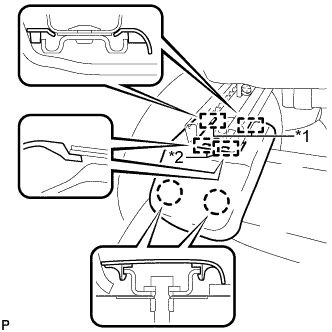
Text in Illustration *1 Hook *2 Guide Detach the 2 claws and 2 hooks.
-
Detach the 2 guides and remove the front seat inner track bracket cover LH.
-
-
REMOVE INNER SEAT TRACK BRACKET COVER LH
-
Operate the power seat slide switch and move the front seat assembly to the foremost position.
-
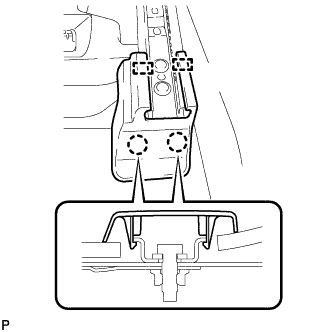
Detach the 2 claws and 2 hooks and remove the inner seat track bracket cover LH.
-
-
REMOVE OUTER SEAT TRACK BRACKET COVER LH
-
Detach the 2 claws and 2 hooks and remove the outer seat track bracket cover LH.
-
-
DISABLE AUTOAWAY/RETURN FUNCTION (w/ Memory)
-
Disable the autoaway/return function by changing the customize parameter Click here.
Note
Record the current customize parameter setting (whether the autoaway/return function is enabled or disabled) in order to restore the current setting after finishing the operation.
Tech Tips
Performing the above operation causes the autoaway/return function to be disabled when the power switch is turned off.
-
Turn the power switch on (IG). Operate the tilt and telescopic switch to fully retract and tilt up the steering column assembly.
-
Turn the power switch off.
-
-
REMOVE FRONT SEAT ASSEMBLY
-
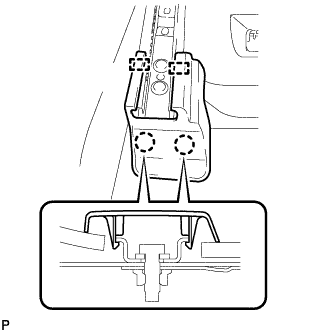
Remove the 2 bolts.
-
Operate the power seat slide switch and move the front seat assembly to the rearmost position.
-
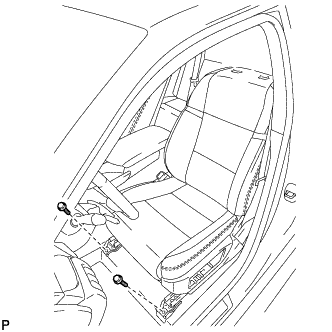
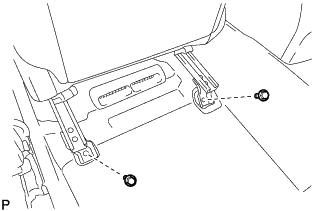
Remove the 2 bolts.
-
Operate the power seat slide switch and move the front seat assembly to the center position.
-
Operate the power seat reclining switch and move the seatback to the upright position.
-
Operate the power seat front vertical switch and rear lifter switch, and move the seat cushion to the uppermost position.
-
for Driver Side:
Operate the power seat variable cushion switch and move the front side of the seat cushion to the front most position.
-
Disconnect the cable from the auxiliary battery negative (-) terminal.
CAUTION:
Wait at least 90 seconds after disconnecting the cable from the auxiliary battery negative (-) terminal to disable the SRS system.
Note
When disconnecting the cable, some systems need to be initialized after the cable is reconnected Click here.
-
Tilt the front seat assembly to the rear of the vehicle.
Note
Be careful not to damage the front seat assembly and vehicle interior.
-
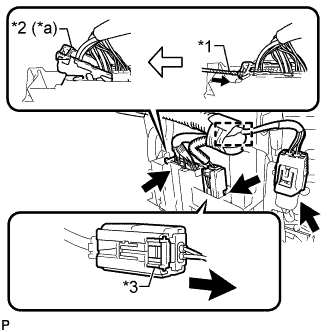
Text in Illustration *1 Protective Tape *2 Connector Lock Lever *3 Connector Lock *a Unlock Position Disconnect the connectors.
-
Disconnect the connector.
-
Push the connector lock to slide the airbag connector and disconnect it.
Note
When handling the airbag connector, take care not to damage the airbag wire harness or connector.
-
Using a screwdriver, move the connector lock lever to the unlock position as shown in the illustration and disconnect the connector.
Tech Tips
Tape the screwdriver tip before use.
-
-
Detach the wire harness clamp.
-
Remove the front seat assembly from the vehicle.
Note
-
2 or more people are required when carrying the front seat assembly out of the vehicle.
-
Be careful not to damage the vehicle body.
Tech Tips
When removing the front seat assembly from the vehicle, pass it through under the steering wheel.
-
-