SUB RADIATOR REMOVAL

-
PRECAUTION
Note
After turning the power switch off, waiting time may be required before disconnecting the cable from the battery terminal. Therefore, make sure to read the disconnecting the cable from the battery terminal notice before proceeding with work Click here.
-
REMOVE LUGGAGE COMPARTMENT FLOOR MAT
-
Remove the luggage compartment floor mat.
-
-
REMOVE LUGGAGE COMPARTMENT TRIM COVER LH
-
Remove the luggage compartment trim cover LH.
-
-
DISCONNECT CABLE FROM AUXILIARY BATTERY NEGATIVE TERMINAL
Note
When disconnecting the cable, some systems need to be initialized after the cable is reconnected Click here.
-
REMOVE ENGINE ROOM SIDE COVER
-
Remove the 4 clips and engine room side cover.
-
-
REMOVE COOL AIR INTAKE DUCT SEAL
-
Remove the 7 clips and cool air intake duct seal.
-
-
REMOVE NO. 1 AIR CLEANER INLET
-
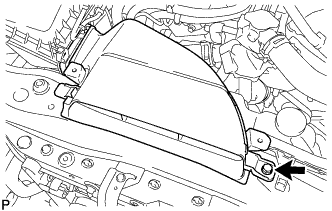
Remove the bolt and No. 1 air cleaner inlet.
-
-
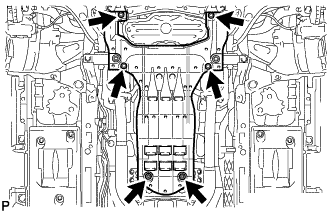
REMOVE ENGINE UNDER COVER
-
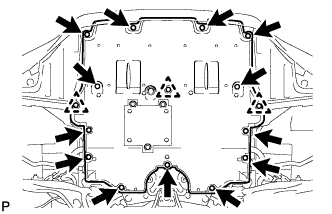
Remove the 13 screws, 3 clips and engine under cover.
-
-
REMOVE FRONT SUSPENSION MEMBER BRACE
-
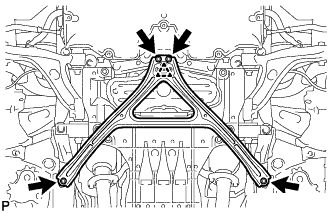
Remove the 4 bolts, and then turn the clip and remove the front suspension member brace.
Tech Tips
Do not remove the clip from the front suspension member brace.
-
-
REMOVE NO. 2 ENGINE UNDER COVER
-
Remove the 4 screws, 2 grommets and No. 2 engine under cover.
-
-
DRAIN COOLANT (for Inverter)
Note
-
Do not reuse the drained coolant because it may contain foreign objects.
-
Collect the drained coolant and measure its volume to establish a benchmark. When adding coolant, make sure to add more coolant than the measured amount.
-
Remove the reservoir tank cap.
CAUTION:
To avoid the danger of being burned, do not remove the reservoir tank cap while the coolant for the inverter is still hot.
-
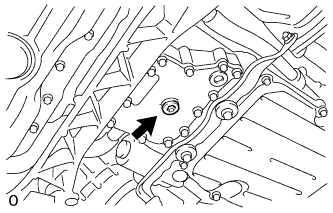
Using a 10 mm hexagon wrench, remove the drain plug indicated in the illustration and drain the coolant.
CAUTION:
Use caution when handling coolant immediately after driving or in summer because it may be hot.
-
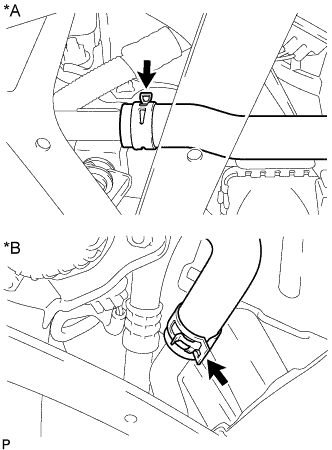
Text in Illustration *A for LHD *B for RHD Disconnect the No. 5 inverter cooling hose.
-
Install the plug with a new gasket.
- Torque:
- 39 N*m { 398 kgf*cm, 29 ft.*lbf }
-
Connect the No. 5 inverter cooling hose.
-
-
REMOVE MILLIMETER WAVE RADAR SENSOR ASSEMBLY (w/ Dynamic Radar Cruise Control System)
-
REMOVE HOOD LOCK ASSEMBLY (for LHD)
-
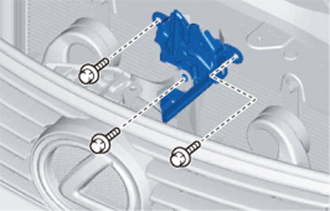
Remove the 3 bolts.
-
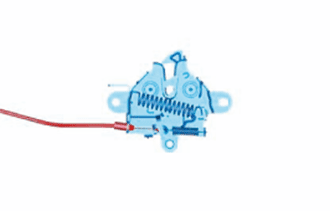
Remove the hood lock from the hood lock control cable.
-
-
REMOVE HOOD LOCK ASSEMBLY (for RHD)
-
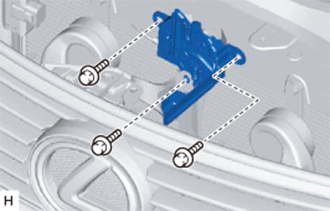
Remove the 3 bolts.
-
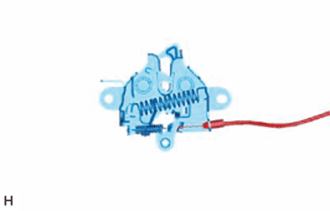
Remove the hood lock from the hood lock control cable.
-
-
REMOVE HOOD LOCK RELEASE LEVER PROTECTOR
-
Disconnect the connector and detach the 2 clamps.
-
Remove the 2 clips and hood lock release lever protector.
-
-
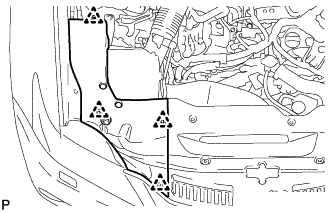
DISCONNECT NO. 2 ENGINE ROOM WIRE
-
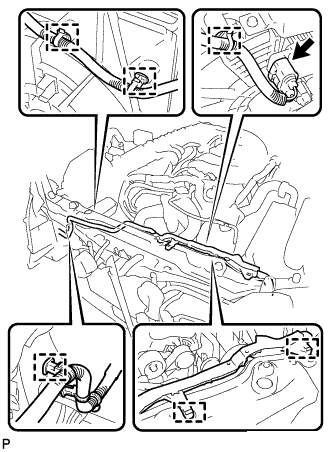
Disconnect the 6 wire harness clamps, connector and No. 2 engine room wire.
-
-
DISCONNECT HOOD LOCK CONTROL CABLE COVER (w/ Cover)
-
Detach the claw and remove the 2 screws to disconnect the hood lock control cable cover.
-
-
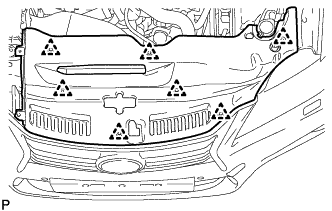
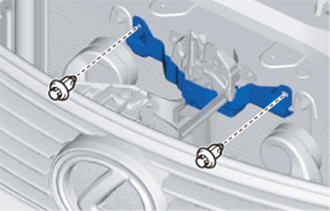
REMOVE UPPER RADIATOR SUPPORT
-
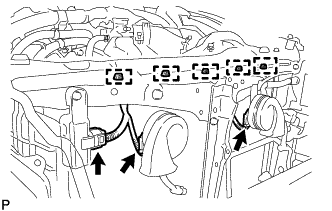
Disconnect the 5 wire harness clamps and 3 connectors.
-
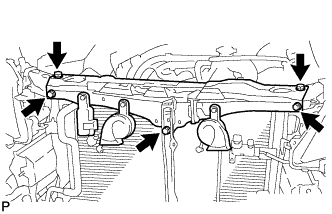
Remove the 5 bolts and upper radiator support.
-
-
REMOVE HOOD LOCK CONTROL CABLE COVER (w/ Cover)
-
Detach the guide and remove the hood lock control cable cover.
-
-
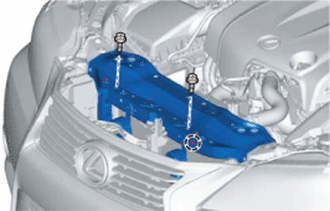
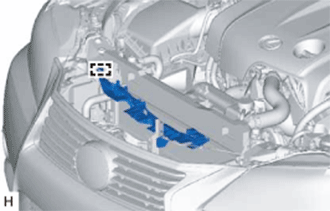
REMOVE RADIATOR ASSEMBLY
-
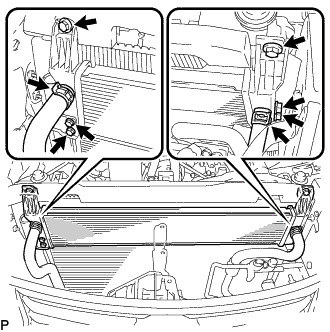
Disconnect the 2 water hoses.
Note
Apply insulating tape to the pipes and in the disconnected hoses or cover the pipes and hoses with plastic bags to prevent entry of foreign matter.
-
Remove the 6 bolts and radiator.
-