CAMSHAFT OIL CONTROL VALVE REMOVAL

-
REMOVE NO. 1 ENGINE COVER SUB-ASSEMBLY
-
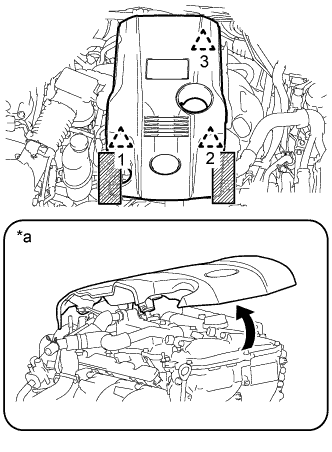
Text in Illustration *a When detaching the clip on the rear side of the cover 
Areas to be held when lifting the No. 1 engine cover sub-assembly Place both hands on either side of the No. 1 engine cover sub-assembly as shown in the illustration and detach the left and right side clips (1 and 2) near the front of the cover. Then, lift up the cover to detach the clip (3) on the rear side and remove the cover.
Note
-
If the left and right sides and front and back sides of the cover are lifted up at the same time, the cover may be damaged.
-
If the procedures are not followed exactly, the clip on the rear side of the cover may be damaged.
-
If you attempt to remove the cover with only one of the front clips detached, the cover may be damaged.
-
-
-
REMOVE CAMSHAFT TIMING OIL CONTROL VALVE ASSEMBLY
-
for Exhaust Side:
-

Disconnect the camshaft timing oil control valve assembly connector.
-
Remove the bolt and camshaft timing oil control valve assembly from the cylinder head cover sub-assembly.
Note
Do not allow foreign matter to contact the oil seal face of the camshaft timing oil control valve assembly (connecting surface with the cylinder head cover sub-assembly).
-
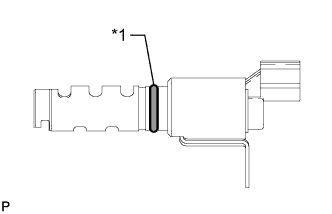
Text in Illustration *1 O-ring Remove the O-ring from the camshaft timing oil control valve assembly.
-
-
for Intake Side:
-
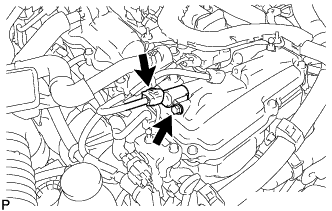
Disconnect the camshaft timing oil control valve assembly connector.
-
Remove the bolt and camshaft timing oil control valve assembly from the cylinder head cover sub-assembly.
Note
Do not allow foreign matter to contact the oil seal face of the camshaft timing oil control valve assembly (connecting surface with the cylinder head cover sub-assembly).
-
Text in Illustration *1 O-ring Remove the O-ring from the camshaft timing oil control valve assembly.
-
-