RADIATOR REMOVAL

-
REMOVE ENGINE ROOM SIDE COVER
-
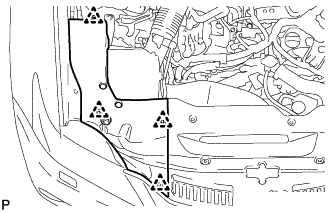
Remove the 4 clips and engine room side cover.
-
-
REMOVE COOL AIR INTAKE DUCT SEAL
-
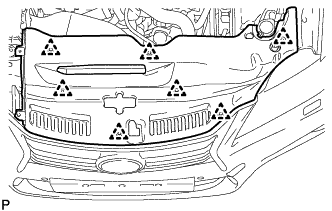
Remove the 7 clips and cool air intake duct seal.
-
-
REMOVE MILLIMETER WAVE RADAR SENSOR ASSEMBLY (w/ Dynamic Radar Cruise Control System)
-
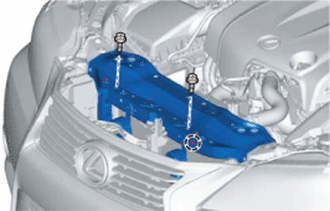
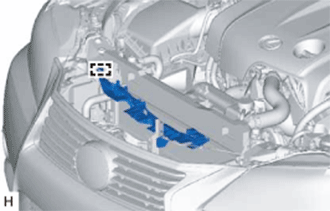
REMOVE V-BANK COVER SUB-ASSEMBLY
-
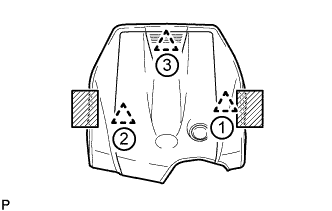
Place both hands on the sides of the cover as shown in the illustration, lift the cover to detach the 2 clips near the front in the order shown in the illustration, and then lift the cover further to detach the rear clip and remove the cover.
Text in Illustration 
Areas to place hands when lifting cover Note
If the cover is lifted rearward or forward and to the right or left at the same time, the cover may be damaged.
-
-
REMOVE NO. 1 AIR CLEANER INLET
-
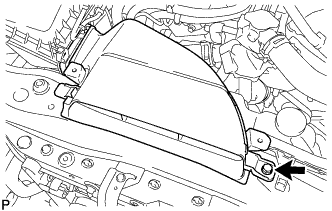
Remove the bolt and No. 1 air cleaner inlet.
-
-
REMOVE AIR CLEANER CAP WITH AIR CLEANER HOSE
-
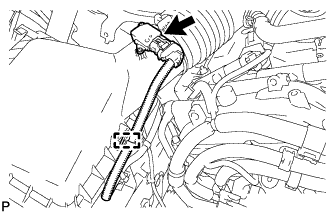
Disconnect the mass air flow meter connector.
-
Disconnect the clamp from the air cleaner.
-

Disconnect the VSV hose.
-
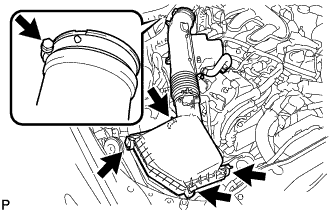
Disconnect the 4 clamps.
-
Remove the hose clamp and air cleaner cap with air cleaner hose.
-
-
REMOVE ENGINE UNDER COVER
-
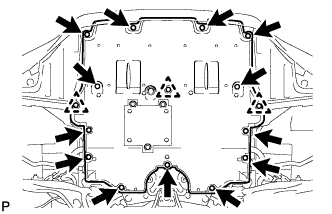
Remove the 13 screws, 3 clips and engine under cover.
-
-
DRAIN ENGINE COOLANT
CAUTION:
Do not remove the radiator cap or reservoir tank cap while the engine and radiator are still hot. Pressurized hot engine coolant and steam may be released and cause serious burns.
-
Loosen the radiator drain cock plug.
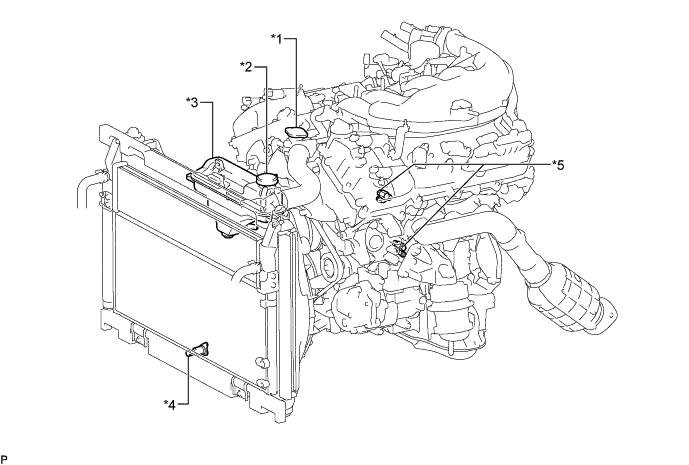
Text in Illustration *1 Radiator Cap *2 Reservoir Tank Cap *3 Radiator Reservoir Tank *4 Radiator Drain Cock Plug *5 Cylinder Block Drain Cock Plug - - -
Remove the reservoir tank cap and drain the coolant.
Tech Tips
Collect the coolant in a container and dispose of it according to the local regulations.
-
Loosen the 2 cylinder block drain cock plugs and drain the coolant from the engine.
-
-
REMOVE HOOD LOCK RELEASE LEVER PROTECTOR
-
Disconnect the connector and detach the 2 clamps.
-
Remove the 2 clips and hood lock release lever protector.
-
-
DISCONNECT HOOD LOCK CONTROL CABLE ASSEMBLY
-
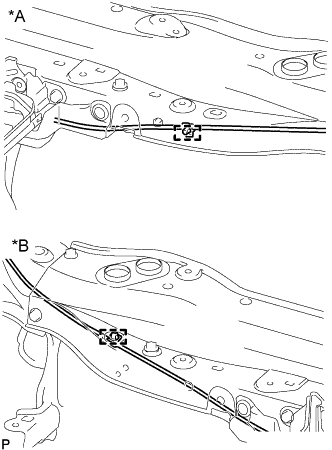
Text in Illustration *A for LHD *B for RHD Detach the clamp and disconnect the hood lock control cable.
-
-
REMOVE HOOD LOCK ASSEMBLY (for LHD)
-
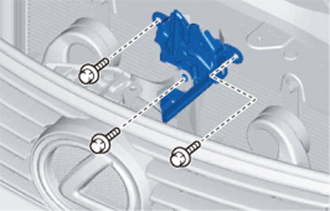
Remove the 3 bolts.
-
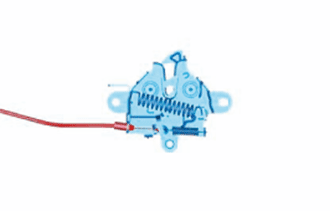
Remove the hood lock from the hood lock control cable.
-
-
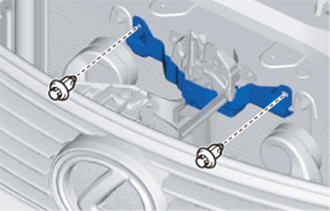
REMOVE HOOD LOCK ASSEMBLY (for RHD)
-
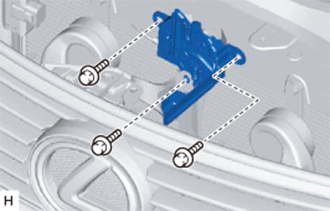
Remove the 3 bolts.
-
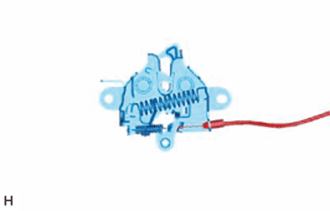
Remove the hood lock from the hood lock control cable.
-
-
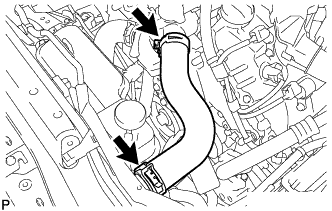
REMOVE NO. 1 RADIATOR HOSE
-
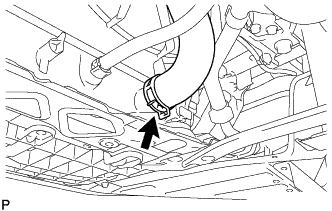
REMOVE RADIATOR RESERVOIR TANK
-
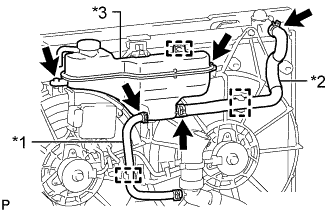
Text in Illustration *1 Reservoir Tank Outlet Hose *2 Radiator Reservoir Tank Hose *3 Radiator Reservoir Tank Detach the clamp, move the 2 hose clamps and remove the radiator reservoir tank hose.
-
Detach the clamp, move the hose clamp and disconnect the reservoir tank outlet hose.
-
Disconnect the wire harness clamp and remove the 2 bolts and radiator reservoir tank.
-
-
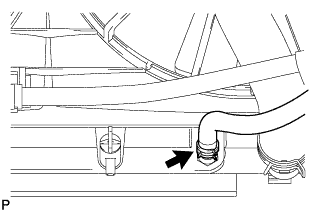
DISCONNECT NO. 2 RADIATOR HOSE
-

Detach the clamp and disconnect the No. 2 radiator hose from the fan shroud.
-
Disconnect the No. 2 radiator hose from the radiator assembly.
-
-
DISCONNECT NO. 2 OIL COOLER INLET HOSE
-
Disconnect the No. 2 oil cooler inlet hose from the radiator assembly.
-
-
DISCONNECT NO. 2 OIL COOLER OUTLET HOSE
-

Disengage the clamp and disconnect the No. 2 oil cooler outlet hose from the No. 1 flexible hose clamp.
-
Remove the No. 1 flexible hose clamp from the radiator assembly.
-
Slide the clip and disconnect the No. 2 oil cooler outlet hose from the radiator assembly.
-
-
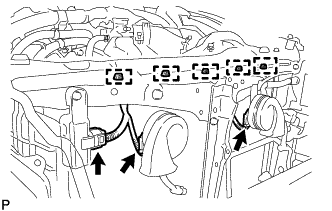
DISCONNECT NO. 2 ENGINE ROOM WIRE
-
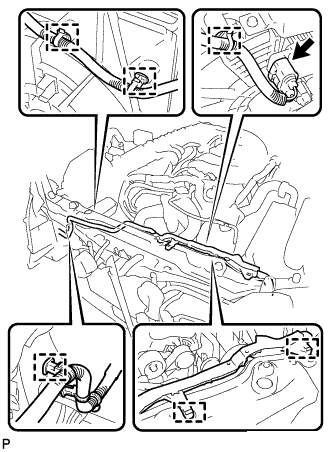
Disconnect the 6 wire harness clamps, connector and No. 2 engine room wire.
-
-
DISCONNECT HOOD LOCK CONTROL CABLE COVER (w/ Cover)
-
Detach the claw and remove the 2 screws to disconnect the hood lock control cable cover.
-
-
REMOVE UPPER RADIATOR SUPPORT
-
Disconnect the 5 wire harness clamps and 3 connectors.
-
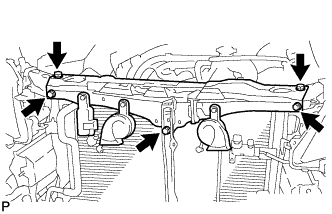
Remove the 5 bolts and upper radiator support.
-
-
REMOVE HOOD LOCK CONTROL CABLE COVER (w/ Cover)
-
Detach the guide and remove the hood lock control cable cover.
-
-
SEPARATE COOLER CONDENSER ASSEMBLY
-
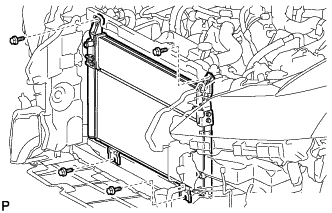
Remove the 4 bolts and separate the cooler condenser assembly from the radiator assembly.
-
-
REMOVE RADIATOR ASSEMBLY
-
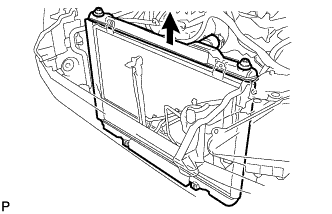
Remove the radiator assembly from the vehicle together with the cooling fan assembly.
Note
Do not allow the radiator to interfere with other parts.
-
Remove the 2 radiator support cushions and 2 lower radiator supports.
-
-
REMOVE FAN SHROUD
-
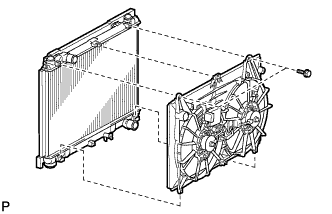
Remove the 2 bolts and detach the claw on the upper part of the fan shroud.
-
Detach the 2 claws on the lower part of the fan shroud and remove the fan shroud.
-