EXHAUST PIPE REMOVAL

-
REMOVE NO. 1 REAR FLOOR BOARD SUB-ASSEMBLY
-
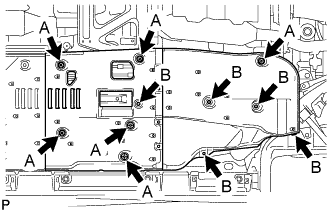
Remove the 5 clips labeled B in the illustration.
-
Loosen the 6 clips labeled A in the illustration and remove the No. 1 rear floor board sub-assembly.
-
-
REMOVE NO. 2 REAR FLOOR BOARD SUB-ASSEMBLY
-
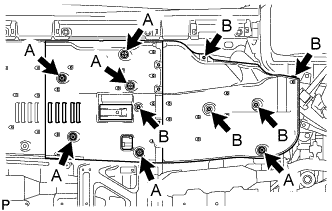
Remove the 5 clips labeled B in the illustration.
-
Loosen the 6 clips labeled A in the illustration and remove the No. 2 rear floor board sub-assembly.
-
-
REMOVE FRONT CENTER FLOOR BRACE
-
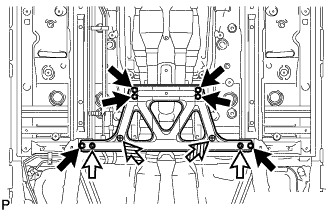
Remove the 6 bolts and 2 nuts.
Text in Illustration 
Bolt 
Nut 
Clip -
Loosen the 2 clips and remove the front center floor brace.
-
-
DISCONNECT HEATED OXYGEN SENSOR (for Bank 1 Sensor 2)
-
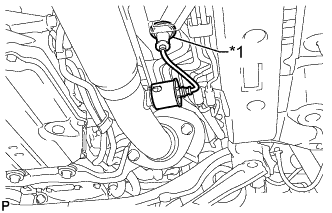
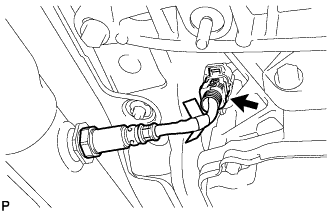
Text in Illustration *1 Grommet Disconnect the grommet of the heated oxygen sensor.
-
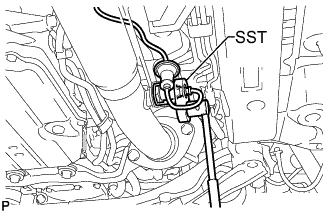
Using SST, disconnect the heated oxygen sensor.
- SST
- 09224-00010
-
-
REMOVE HEATED OXYGEN SENSOR (for Bank 2 Sensor 2)
-
Disconnect the heated oxygen sensor connector.
-
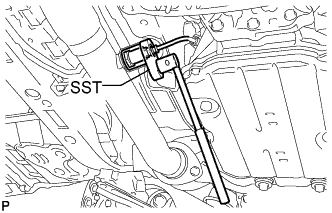
Using SST, remove the heated oxygen sensor.
- SST
- 09224-00010
-
-
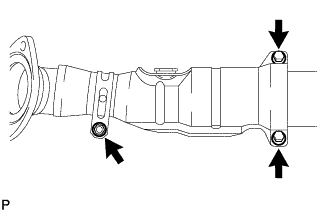
REMOVE FRONT EXHAUST PIPE ASSEMBLY
-
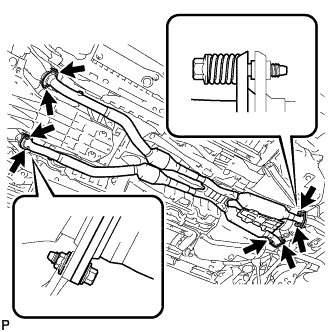
Remove the 4 nuts, 8 bolts, 4 compression springs and front exhaust pipe assembly.
-
Remove the 4 gaskets.
-
w/ Towing Package:
Tech Tips
Only perform this procedure when replacement of the front No. 1 exhaust pipe protector is necessary.
-
Remove the bolt and clamp.
-
Remove the 2 bolts, 2 nuts, exhaust pipe protector stay and front No. 1 exhaust pipe protector.
-
-
-
REMOVE TAILPIPE RH
-
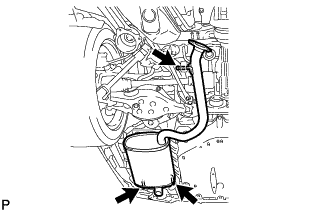
Remove the tailpipe RH from the 3 exhaust pipe supports.
-
-
REMOVE TAILPIPE LH
-
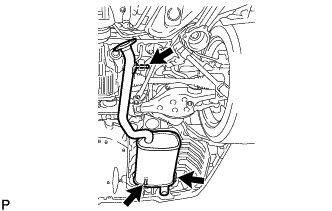
Remove the tailpipe LH from the 3 exhaust pipe supports.
-