THERMOSTAT REMOVAL

-
DRAIN ENGINE COOLANT
CAUTION:
Do not remove the water filler cap sub-assembly or reservoir tank cap while the engine and radiator assembly are still hot. Pressurized hot engine coolant and steam may be released and cause serious burns.
-
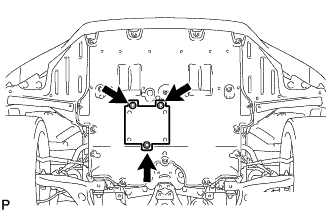
Remove the 3 screws and No. 4 center engine under cover.
-
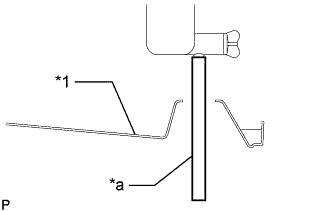
Text in Illustration *1 Engine Under Cover *a Vinyl Tube Install a vinyl tube to the radiator drain cock on the radiator side.
-
Loosen the radiator drain cock sub-assembly.
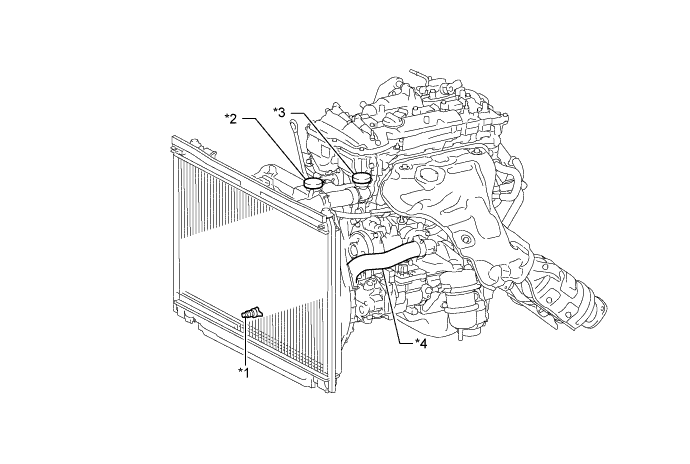
Text in Illustration *1 Radiator Drain Cock Sub-assembly *2 Reservoir Tank Cap *3 Water Filler Cap Sub-assembly *4 No. 2 Radiator Hose Sub-assembly -
Remove the reservoir tank cap and water filler cap sub-assembly. Then drain the engine coolant.
Tech Tips
Collect the engine coolant in a container and dispose of it according to the regulations in your area.
-
-
REMOVE SERVICE PLUG GRIP
-
DISCONNECT AIR CONDITIONING HARNESS
-
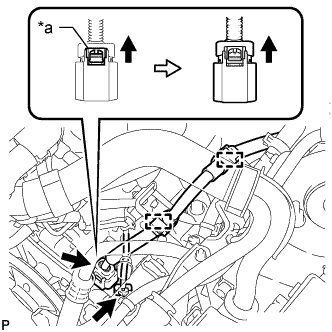
Text in Illustration *a Green-colored Lock Using a screwdriver, slide the green-colored lock of the connector as shown in the illustration to release it and disconnect the connector.
CAUTION:
Make sure to wear insulated gloves.
Note
Insulate the removed terminals and connector with insulating tape.
-
Detach the 2 wire harness clamps.
-
-
REMOVE RADIATOR HOSE SUB-ASSEMBLY
-
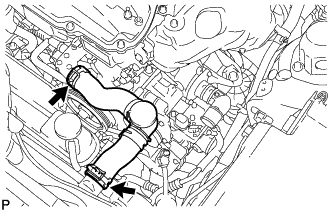
Slide the 2 clamps and remove the radiator hose sub-assembly from the water outlet sub-assembly and radiator assembly.
-
-
DISCONNECT NO. 2 RADIATOR HOSE SUB-ASSEMBLY
-
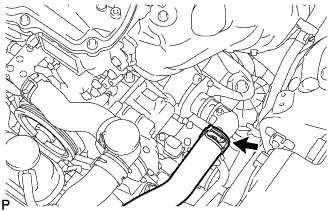
Slide the clip and disconnect the No. 2 radiator hose sub-assembly from the water inlet with thermostat sub-assembly.
-
-
REMOVE WATER INLET WITH THERMOSTAT SUB-ASSEMBLY
-
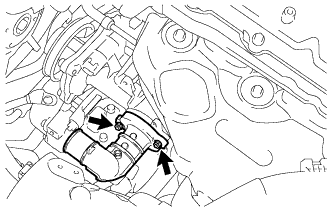
Remove the 2 nuts and water inlet with thermostat sub-assembly.
-
Remove the gasket from the water inlet with thermostat sub-assembly.
-