LUGGAGE COMPARTMENT DOOR DISASSEMBLY

-
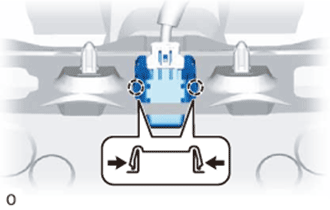
REMOVE LUGGAGE LOCK CONTROL CABLE PLATE (w/ Handle)
-
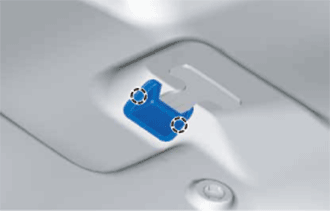
Detach the 2 claws and remove the luggage lock control cable plate.
-
-
REMOVE LUGGAGE COMPARTMENT DOOR INSIDE HANDLE (w/ Handle)
-
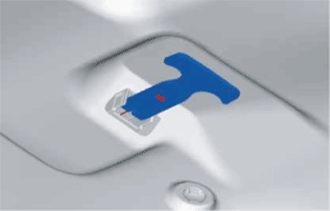
Disconnect the luggage compartment door inside handle from the luggage door lock control cable.
-
-
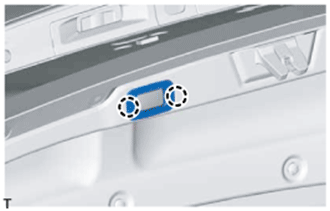
REMOVE LUGGAGE COMPARTMENT DOOR ASSIST GRIP
-
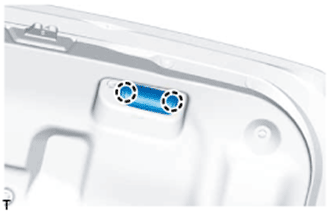
Detach the 2 claws and open the cover.
-
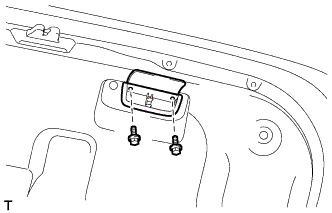
Remove the 2 screws and luggage compartment door assist grip.
-
-
REMOVE SWITCH BEZEL (w/ Power Trunk Lid System)
-
Detach the 2 claws and remove the switch bezel.
-
-
REMOVE LUGGAGE COMPARTMENT DOOR COVER
-
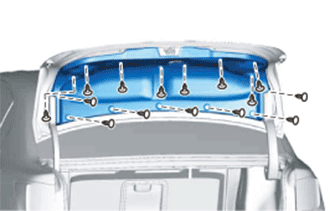
Remove the 15 clips and luggage compartment door cover.
-
-
REMOVE LUGGAGE COMPARTMENT TRIM INNER COVER LH (w/ Power Trunk Lid System)
-
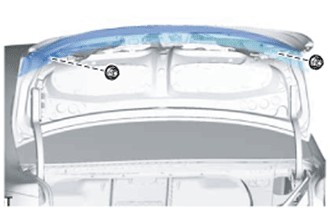
REMOVE LUGGAGE COMPARTMENT DOOR HINGE COVER LH
-
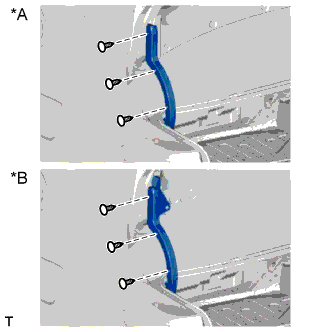
Text in Illustration *A w/o Power Trunk Lid System *B w/ Power Trunk Lid System Remove the 3 clips and luggage compartment door hinge cover.
-
-
REMOVE LUGGAGE COMPARTMENT DOOR HINGE COVER RH
-
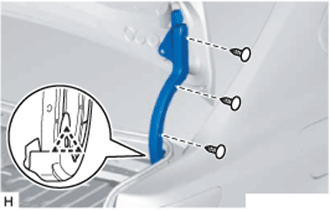
Remove the 3 clips.
-
Detach the clip and remove the luggage compartment door hinge cover.
-
-
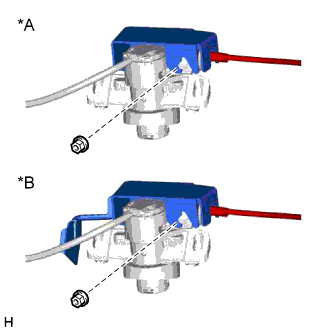
REMOVE DOOR CONTROL SWITCH (w/ Power Trunk Lid System)
-
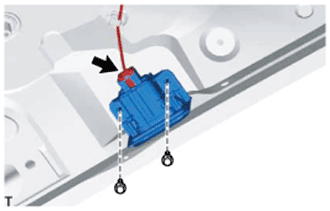
Disconnect the connector.
-
Remove the 2 bolts and door control switch.
-
-
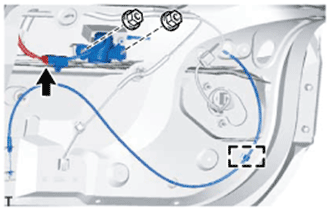
REMOVE LUGGAGE DOOR LOCK CONTROL CABLE SUB-ASSEMBLY (w/ Handle)
-
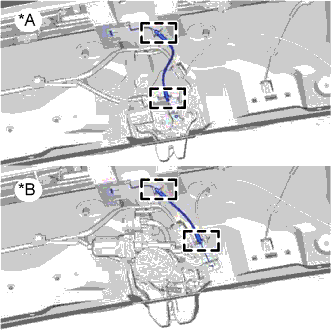
Text in Illustration *A w/o Easy Closer *B w/ Easy Closer Detach the clamp of the luggage compartment door lock and the clamp of the luggage lock control cable clamp and remove the luggage door lock control cable.
-
-
REMOVE LUGGAGE COMPARTMENT DOOR LOCK ASSEMBLY
-
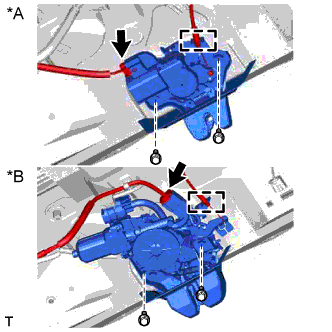
Text in Illustration *A w/o Easy Closer *B w/ Easy Closer Disconnect the connector.
-
Disconnect the luggage door lock control cable.
-
Remove the 2 bolts and luggage compartment door lock.
-
-
REMOVE LUGGAGE LOCK CONTROL CABLE CLAMP (w/ Handle)
-
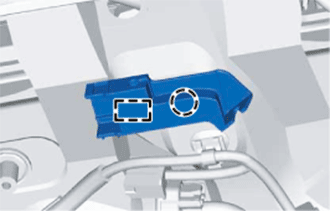
Detach the clip and guide and remove the luggage lock control cable clamp.
-
-
REMOVE LUGGAGE COMPARTMENT DOOR LOCK CYLINDER ASSEMBLY
-
Disconnect the connector.
-
Detach the clamp of the luggage door lock control cable.
-
Remove the 2 nuts and luggage compartment door lock cylinder together with the luggage door lock control cable.
-
-
REMOVE LUGGAGE COMPARTMENT KEY CYLINDER PROTECTOR
-
Text in Illustration *A for Type A *B for Type B Remove the nut and luggage compartment key cylinder protector.
-
-
REMOVE LUGGAGE DOOR LOCK CONTROL CABLE SUB-ASSEMBLY
-
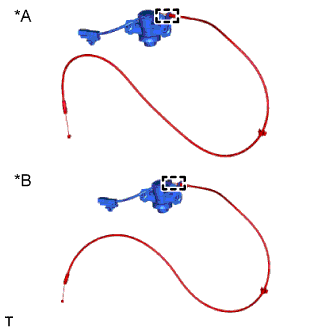
Text in Illustration *A w/o Easy Closer *B w/ Easy Closer Detach the luggage door lock control cable from the luggage compartment door lock cylinder.
-
-
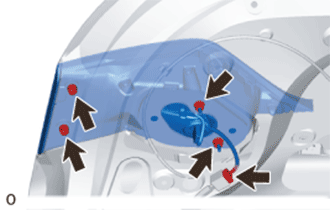
REMOVE REAR SPOILER SUB-ASSEMBLY (w/ Rear Spoiler)
Tech Tips
When removing the rear spoiler, heat the vehicle body and rear spoiler using a heat light.
Standard Item Temperature Vehicle Body 40 to 60°C (104 to 140°F) Rear Spoiler 20 to 30°C (68 to 86°F) Note
Do not heat the vehicle body or rear spoiler excessively.
-
Remove the 2 nuts.
-

Put protective tape around the rear spoiler.
-
Insert piano wire between the vehicle body and rear spoiler.
Tech Tips
Be careful of the bolt positions.
-
Tie objects that can serve as handles (for example, wooden blocks) to the piano wire ends.
-
Pull the piano wire and scrape off the double-sided tape that holds the rear spoiler to the vehicle body.
Note
Be careful not to damage the vehicle body.
-
Detach the 5 clips and remove the rear spoiler.
Text in Illustration *1 Protective Tape *2 Wooden Block
-
-
REMOVE REAR LIGHT ASSEMBLY LH
-
Remove the 4 nuts and rear light assembly LH.
Note
-
When removing the rear light assembly LH, be careful not to damage the clip.
-
If a clip is damaged or becomes detached from the vehicle, replace it with a new one.
-
-
Disconnect the connector.
-
-
REMOVE REAR LIGHT ASSEMBLY RH
Tech Tips
Use the same procedure described for the LH side.
-
REMOVE NO. 3 LUGGAGE COMPARTMENT DOOR OUTSIDE GARNISH
-
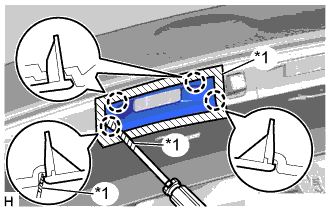
Text in Illustration *1 Protective Tape Put protective tape around the No. 3 luggage compartment door outside garnish.
-
Using a screwdriver, detach the 4 claws and remove the No. 3 luggage compartment door outside garnish.
Tech Tips
Tape the screwdriver tip before use.
-
-
REMOVE NO. 2 LUGGAGE COMPARTMENT DOOR OUTSIDE GARNISH
Tech Tips
Use the same procedure described for the No. 3 luggage compartment door outside garnish.
-
REMOVE LUGGAGE COMPARTMENT DOOR OUTSIDE GARNISH SUB-ASSEMBLY
-
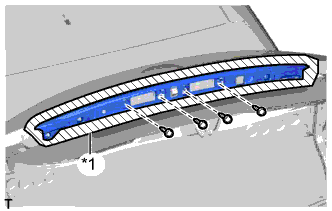
Text in Illustration *1 Protective Tape Put protective tape around the luggage compartment door outside garnish.
-
Remove the 4 screws.
-
Detach the 4 clips and remove the luggage compartment door outside garnish.
-
-
REMOVE REAR TELEVISION CAMERA ASSEMBLY
-
Pull the rear television camera assembly to detach the 2 claws on the outside of the rear television camera assembly.
-
Disconnect the connector and remove the rear television camera assembly.
-
-
REMOVE LUGGAGE ELECTRICAL KEY SWITCH
-
Disconnect the connector.
-

Remove the 2 screws and luggage electrical key switch.
-
-
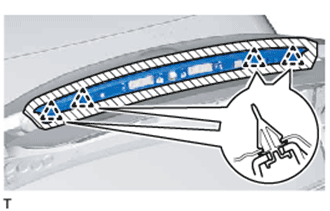
REMOVE LICENSE PLATE LIGHT ASSEMBLY
-
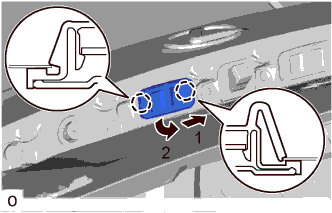
Detach the 2 claws as indicated by the arrows in the order shown in the illustration and remove the license plate light assembly.
-
Disconnect the connector.
-