POWER SEAT SWITCH (w/ Shoulder Switch) REMOVAL

CAUTION:
Wear protective gloves. Sharp areas on the parts may injure your hands.
Tech Tips
-
Use the same procedure for RHD and LHD vehicles.
-
The procedure listed below is for LHD vehicles.
-
Use the same procedure for the RH and LH sides.
-
The procedure listed below is for the RH side.
-
REMOVE FRONT SEAT ASSEMBLY RH
-
Use the same procedure described for the LH side Click here.
-
-
REMOVE FRONT SEATBACK BOARD SUB-ASSEMBLY RH
-
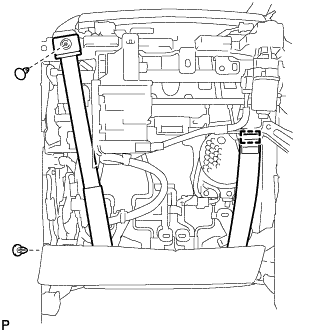
Using a clip remover, remove the clip and disconnect the rubber band.
-
Detach the hook and disconnect the rubber band.
-
Using a clip remover, remove the clip.
-
Open the lower part of the front seatback board sub-assembly RH and remove the 2 screws.
-
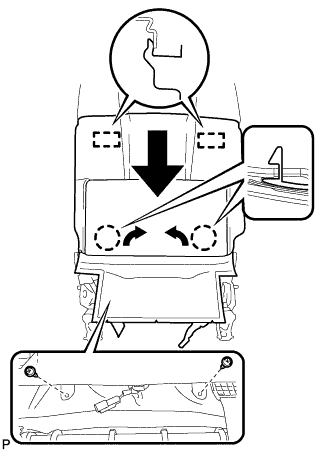
Push and slide the front seatback board subassembly LH to detach the claw.
Tech Tips
Use the same procedure to detach the claw on the other side.
-
Slide the front seatback board sub-assembly RH downward to detach the 2 hooks and remove it.
-
-
REMOVE FRONT SEATBACK BOARD
-
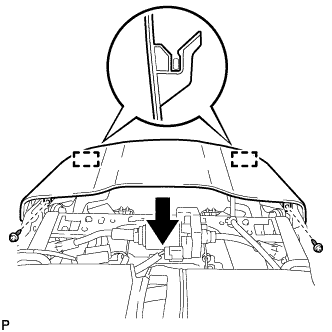
Remove the 2 screws.
-
Slide the front seatback board downward to detach the 2 hooks and remove it.
-
-
REMOVE FRONT POWER SEAT SWITCH ASSEMBLY RH
-
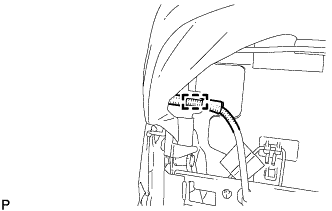
Detach the wire harness clamp.
-
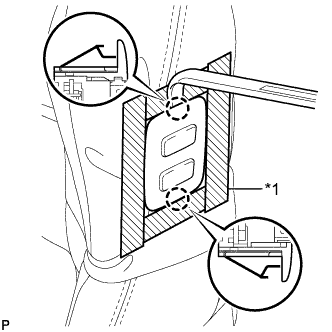
Text in Illustration *1 Protective Tape Apply protective tape as shown in the illustration.
-
Using moulding remover A, detach the 2 claws and remove the front power seat switch assembly RH.
-
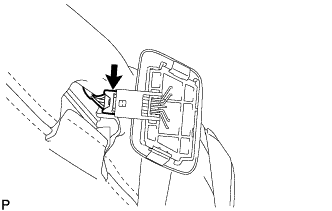
Disconnect the connector.
-