POWER SEAT SWITCH (for Luxury Seat Type) REMOVAL

CAUTION:
Wear protective gloves. Sharp areas on the parts may injure your hands.
Tech Tips
-
Use the same procedure for RHD and LHD vehicles.
-
The procedure listed below is for LHD vehicles.
-
Use the same procedure for the RH and LH sides.
-
The procedure listed below is for the LH side.
-
REMOVE FRONT SEAT ASSEMBLY
-
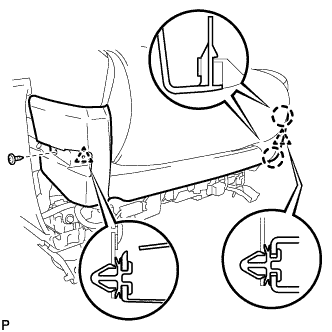
REMOVE FRONT SEAT INNER NO. 1 CUSHION SHIELD LH
-
Remove the screw.
-
Detach the 2 claws and 2 clips and remove the front seat inner No. 1 cushion shield LH.
-
-
REMOVE FRONT SEAT CUSHION SHIELD LH
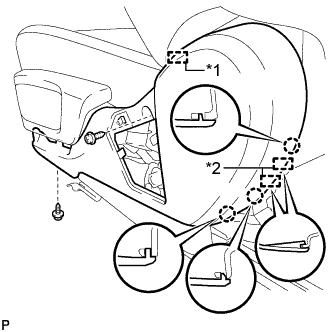
Text in Illustration *1 Hook *2 Guide
-
Remove the 2 screws.
-
Detach the 3 claws and 2 guides.
-
Detach the hook and remove the front seat cushion shield LH.
-
-
REMOVE POWER SEAT SWITCH KNOB LH (for Slide)
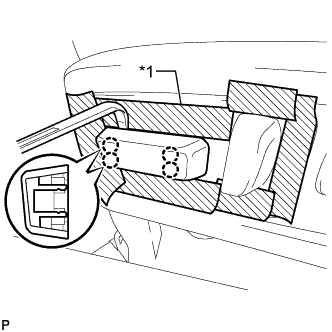
Text in Illustration *1 Protective Tape
-
Apply protective tape as shown in the illustration.
-
Using moulding remover A, detach the 4 claws and remove the power seat switch knob LH.
-
-
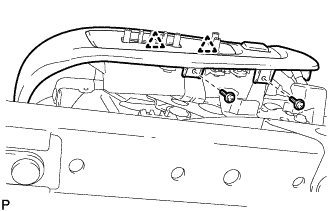
REMOVE POWER SEAT SWITCH KNOB LH (for Reclining)

Text in Illustration *1 Protective Tape
-
Apply protective tape as shown in the illustration.
-
Using moulding remover A, detach the 3 claws and remove the power seat switch knob LH.
-
-
REMOVE FRONT POWER ADJUSTER SHIELD LH
-
Remove the 2 screws.
-
Detach the 2 clips and remove the front power adjuster shield LH.
-
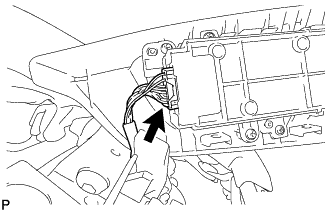
Disconnect the connector.
-
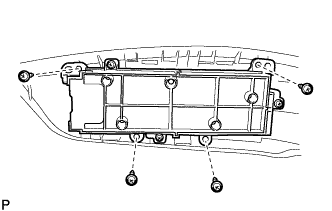
Remove the 4 screws and switch bezel from the front power adjuster shield LH.
-
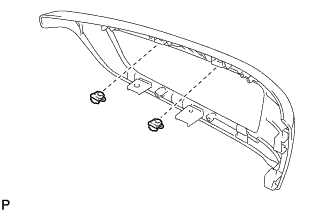
Remove the 2 clips from the front power adjuster shield LH.
-
-
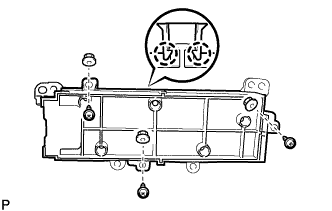
REMOVE POWER SEAT SWITCH ASSEMBLY
-
Remove the 3 screws and 3 nuts.
-
Detach the 2 claws and remove the power seat switch assembly from the switch bezel.
-