SOLAR SENSOR REMOVAL

-
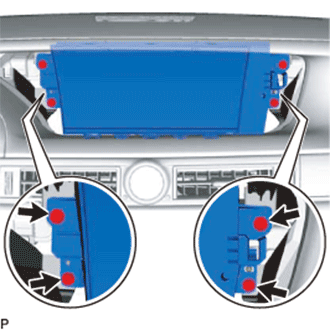
REMOVE UPPER INSTRUMENT CLUSTER FINISH PANEL
-
Put protective tape around the upper instrument cluster finish panel.
-
Remove the 3 clips <B>.
-
Detach the 2 clips and 3 claws and remove the upper instrument cluster finish panel.

Text in Illustration *A for 12.3 Inch *B for 8 Inch *1 Protective Tape - -
-
-
REMOVE MULTI-DISPLAY (for 8 Inch)
-
Remove the 4 screws.
-
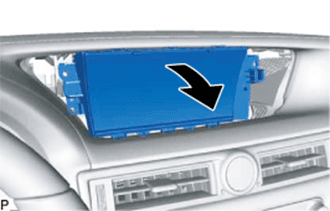
Move the multi-display in the direction of the arrow in the illustration.
-
Disconnect all the connectors and remove multi-display.
-
-
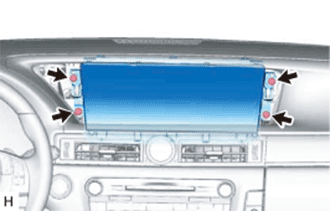
REMOVE ACCESSORY METER ASSEMBLY (for 12.3 Inch)
-
Remove the 4 bolts.
-
Disconnect the connectors and remove the accessory meter assembly.
-
-
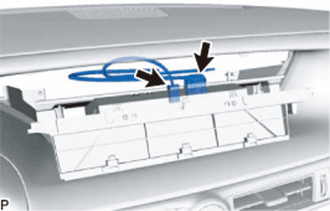
REMOVE AUTOMATIC LIGHT CONTROL SENSOR
-
Disconnect the connector.
-
Detach the 2 claws and remove the automatic light control sensor (solar sensor).
-