HUMIDITY SENSOR INSTALLATION

-
INSTALL AIR CONDITIONING THERMISTOR ASSEMBLY
Text in Illustration *1 Bracket *2 Stopper
-
Attach the 2 brackets, and carefully install the air conditioning thermistor assembly (humidity sensor) to the glass surface, preventing air bubbles from forming between the contact surfaces.
-
Push in the stopper.
-
Connect the connector.
-
-
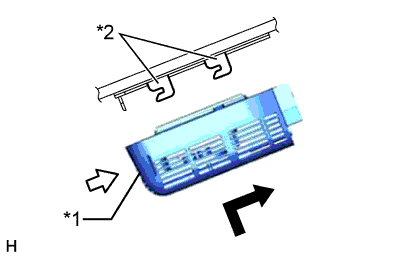
INSTALL FRONT ROOF TOP GARNISH
Text in Illustration *1 Guide *2 Fastener
-
w/ Night View System:
-
While being careful not to apply force to the camera, attach the 6 claws, guide and fastener to install the front roof top garnish.
Note
When removing and installing the front roof top garnish, do not apply force to the camera sensor located at (x).
-
-
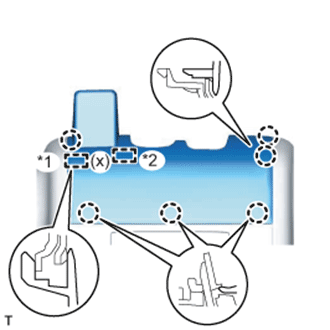
w/o Night View System:
-
While being careful not to apply force to the camera (for vehicles with the lane keeping assist system), attach the 6 claws and guide to install the front roof top garnish.
Note
w/ Lane Keeping Assist System:
When removing and installing the front roof top garnish, do not apply force to the camera sensor located at (x).
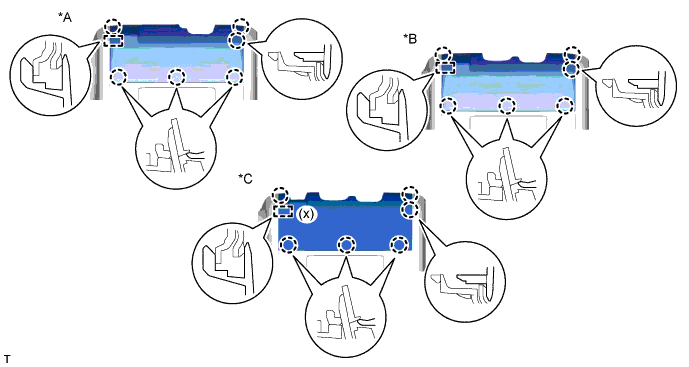
Text in Illustration *A for Standard *B w/ Rain Sensor *C w/ Lane Keeping Assist System - -
-
-