AIR CONDITIONING UNIT DISASSEMBLY

Tech Tips
-
Use the same procedure for RHD and LHD vehicles.
-
The procedure listed below is for LHD vehicles.
-
REMOVE BLOWER ASSEMBLY
-
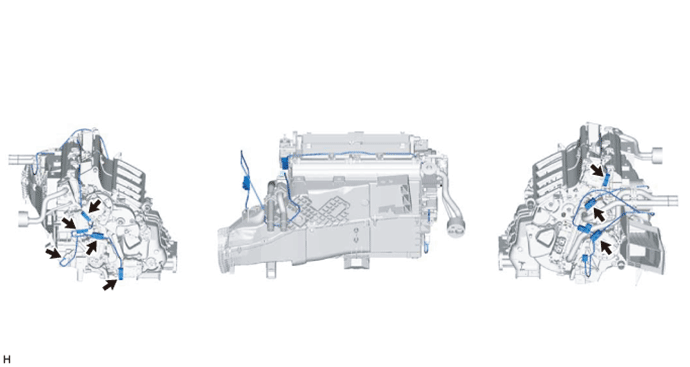
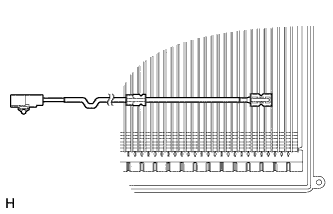
REMOVE AIR CONDITIONING HARNESS ASSEMBLY
-
for Standard:
-
Disconnect the connectors.
-
Remove the air conditioning harness assembly as shown in the illustration.
-
-
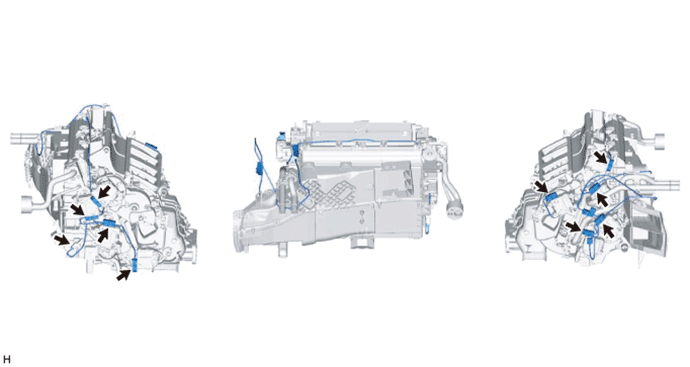
for 3 Zone Type:
-
Disconnect the connectors.
-
Remove the air conditioning harness assembly as shown in the illustration.
-
-
-
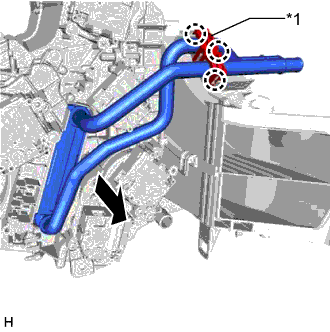
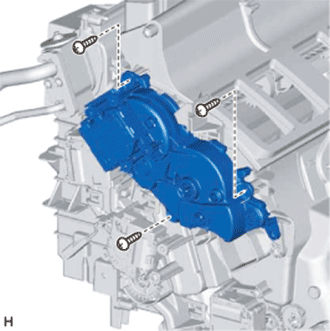
REMOVE AIR CONDITIONING TUBE ASSEMBLY
-
Text in Illustration *1 Packing Remove the packing.
-
Text in Illustration *1 Butyl Tape Remove the butyl tape.
-

Using a 4 mm hexagon wrench, remove the 2 hexagon bolts, air conditioning tube assembly.
-
Remove the 2 O-rings from the air conditioning tube assembly.
-
-
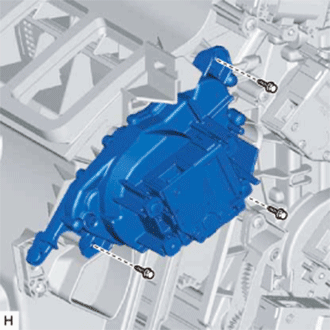
REMOVE COOLER EXPANSION VALVE
-
Remove the cooler expansion valve.
-
-
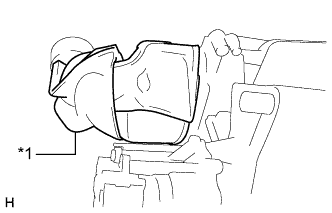
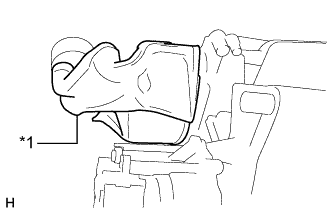
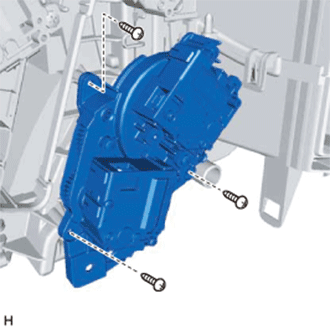
REMOVE HEATER RADIATOR UNIT SUB-ASSEMBLY
Text in Illustration *1 Clamp
-
Detach the 3 claws and remove the clamp.
-
Remove the heater unit sub-assembly as shown in the illustration.
-
-
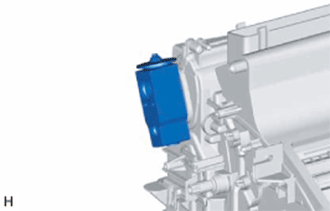
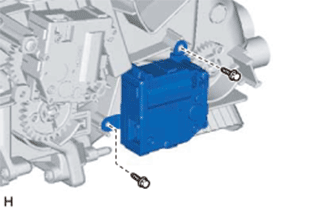
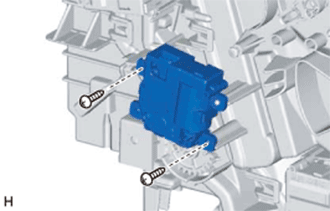
REMOVE NO. 1 AIR CONDITIONING RADIATOR DAMPER SERVO SUB-ASSEMBLY
-
Remove the 2 screws and No. 1 air conditioning radiator damper servo sub-assembly.
-
-
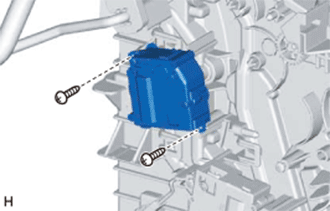
REMOVE NO. 2 AIR CONDITIONING RADIATOR DAMPER SERVO SUB-ASSEMBLY (for RH Side)
-
Remove the 2 screws and No. 2 air conditioning radiator damper servo sub-assembly.
-
-
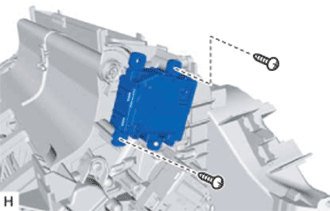
REMOVE NO. 3 AIR CONDITIONING RADIATOR DAMPER SERVO SUB-ASSEMBLY
-
Remove the 3 screws and No. 3 air conditioning radiator damper servo sub-assembly.
-
-
REMOVE NO. 5 AIR CONDITIONING RADIATOR DAMPER SERVO SUB-ASSEMBLY (for 3 Zone Type)
-
Remove the 3 screws and No. 5 air conditioning radiator damper servo sub-assembly.
-
-
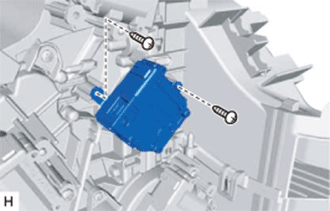
REMOVE NO. 7 AIR CONDITIONING RADIATOR DAMPER SERVO SUB-ASSEMBLY
-
Remove the 2 screws and No. 7 air conditioning radiator damper servo sub-assembly.
-
-
REMOVE NO. 6 AIR CONDITIONING RADIATOR DAMPER SERVO SUB-ASSEMBLY
-
Remove the 3 screws and No. 6 air conditioning radiator damper servo sub-assembly.
-
-
REMOVE NO. 4 AIR CONDITIONING RADIATOR DAMPER SERVO SUB-ASSEMBLY
-
Remove the 2 screws and No. 4 air conditioning radiator damper servo sub-assembly.
-
-
REMOVE NO. 2 AIR CONDITIONING RADIATOR DAMPER SERVO SUB-ASSEMBLY (for LH Side)
-
Remove the 2 screws and No. 2 air conditioning radiator damper servo sub-assembly.
-
-
REMOVE NO. 1 COOLER EVAPORATOR SUB-ASSEMBLY
-
Remove the 5 screws.
-
Detach the 5 claws and remove the air duct.

Text in Illustration *1 Air Duct - - -
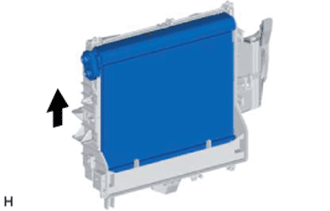
Remove the No. 1 cooler evaporator sub-assembly.
-
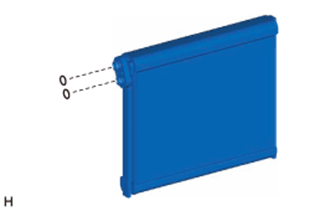
Remove the 2 O-rings from the evaporator.
-
-
REMOVE COOLER THERMISTOR
-
Remove the cooler thermistor (front evaporator temperature sensor).
-