TRANSMISSION WIRE REMOVAL

-
REMOVE FRONT SUSPENSION MEMBER BRACE
-
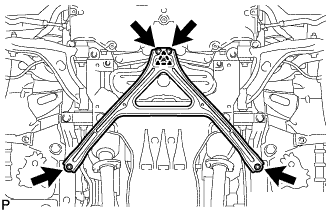
Remove the 4 bolts, and then turn the clip and remove the front suspension member brace.
Tech Tips
Do not remove the clip from the front suspension member brace.
-
-
REMOVE NO. 2 ENGINE UNDER COVER
-
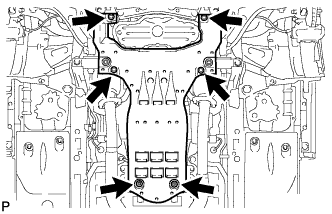
Remove the 4 screws, 2 grommets and No. 2 engine under cover.
-
-
DRAIN AUTOMATIC TRANSMISSION FLUID
-
Remove the drain plug and gasket, and drain the ATF.
-
Install a new gasket and the drain plug.
- Torque:
- 20 N*m { 204 kgf*cm, 15 ft.*lbf }
-
-
REMOVE NO. 1 EXHAUST PIPE SUPPORT BRACKET SUB-ASSEMBLY
-
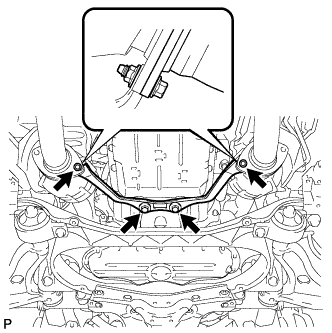
Remove the 2 nuts, 4 bolts and exhaust pipe No. 1 support bracket sub-assembly.
Tech Tips
Turn the nut while holding the bolt.
-
-
REMOVE AUTOMATIC TRANSMISSION OIL PAN SUB-ASSEMBLY
Note
Some fluid will remain in the oil pan.
-
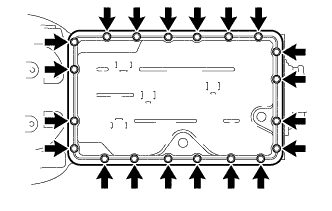
Remove the 20 bolts, automatic transmission oil pan sub-assembly and transmission oil pan gasket.
-
Remove the 3 magnets from the oil pan.
-
Examine particles in the transmission oil pan sub-assembly.
-
Collect any steel chips with the removed magnets.
Carefully look for the foreign objects and particles in the transmission oil pan sub-assembly and on the magnets to guess the type of wear which might be found in the automatic transmission assembly.
Result Steel (magnetic) Bearing, gear and plate wear Brass (non-magnetic) Bushing wear
-
-
-
REMOVE VALVE BODY OIL STRAINER ASSEMBLY
-
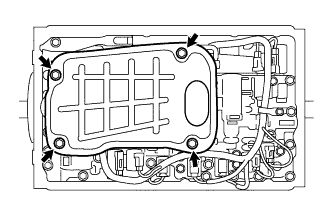
Remove the 4 bolts and valve body oil strainer assembly.
Note
Be careful as some fluid will come out of the valve body oil strainer assembly.
-
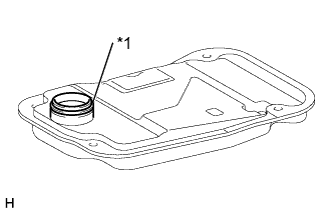
Text in Illustration *1 O-ring Remove the O-ring from the valve body oil strainer assembly.
-
-
DISCONNECT TRANSMISSION WIRE
-
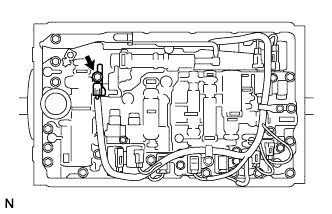
Remove the bolt and the temperature sensor clamp.
-
Disconnect the ATF temperature sensor.
-
Remove the 2 bolts and the 2 valve body wire harness clamps.
-
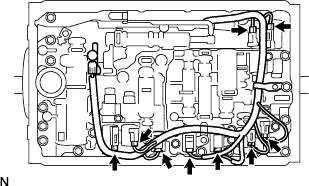
Disconnect the 9 connectors from the shift solenoid valves.
-
-
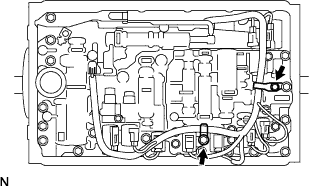
REMOVE TRANSMISSION WIRE
-
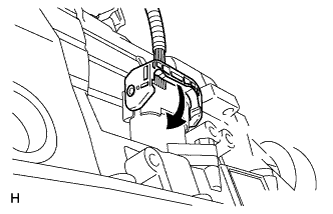
Disconnect the transmission wire connector.
Tech Tips
detach the claw, press down the lever, and disconnect the transmission wire connector.
-
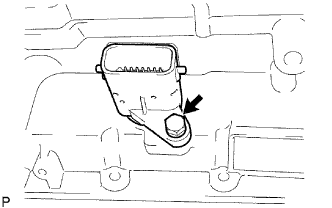
Remove the bolt and pull out the transmission wire.
-
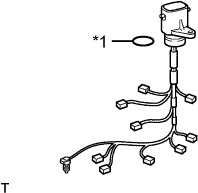
Text in Illustration *1 O-ring Remove the O-ring from the transmission wire.
-