REAR DIFFERENTIAL CARRIER ASSEMBLY (for 2GR-FSE) REMOVAL

-
REMOVE REAR WHEELS
-
DRAIN DIFFERENTIAL OIL
-
Stop the vehicle on a level place.
-
for Front Differential:
-
Remove the engine under cover.
-
Remove the filler plug and gasket.
-
Remove the drain plug and gasket, and drain the oil.
-
Install a new gasket and the drain plug.
- Torque:
- 39 N*m { 400 kgf*cm, 29 ft.*lbf }
-
-
for Rear Differential:
-
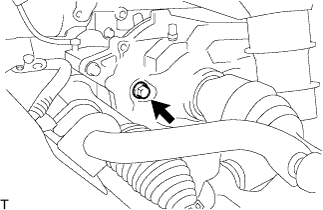
Using a 10 mm hexagon wrench, remove the filler plug and gasket.
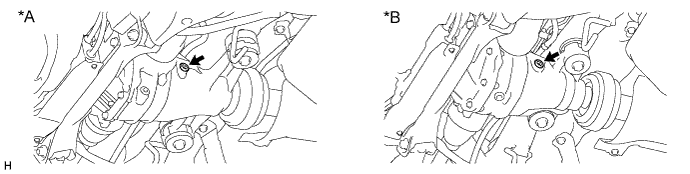
Text in Illustration *A for 2GR-FSE *B for 4GR-FSE -
Using a 10 mm hexagon wrench, remove the drain plug and gasket, and drain the oil.
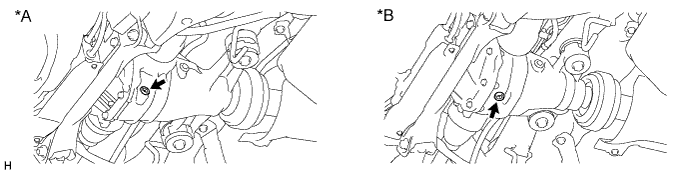
Text in Illustration *A for 2GR-FSE *B for 4GR-FSE -
Install a new gasket and the drain plug.
- Torque:
- 49 N*m { 500 kgf*cm, 36 ft.*lbf }
-
-
-
REMOVE REAR DRIVE SHAFT ASSEMBLY LH
-
REMOVE REAR DRIVE SHAFT ASSEMBLY RH
Tech Tips
Use the same procedure described for the LH side.
-
REMOVE PROPELLER SHAFT WITH CENTER BEARING ASSEMBLY
-
for 2WD:
-
for AWD:
-
-
REMOVE PARKING BRAKE WITH BRACKET ACTUATOR ASSEMBLY
-
REMOVE REAR SUSPENSION MEMBER
-
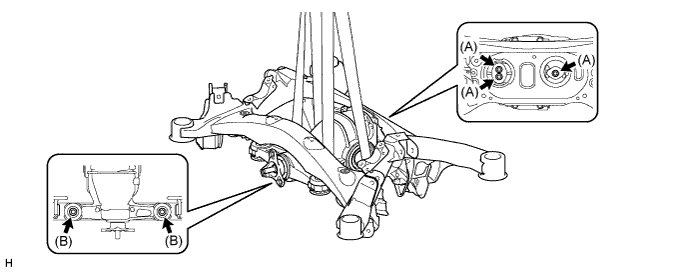
REMOVE REAR DIFFERENTIAL CARRIER ASSEMBLY
-
Using a 12 mm hexagon wrench, remove the 3 bolts (A).
-
Remove the 2 bolts (B), 2 rear upper differential mount stoppers, 2 rear lower differential mount stoppers and rear differential carrier assembly.
Note
-
Do not damage the installation surface when removing the rear differential carrier assembly.
-
Residual oil may leak when the rear differential carrier assembly is removed.
-
Remove the bolts with the rear suspension member sub-assembly secured.
-
-