TRANSFER WIRE REMOVAL

-
REMOVE FRONT EXHAUST PIPE ASSEMBLY
-
DRAIN AUTOMATIC TRANSMISSION FLUID
-
Remove the drain plug and gasket, and drain the ATF.
-
Install a new gasket and the drain plug.
- Torque:
- 20 N*m { 204 kgf*cm, 15 ft.*lbf }
-
-
REMOVE FRONT NO. 1 FLOOR HEAT INSULATOR
-
Remove the 4 nuts and front No. 1 floor heat insulator.
-
-
SUPPORT AUTOMATIC WITH TRANSFER TRANSMISSION ASSEMBLY
-
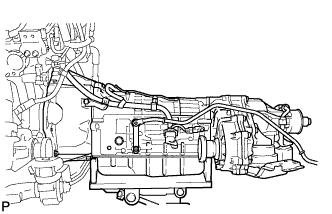
Support the automatic with transfer transmission assembly with a transmission jack.
-
-
REMOVE REAR ENGINE MOUNTING MEMBER
-
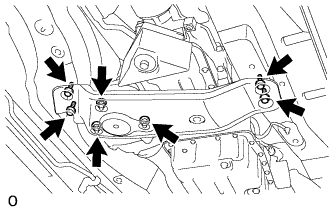
Remove the 4 bolts, 3 nuts and rear engine mounting member.
-
-
REMOVE TRANSFER DYNAMIC DAMPER
-
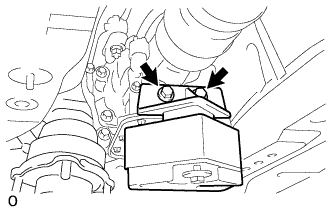
Remove the 2 bolts and the transfer dynamic damper.
-
-
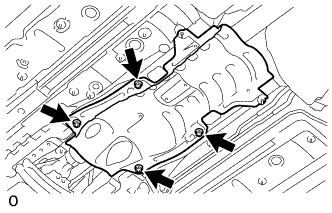
REMOVE TRANSFER OIL PAN SUB-ASSEMBLY
-
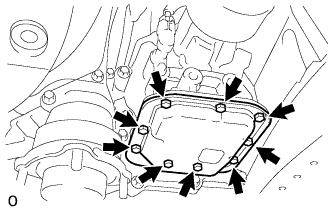
Remove the 9 bolts.
-
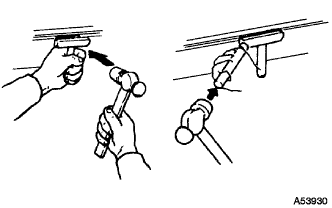
Insert the blade of an oil pan seal cutter between the transfer oil pan sub-assembly and transfer case sub-assembly. Cut through the sealer and remove the transfer oil pan sub-assembly.
Note
Do not damage the contact surface of the transfer oil pan sub-assembly.
-
Remove the transfer oil cleaner magnet from the transfer oil pan sub-assembly.
Note
-
Clean the inside of the transfer oil pan sub-assembly thoroughly, removing all metal shavings, sludge and any other foreign objects.
-
Remove any metal shavings from the transfer oil cleaner magnet.
-
-
-
REMOVE TRANSFER CONTROL VALVE BODY ASSEMBLY
-
Remove the 4 bolts and the transfer control valve body assembly.
-
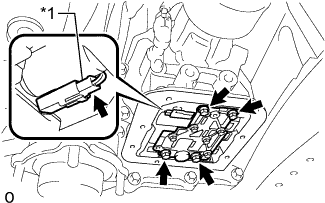
Text in Illustration *1 Connector Disconnect the connector from the transfer control solenoid assembly.
-
-
REMOVE TRANSFER TRANSMISSION WIRE
-
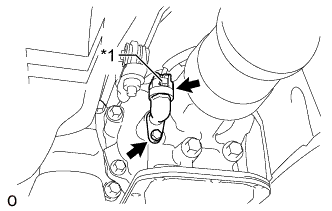
Text in Illustration *1 Connector Disconnect the connector.
-
Remove the bolt and the transfer transmission wire.
-