LUGGAGE COMPARTMENT DOOR OUTSIDE GARNISH REMOVAL

-
REMOVE LUGGAGE COMPARTMENT DOOR COVER
-
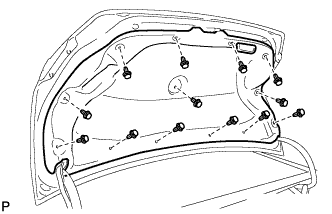
Remove the 13 clips and luggage compartment door cover.
-
-
REMOVE REAR LIGHT ASSEMBLY LH
-
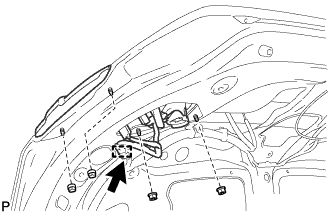
Disconnect the connector.
-
Disengage the clamp.
-
Remove the 4 nuts and rear light assembly.
-
-
REMOVE REAR LIGHT ASSEMBLY RH
Tech Tips
Use the same procedure as for the LH side.
-
REMOVE LUGGAGE COMPARTMENT DOOR OUTSIDE GARNISH SUB-ASSEMBLY
-
w/ Smart Entry and Start System:
-
Disconnect the connector.
-
-

Remove the 5 nuts.
-
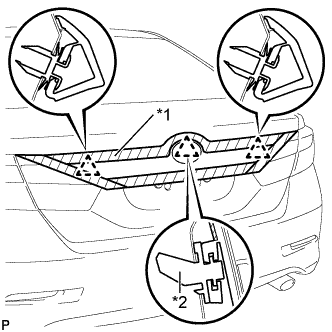
Text in Illustration *1 Protective Tape *2 Back Door Outside Garnish Clip Put protective tape around the luggage compartment door outside garnish sub-assembly.
-
Disengage the 3 clips and remove the luggage compartment door outside garnish sub-assembly.
-
Remove the clip (back door outside garnish clip) and 2 clips from the luggage compartment door outside garnish sub-assembly.
-
Remove the 5 gaskets from the luggage compartment door outside garnish sub-assembly.
-
-
REMOVE LUGGAGE ELECTRICAL KEY SWITCH COVER (w/o Smart Entry and Start System)
-
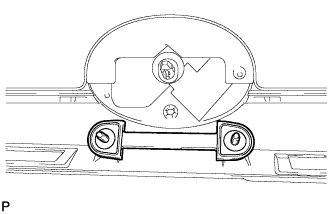
Remove the luggage electrical key switch cover.
-
-
REMOVE LUGGAGE DOOR OPENING SWITCH ASSEMBLY (w/ Smart Entry and Start System)
-
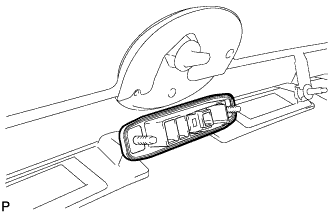
Remove the luggage door opening switch assembly.
-
-
REMOVE LUGGAGE COMPARTMENT DOOR EMBLEM
-
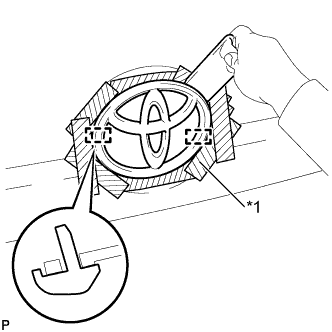
Text in Illustration *1 Protective Tape Put protective tape around the luggage compartment door emblem.
-
Using a moulding remover, peel off the double-sided tape and disengage the 2 pins to remove the luggage compartment door emblem.
Note
Be careful not to damage the vehicle body.
-
-
REMOVE UPPER BACK DOOR GARNISH MOULDING PROTECTOR
-
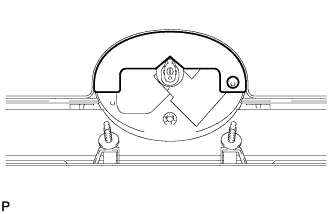
Remove the upper back door garnish moulding protector.
-
-
REMOVE BACK DOOR GARNISH MOULDING PROTECTOR LH
-
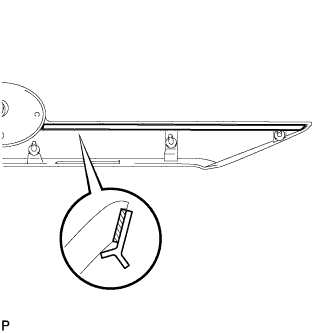
Remove the back door outside garnish protector.
-
-
REMOVE BACK DOOR GARNISH MOULDING PROTECTOR RH
Tech Tips
Use the same procedure as for the LH side.