ENGINE HOOD COURTESY SWITCH INSTALLATION

-
INSTALL ENGINE HOOD COURTESY SWITCH (HOOD LOCK ASSEMBLY) (for LHD)
-
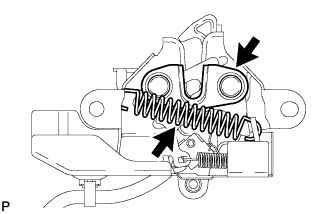
Apply MP grease to the sliding areas of the lock.
-
Connect the hood lock control cable assembly.
-
Install the hood lock assembly with the 2 bolts and hood lock bolt.
- Torque:
- 7.5 N*m { 76 kgf*cm, 66 in.*lbf }
Tech Tips
The hood lock nut cap is a non-reusable part. Be sure to install it after performing the Inspect Hood Sub-assembly and Adjust Hood Sub-assembly steps.
-
Connect the connector.
-
-
INSTALL ENGINE HOOD COURTESY SWITCH (HOOD LOCK ASSEMBLY) (for RHD)
-
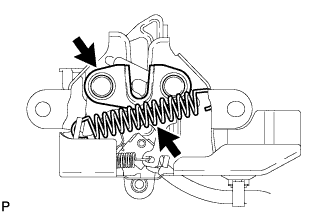
Apply MP grease to the sliding areas of the lock.
-
Connect the hood lock control cable assembly.
-
Install the hood lock assembly with the 2 bolts and hood lock bolt.
- Torque:
- 7.5 N*m { 76 kgf*cm, 66 in.*lbf }
Tech Tips
The hood lock nut cap is a non-reusable part. Be sure to install it after performing the Inspect Hood Sub-assembly and Adjust Hood Sub-assembly steps.
-
Connect the connector.
-
-
INSTALL FRONT BUMPER ASSEMBLY
-
INSPECT HOOD SUB-ASSEMBLY
-
Check that the clearance measurements of areas *a through *f are within each standard range.
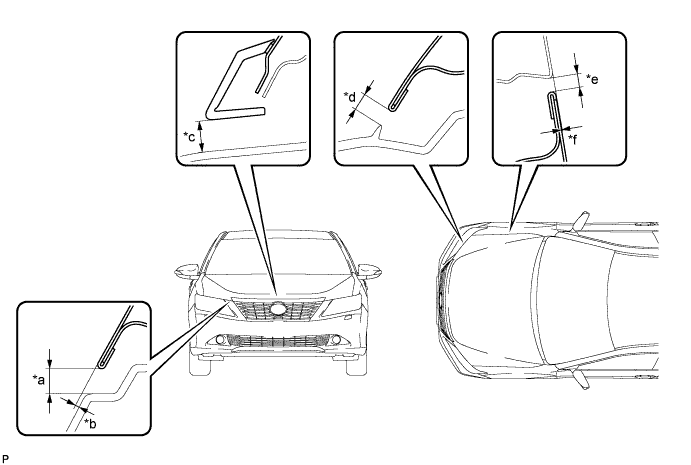
Standard Clearance Area Measurement Area Measurement *a 5.5 to 9.5 mm (0.217 to 0.374 in.) *b -0.8 to 3.2 mm (-0.0315 to 0.126 in.) *c 8.7 to 12.7 mm (0.345 to 0.50 in.) *d 2.8 to 6.8 mm (0.110 to 0.268 in.) *e 2.3 to 5.3 mm (0.0906 to 0.209 in.) *f -1.5 to 1.5 mm (-0.0590 to 0.0590 in.)
-
-
ADJUST HOOD SUB-ASSEMBLY