YAW RATE AND ACCELERATION SENSOR (for Separate Type Yaw Rate Sensor) INSTALLATION

-
INSTALL YAW RATE SENSOR BRACKET
-
Install the yaw rate sensor bracket with the 2 bolts.
- Torque:
- 13 N*m { 127 kgf*cm, 9 ft.*lbf }
-
Engage the 2 clamps to install the wire harnesses.
-
-
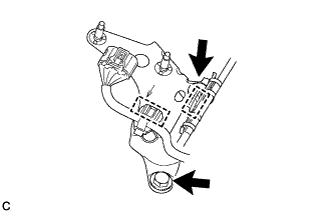
INSTALL NO. 3 INDOOR ELECTRICAL KEY ANTENNA ASSEMBLY (w/ Smart Entry and Start System)
-
Connect the connector to the No. 3 indoor electrical key antenna assembly.
Note
Be careful when installing the No. 3 indoor electrical key antenna assembly. If the antenna is dropped, replace it with a new one.
-
Engage the clamp to install the No. 3 indoor electrical key antenna assembly to the yaw rate sensor bracket.
-
-
INSTALL YAW RATE SENSOR
-
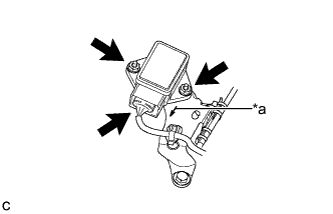
Text in Illustration *a Arrow Mark Install the yaw rate sensor to the yaw rate sensor bracket with the 2 nuts.
- Torque:
- 6.5 N*m { 66 kgf*cm, 58 in.*lbf }
Note
-
Do not damage the yaw sensor.
-
Make sure that the yaw rate sensor is installed securely.
-
Do not use dropped or damaged parts.
-
Keep the contact surfaces of the yaw rate sensor and yaw rate sensor bracket free of foreign matter.
-
Make sure that the connector end of the yaw rate sensor is facing in the same direction as the arrow mark on the bracket when installing the yaw rate sensor.
-
Connect the connector to the yaw rate sensor.
Note
Make sure that the yaw rate sensor connector is connected securely.
-
-
INSTALL CONSOLE BOX ASSEMBLY
-
CONNECT CABLE TO NEGATIVE BATTERY TERMINAL
Note
When disconnecting the cable, some systems need to be initialized after the cable is reconnected Click here.