REAR STRUT ROD REMOVAL

Tech Tips
-
Use the same procedure for the RH side and LH side.
-
The procedure listed below is for the LH side.
-
REMOVE REAR WHEEL
-
REMOVE NO. 2 FLOOR UNDER COVER
-
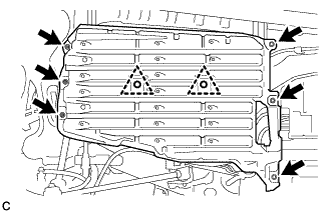
Remove the 2 clips.
Text in Illustration 
Nut (attached to under cover) -
Disengage the 6 nuts and remove the No. 2 floor under cover.
Tech Tips
The 6 nuts will remain attached to the No. 2 floor under cover.
-
-
REMOVE NO. 1 FLOOR UNDER COVER (for RH Side)
-
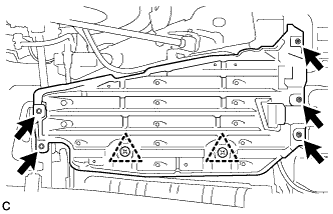
Disengage the 5 nuts and 2 clips, and remove the No. 1 floor under cover.
Text in Illustration Nut (attached to under cover) Tech Tips
Rotate the clips to disengage them. The 5 nuts and 2 clips will remain attached to the No. 1 floor under cover.
-
-
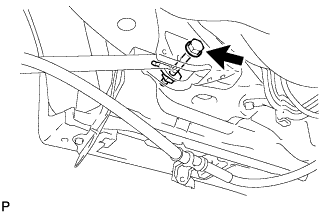
SEPARATE NO. 3 PARKING BRAKE CABLE ASSEMBLY
-
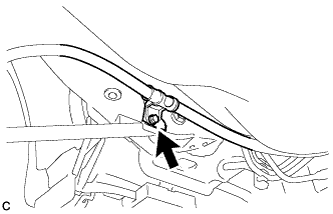
Remove the bolt and separate the No. 3 parking brake cable assembly from the vehicle.
-
-
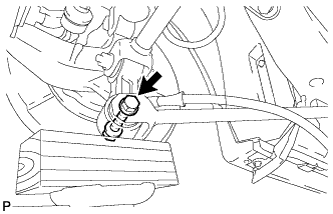
REMOVE REAR STRUT ROD ASSEMBLY
-
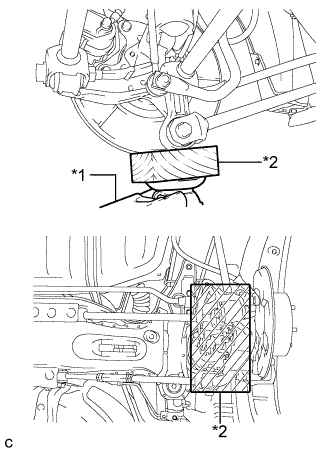
Text in Illustration *1 Jack *2 Wooden Block Support the rear axle carrier sub assembly with a jack using a wooden block.
-
Remove the bolt, nut and separate the rear strut rod assembly (front side).
Note
When removing the bolt, keep the nut from rotating.
-
Remove the bolt, nut and rear strut rod assembly from the rear axle carrier sub-assembly.
Note
When removing the bolt, keep the nut from rotating.
-