VALVE BODY ASSEMBLY REMOVAL

-
REMOVE AUTOMATIC TRANSAXLE ASSEMBLY
-
REMOVE AUTOMATIC TRANSAXLE OIL PAN SUB-ASSEMBLY
-
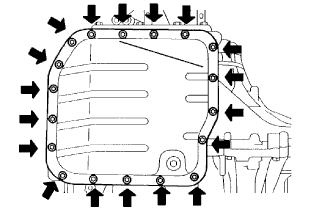
Remove the 18 bolts, automatic transaxle oil pan sub-assembly and gasket from the automatic transaxle assembly.
Note
Some fluid will remain in the automatic transaxle oil pan sub-assembly.
Remove all the automatic transaxle oil pan sub-assembly bolts, and carefully remove the automatic transaxle oil pan sub-assembly.
-
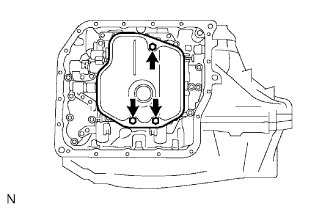
Remove the 2 magnets from the automatic transaxle oil pan sub-assembly.
-
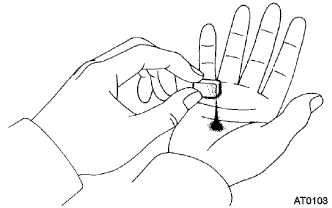
Examine the particles in the automatic transaxle oil pan sub-assembly.
-
Collect any steel chips using the removed magnets.
Carefully inspect the foreign matter and particles in the automatic transaxle oil pan sub-assembly and on the magnets to see the type of wear which might be found in the automatic transaxle assembly.
Steel (magnetic): bearing, gear and clutch plate wear
Brass (non-magnetic): bushing wear
-
-
-
REMOVE VALVE BODY OIL STRAINER ASSEMBLY
-
Remove the 3 bolts and valve body oil strainer assembly from the transmission valve body assembly.
Note
Perform the operation carefully as some fluid will come out from the valve body oil strainer assembly.
-
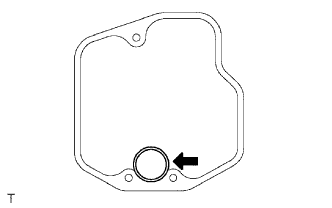
Remove the O-ring from the valve body oil strainer assembly.
-
-
REMOVE TRANSMISSION VALVE BODY ASSEMBLY
-
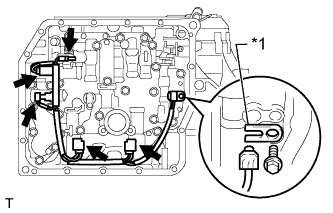
Text in Illustration *1 Lock Plate Disconnect the 5 connectors from the transmission valve body assembly.
-
Remove the bolt, lock plate and ATF temperature sensor from the transmission valve body assembly.
-
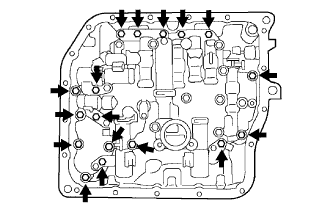
Support the valve body and remove the 17 bolts and transmission valve body assembly.
Note
Do not drop the check ball body, spring or accumulator piston.
-
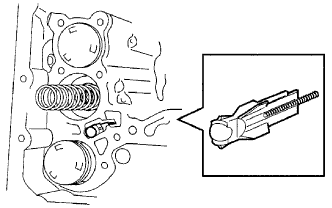
Remove the check ball body and spring from the transmission valve body assembly.
-
-
REMOVE MANUAL VALVE
-
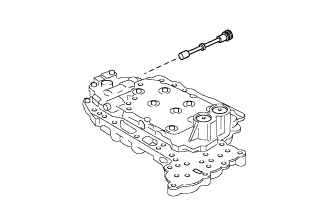
Remove the manual valve from the transmission valve body assembly.
-