LUGGAGE DOOR LOCK CONTROL CABLE ASSEMBLY (for RHD) REMOVAL

-
PRECAUTION
Note
After turning the ignition switch off, waiting time may be required before disconnecting the cable from the negative (-) battery terminal. Therefore, make sure to read the disconnecting the cable from the negative (-) battery terminal notices before proceeding with work Click here.
-
REMOVE FRONT SEAT ASSEMBLY RH (for Manual Seat)
-
REMOVE FRONT SEAT ASSEMBLY RH (for Power Seat)
-
REMOVE FRONT DOOR SCUFF PLATE RH
Tech Tips
Use the same procedure as for the LH side Click here.
-
DISCONNECT FRONT DOOR OPENING TRIM WEATHERSTRIP RH
Tech Tips
Use the same procedure as for the LH side Click here.
-
REMOVE REAR DOOR SCUFF PLATE RH
Tech Tips
Use the same procedure as for the LH side Click here.
-
DISCONNECT REAR DOOR OPENING TRIM WEATHERSTRIP RH
Tech Tips
Use the same procedure as for the LH side Click here.
-
REMOVE LAP BELT OUTER ANCHOR COVER
Tech Tips
Use the same procedure as for the LH side Click here.
-
DISCONNECT FRONT SEAT OUTER BELT ASSEMBLY RH
Tech Tips
Use the same procedure as for the LH side Click here.
-
REMOVE CENTER PILLAR LOWER GARNISH RH
Tech Tips
Use the same procedure as for the LH side Click here.
-
REMOVE REAR SEAT CUSHION ASSEMBLY
-
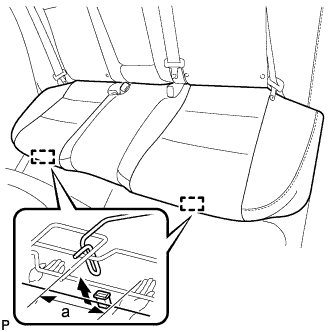
Disengage the hook of the seat cushion from the vehicle body as shown in the illustration.
Standard Measurement a 100 mm (3.94 in.) or less Note
Follow the instructions below carefully as the cushion frame can be deformed easily.
-
Choose a hook to disengage first. Place your hands near the hook as shown in the illustration. Then lift the seat cushion to disengage the hook.
-
Repeat the step above for the other hook.
-
-
Remove the rear seat cushion assembly.
Note
Be careful not to damage the vehicle body.
-
-
REMOVE REAR SEAT CUSHION LOCK HOOK
-
Disengage the claw and remove the rear seat cushion lock hook.
Note
Rear seat cushion lock hooks must not be reused.
Tech Tips
Use the same procedure for the LH side and RH side.
-
-
REMOVE REAR SIDE SEATBACK ASSEMBLY RH
-
Disconnect the rear seat outer belt from the rear seat shoulder belt guide RH.
-
Remove the bolt.
-
Disengage the hook and remove the rear side seatback assembly RH.
Note
Be careful not to damage the vehicle body.
-
-
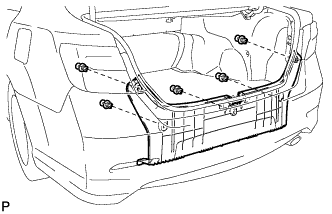
REMOVE LUGGAGE COMPARTMENT DOOR COVER
-
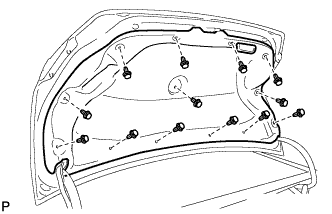
Remove the 13 clips and luggage compartment door cover.
-
-
REMOVE LUGGAGE COMPARTMENT FLOOR MAT
-
Remove the luggage compartment floor mat.
-
-
REMOVE BAGGAGE HOLDER NET (w/ Partition Net)
-
Remove the baggage holder net.
-
-
REMOVE REAR FLOOR FINISH PLATE
-
Remove the 5 clips.
-
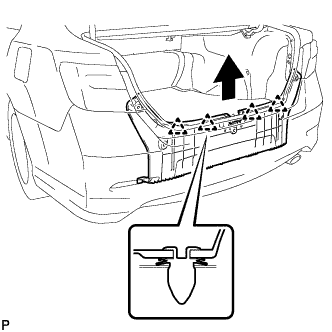
Disengage the 4 clips and remove the rear floor finish plate.
-
-
REMOVE NO. 1 LUGGAGE COMPARTMENT TRIM HOOK
-
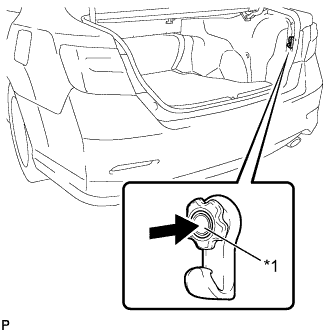
Text in Illustration *1 Pin Push the pin and remove the No. 1 luggage compartment trim hook.
-
-
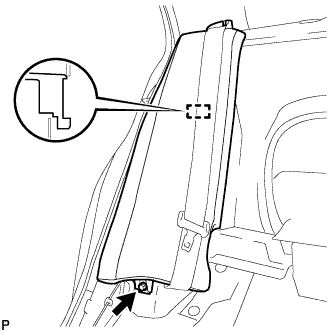
REMOVE LUGGAGE COMPARTMENT INNER TRIM COVER RH
-
Remove the 3 clips.
-
Disengage the fastener and remove the luggage compartment inner trim cover RH.
-
-
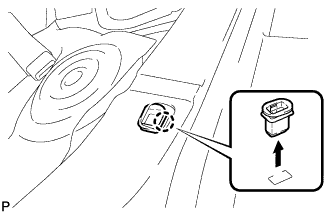
REMOVE FUEL LID LOCK OPEN LEVER SUB-ASSEMBLY
-
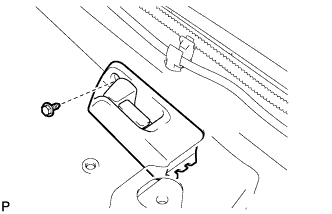
Remove the screw.
-
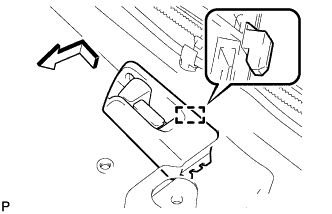
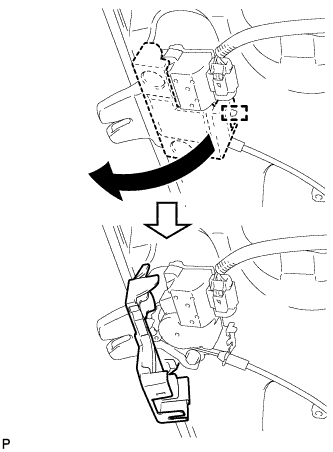
Disengage the guide and disconnect the fuel lid lock open lever sub-assembly as shown in the illustration.
-

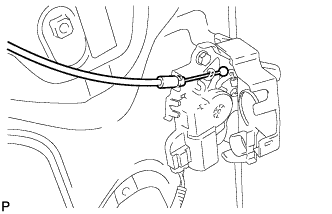
Disconnect the fuel lid lock control cable sub-assembly and luggage door lock control cable sub-assembly and remove the fuel lid lock open lever sub-assembly.
-
-
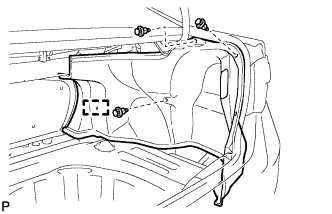
REMOVE LUGGAGE DOOR LOCK CONTROL CABLE SUB-ASSEMBLY
-
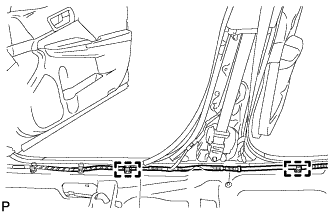
Disengage the 2 clamps.
-
Disengage the clamp and disconnect the wire harness.
-
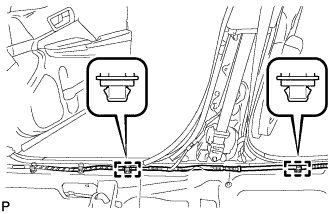
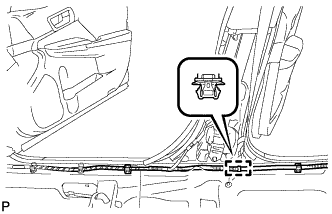
Disengage the 2 clamps and remove the 2 scuff plate clips.
-
Turn back the floor carpet so that the luggage door lock control cable sub-assembly can be removed.
-
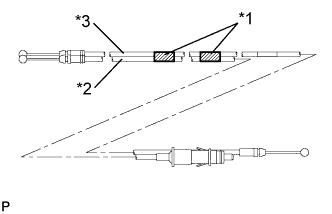
Text in Illustration *1 Tape *2 Fuel Lid Lock Control Cable Sub-assembly *3 Luggage Door Lock Control Cable Sub-assembly Remove the 2 pieces of tape that connect the fuel lid lock control cable sub-assembly and luggage door lock control cable sub-assembly.
-
Disengage the guide as shown in the illustration.
-
Disconnect the luggage door lock control cable sub-assembly.
-
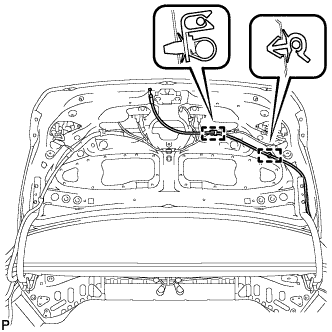
Disengage the 2 clamps and disconnect the luggage door lock control cable sub-assembly.
-
Disengage the 10 clamps and remove the luggage door lock control cable sub-assembly.
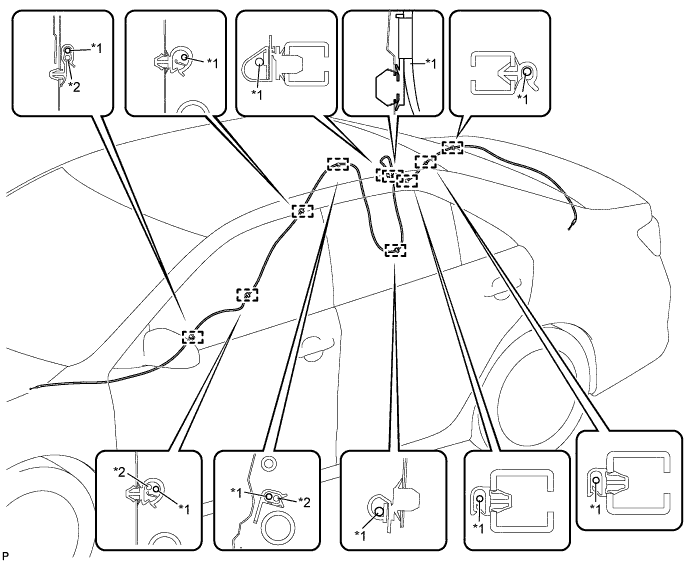
Text in Illustration *1 Luggage Door Lock Control Cable Sub-assembly *2 Fuel Lid Lock Control Cable Sub-assembly
-