THROTTLE BODY REMOVAL

-
DRAIN ENGINE COOLANT
Note
Do not remove the radiator cap sub-assembly or radiator drain cock plug while the engine and radiator assembly are still hot. Pressurized, hot engine coolant and steam may be released and cause serious burns.
-
Loosen the radiator drain cock plug.
-
Loosen the cylinder block drain cock plug.
-
Remove the radiator cap sub-assembly.
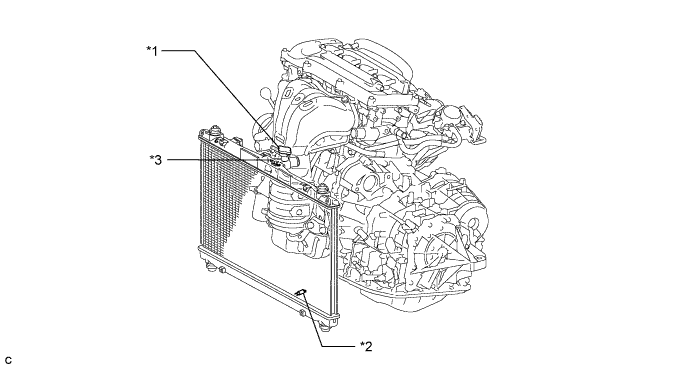
Text in Illustration *1 Radiator Cap Sub-assembly *2 Radiator Drain Cock Plug *3 Cylinder Block Drain Cock Plug - Tech Tips
Collect the engine coolant in a container and dispose of it according to the regulations in your area.
-
-
REMOVE NO. 1 ENGINE COVER SUB-ASSEMBLY
-
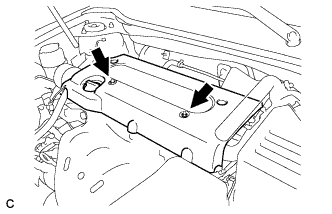
Remove the 2 nuts and No. 1 engine cover sub-assembly.
-
-
REMOVE WINDSHIELD WIPER MOTOR AND LINK ASSEMBLY
-
REMOVE FRONT OUTER COWL TOP PANEL SUB-ASSEMBLY
-
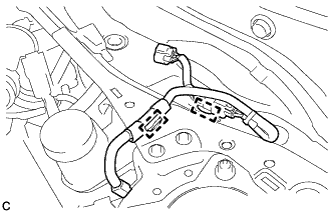
Disengage the 2 clamps and separate the wire harness from the front outer cowl top panel sub-assembly.
-

Remove the 10 bolts and front outer cowl top panel sub-assembly.
-
-
REMOVE AIR CLEANER CAP SUB-ASSEMBLY
-

Disconnect the vacuum switching valve connector.
-
Disconnect the 2 vacuum switching valve vacuum hoses.
-
Disconnect the purge line hose from the 2 clamps.
-
Disconnect the mass air flow meter connector.
-
Disconnect the wire harness clamp.
-
Loosen the 2 bolts and separate the air cleaner cap sub-assembly.
-
Disconnect the ventilation hose from the cylinder head cover sub-assembly.
-
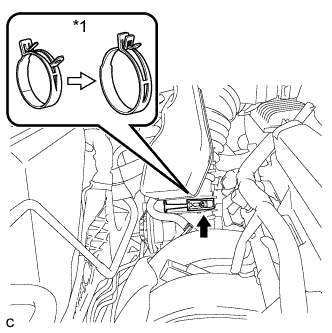
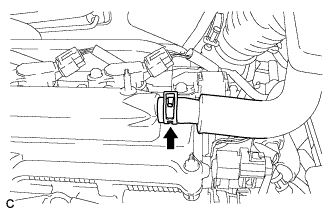
Text in Illustration *1 Air Cleaner Hose Clamp Lock the air cleaner hose clamp as shown in the illustration, and disconnect the air cleaner cap sub-assembly from the throttle with motor body assembly.
-
Remove the air cleaner filter element from the air cleaner case sub-assembly.
-
-
REMOVE THROTTLE WITH MOTOR BODY ASSEMBLY
-
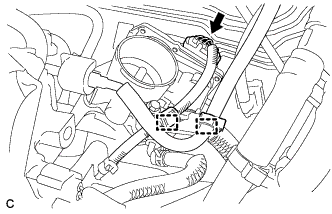
Disconnect the wire harness clamp and the throttle with motor body assembly connector.
-
Separate the fuel tube from the fuel tube bracket.
-
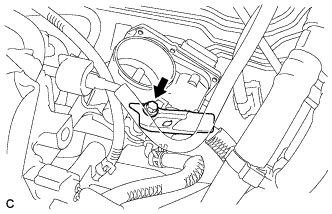
Remove the bolt and fuel tube bracket.
-
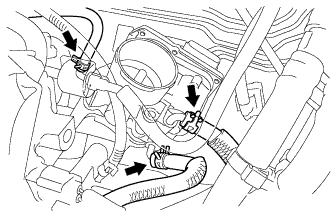
Disconnect the 2 water by-pass hoses.
-
Disconnect the purge line hose.
-
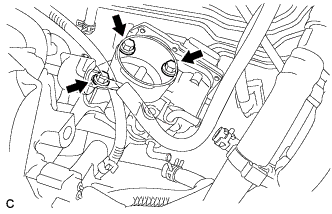
Remove the 3 bolts and the throttle with motor body assembly.
-
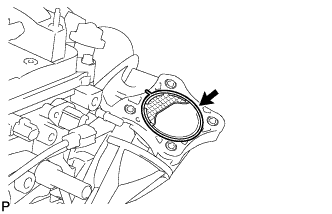
Remove the gasket from the intake manifold.
-