BACK DOOR GLASS INSTALLATION
PROCEDURE
-
CLEAN BACK DOOR GLASS
-
Using a scraper, remove any excess or protruding adhesive sticking to the back door glass.
Note
Be careful not to damage the glass.
-
Clean the outer surface of the back door glass with a non-residue solvent.
Note
Even if using a new back door glass, clean the back door glass with a non-residue solvent.
-
-
INSTALL QUARTER WINDOW GLASS SPACER
-
Apply primer to the installation part of the quarter window glass spacer.
Note
Do not apply too much primer.
-
Install new quarter window glass spacer onto the back door panel sub-assembly, as shown in the illustration.
Note
Allow the primer to dry for 3 minutes or more.
-
-
INSTALL NO. 1 BACK WINDOW GLASS SPACER
-
Apply primer to the installation part of the No. 1 back window glass spacer.
Note
Do not apply too much primer.
-
Install new back door glass spacer onto the back door glass, as shown in the illustration.
Note
Allow the primer to dry for 3 minutes or more.
-
-
INSTALL NO. 2 BACK WINDOW GLASS SPACER
-
Apply primer to the installation part of the No. 2 back window glass spacer.
Note
-
Do not apply too much primer.
-
Allow the primer to dry for 3 minutes or more.
-
-
Install new No. 2 back window glass spacer onto the back door glass, as shown in the illustration.
-
-
INSTALL BACK WINDOW OUTSIDE MOULDING
-
Apply primer to the installation part of the back window outside moulding.
Note
-
Do not apply too much primer.
-
Allow the primer to dry for 3 minutes or more.
-
-
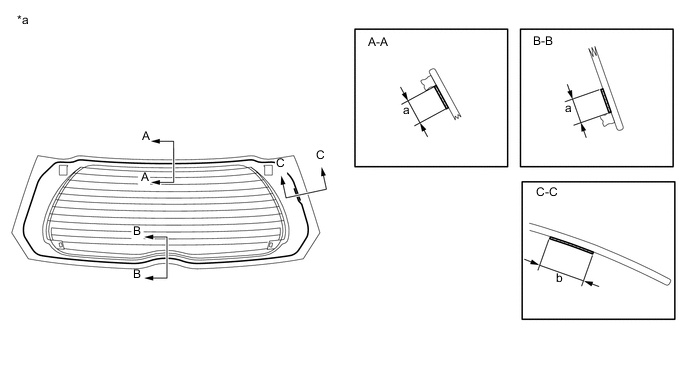
Install a new back window outside moulding onto the back door glass, as shown in the illustration.
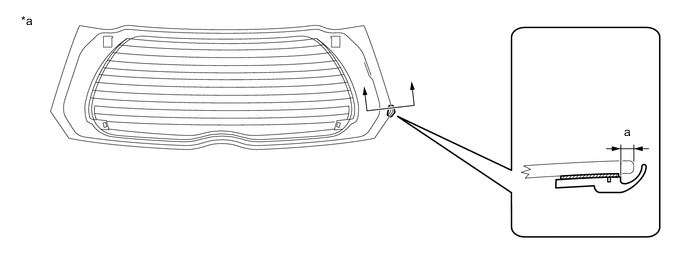
Text in Illustration *a Back Side - - Standard Dimension: Area Dimension a 5.8 mm (0.2283 in.)
-
-
INSTALL BACK DOOR GLASS ADHESIVE DAM
-
Apply primer to the installation part of the back window lower moulding.
Note
-
Do not apply too much primer.
-
Allow the primer to dry for 3 minutes or more.
-
-
Install a new back window lower moulding onto the back door glass, as shown in the illustration.
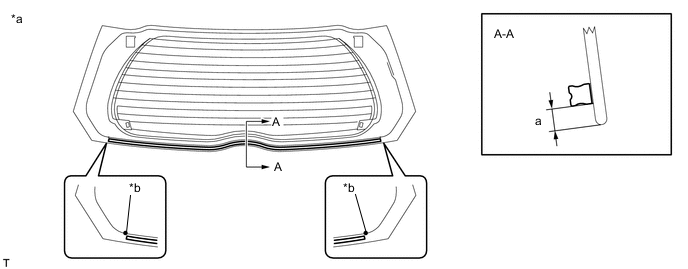
Text in Illustration *a Back Side *b Marking For Moulding Pasting Standard Dimension: Area Dimension a 7.1 mm (0.2795 in.)
-
-
INSTALL BACK DOOR GLASS ADHESIVE DAM
-
Apply primer to the installation part of the back door window moulding.
Note
-
Do not apply too much primer.
-
Allow the primer to dry for 3 minutes or more.
-
-
Install a new back door window moulding onto the back door glass, as shown in the illustration.
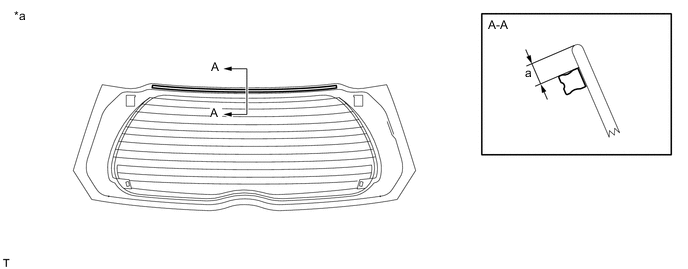
Text in Illustration *a Back Side - - Standard Dimension: Area Dimension a 7.1 mm (0.2795 in.)
-
-
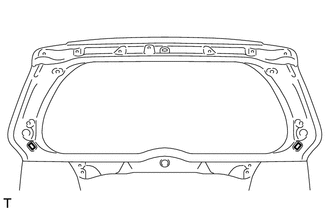
INSTALL BACK DOOR GLASS
-
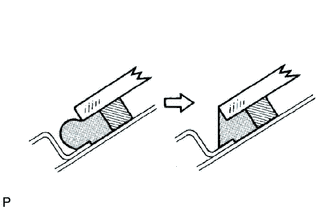
Clean and shape the contact surface of the vehicle body.
-
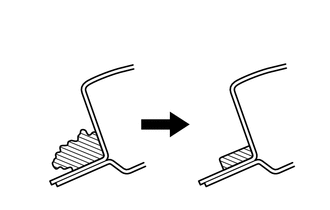
Using a knife, cut away any rough adhesive on the contact surface of the vehicle body to ensure the appropriate surface shape.
Text in Illustration 
Adhesive Note
Leave as much adhesive on the vehicle body as possible.
-
Clean the outer edge of the back door glass with a non-residue solvent.
-
-
Using a brush, apply primer to the exposed part of the vehicle body.
Note
-
Do not apply primer to the adhesive.
-
Throw away any leftover primer.
-
Do not apply too much primer.
-
-
Using a brush, apply primer to the contact surface.
Text in Illustration *a Back Side - - Primer - - Standard Dimension: Area Dimension a 11.0 mm (0.4331 in.) b 22.0 mm (0.8661 in.) Note
-
Do not apply too much primer.
-
Allow the primer to dry for 3 minutes or more.
-
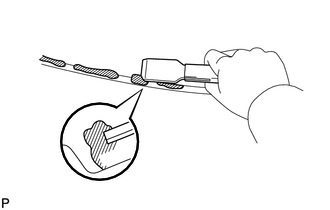
Cut off the tip of the cartridge nozzle as shown in the illustration.
-
Load the sealer gun with the cartridge.
-
Apply adhesive to the back door glass as shown in the illustration.
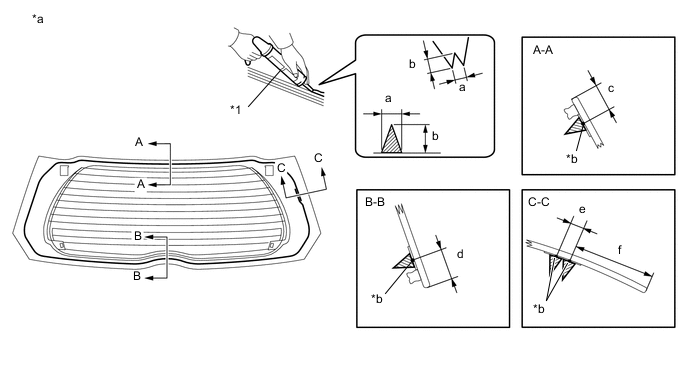
Text in Illustration *1 Sealer Gun - - *a Back Side *b Adhesive Center Line Adhesive - - Standard Dimension: Area Dimension a 8.0 mm (0.3150 in.) b 12.0 mm (0.4724 in.) c 13.0 mm (0.5118 in.) d 15.1 mm (0.5945 in.) e 8.0 mm (0.3150 in.) f 48.9 mm (1.9252 in.)
-
-
Install the back door glass.
-
Position the back door glass so that the matchmarks are aligned, and press it in gently along the rim (when glass without a clip is used).
-
Lightly press the back door glass to ensure that the back door glass is securely fit to the vehicle body (when glass without a clip is used).
Tech Tips
Press the glass with a force of 98 N (10 kgf, 22 lbf) or more.
-
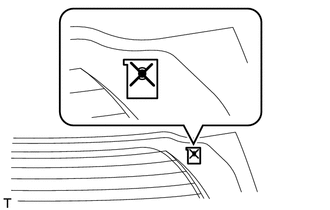
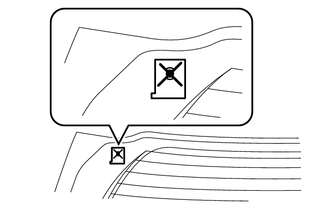
Using suction cups, engage the 2 clips to install the back door glass (when glass with all clips is used)
-
Lightly press the back door glass to ensure that the back door glass is securely fit to the vehicle body.
Tech Tips
Press the back door glass with a force of 98 N (10 kgf, 22 lbf) or more.
-
Using a scraper, remove any excess or protruding adhesive.
Text in Illustration 
Adhesive -
Hold the windshield glass using protective tape until applied adhesive becomes hard.
-
-
Connect the 2 connectors.
-
-
INSTALL REAR SPOILER SUB-ASSEMBLY
-
INSTALL BACK DOOR OUTSIDE GARNISH SUB-ASSEMBLY