ROOF WINDOW FIX GLASS REMOVAL
CAUTION / NOTICE / HINT
CAUTION:
Some of these service operations affect the SRS airbag system. Read the precautionary notices concerning the SRS airbag system before servicing Click here.
PROCEDURE
-
PRECAUTION
Note
After turning the ignition switch off, waiting time may be required before disconnecting the cable from the battery terminal. Therefore, make sure to read the disconnecting the cable from the battery terminal notice before proceeding with work Click here.
-
DISCONNECT CABLE FROM NEGATIVE BATTERY TERMINAL
-
REMOVE ROOF HEADLINING ASSEMBLY
-
REMOVE SLIDING ROOF HOUSING SUB-ASSEMBLY
-
REMOVE ROOF DRIP SIDE FINISH MOULDING
-
REMOVE NO. 1 ROOF WINDOW GLASS SUB-ASSEMBLY
Note
To prevent the roof window glass from dropping when performing this operation, be sure to hold the roof window glass using suction cups.
-
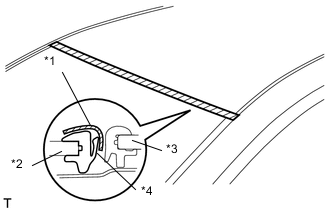
Text in illustration *1 Adhesive Tape *2 Windshield Glass *3 No. 1 Roof Window Glass Sub-assembly *4 Windshield Glass Outside Moulding Lip Turn the lip of the windshield outside moulding and hold it with adhesive tape.
-
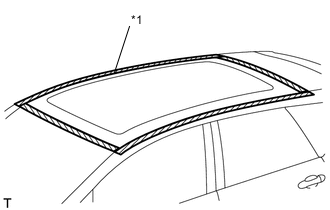
Text in illustration *1 Protective Tape 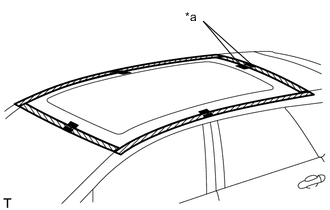
Text in illustration *a Matchmark Apply protective tape to the installation position of the No. 1 roof window glass sub-assembly on the vehicle body.
Note
If reusing the windshield glass, put the adhesive tape etc. on the No. 1 roof window glass sub-assembly and the body panel and put the matchmarks on them before removing the No. 1 roof window glass sub-assembly.
-
Install the suction cups on No. 1 roof window glass sub-assembly.
-
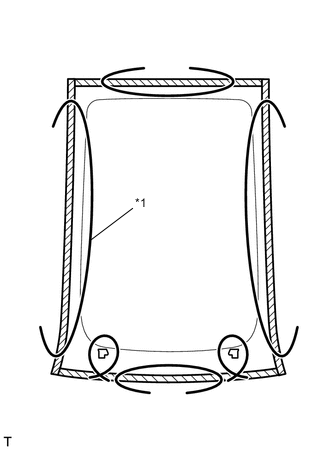
Text in illustration *1 Piano Wire Pass a piano wire between the vehicle body and glass from the interior, as shown in the illustration.
-
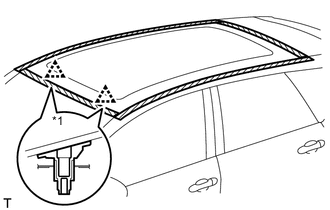
Text in illustration *1 Roof window stopper Tie both wire ends to wooden blocks or similar objects that can serve as handles.
-
Cut off the adhesive by pulling the piano wire around the No. 1 roof window glass sub-assembly.
Note
When separating the windshield glass from the vehicle, be careful not to damage the vehicle's paint or interior/exterior ornaments.
-
Using suction cups, remove the No. 1 roof window glass sub-assembly.
Note
Be careful not to drop the roof window glass.
-