SHIFT LEVER ASSEMBLY INSTALLATION
PROCEDURE
-
INSTALL SHIFT LEVER ASSEMBLY
-
Install the shift lever assembly with the 4 nuts.
- Torque:
- 12 N*m { 122 kgf*cm, 9 ft.*lbf }
-
-
CONNECT TRANSMISSION CONTROL CABLE ASSEMBLY
-
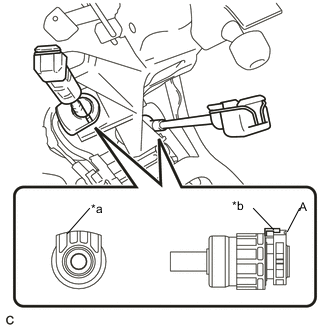
Text in Illustration *a Projecting Part *b Lock Connect the transmission control cable assembly to the shift lever assembly.
Note
-
The projecting part of the cable outer should face outside when the shift cable is connected.
-
After installation, make sure that the cable outer lock is projecting from A as shown in the illustration.
-
-
Install the transmission control shift cable to the shift lever assembly.
-
Install the transmission control select cable to the shift lever assembly.
-
-
ADJUST TRANSMISSION CONTROL SELECT CABLE
-
INSTALL LOWER INSTRUMENT PANEL CENTER FINISH PANEL
-
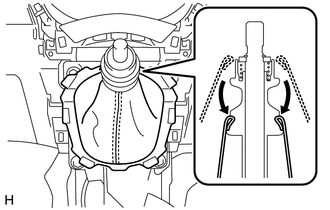
INSTALL SHIFTING HOLE COVER SUB-ASSEMBLY
-
Install the shifting hole cover sub-assembly onto the shift lever assembly.
-
Engage the 6 claws and install the shifting hole cover sub-assembly onto the center instrument cluster finish panel assembly.
-
-
INSTALL CENTER INSTRUMENT CLUSTER FINISH PANEL ASSEMBLY
-
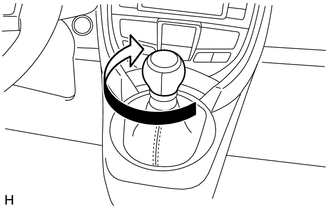
INSTALL SHIFT LEVER KNOB SUB-ASSEMBLY
-
Turn the shift lever knob clockwise and install the shift lever knob sub-assembly onto the shift lever assembly.
-
-
INSTALL NO. 1 METER HOOD CLUSTER
-
INSTALL NO. 2 METER HOOD CLUSTER
-
INSTALL REAR CONSOLE BOX ASSEMBLY