OIL PUMP REMOVAL

PROCEDURE
-
INSTALL ENGINE ON ENGINE STAND
-
REMOVE ENGINE HANGER
-
REMOVE OIL LEVEL DIPSTICK SUB-ASSEMBLY
-
REMOVE ENGINE OIL LEVEL DIPSTICK GUIDE
-
REMOVE IGNITION COIL ASSEMBLY
-
REMOVE NO. 2 VENTILATION HOSE
-
REMOVE VENTILATION HOSE
-
REMOVE NO. 1 WATER BY-PASS PIPE
-
REMOVE V-RIBBED BELT TENSIONER ASSEMBLY
-
REMOVE NO. 1 CRANKSHAFT POSITION SENSOR
-
REMOVE CYLINDER HEAD COVER SUB-ASSEMBLY
-
REMOVE WATER INLET
-
REMOVE NO. 2 WATER INLET HOUSING GASKET
-
REMOVE CRANK POSITION SENSOR
-
REMOVE CRANKSHAFT PULLEY ASSEMBLY
-
REMOVE TIMING CHAIN COVER SUB-ASSEMBLY
-
Disconnect the radio setting condenser connector.
-
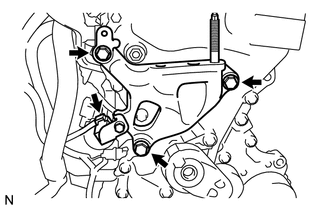
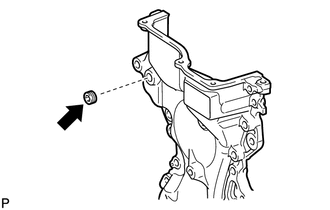
Remove the 3 bolts and engine mounting bracket RH.
-
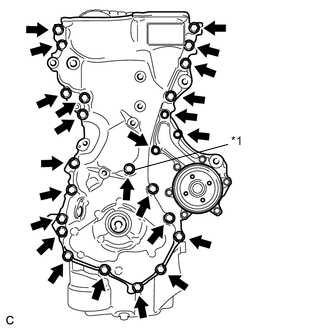
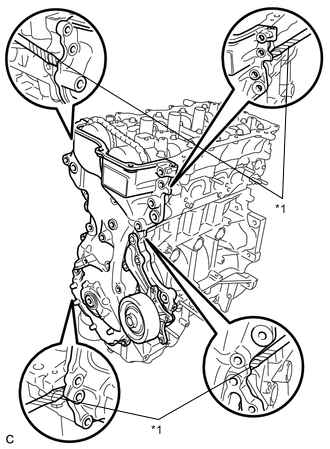
Text in Illustration *1 Seal Washer Remove the 24 bolts and seal washer.
-
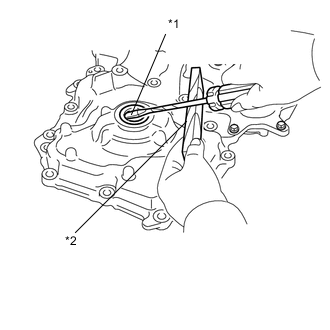
Text in Illustration *1 Protective Tape Remove the timing chain cover by prying between the timing chain cover and cylinder head or cylinder block with a screwdriver.
Note
Be careful not to damage the contact surfaces of the timing chain cover, cylinder block, and cylinder head.
Tech Tips
Tape the screwdriver tip before use.
-
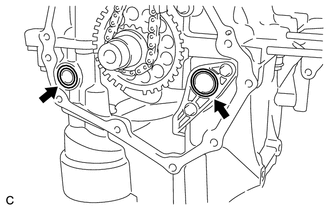
Remove the 2 O-rings.
-
Using an 8 mm socket hexagon wrench, remove the plug.
-
-
REMOVE TIMING CHAIN COVER OIL SEAL
-
Text in Illustration *1 Protective Tape *2 Wooden Block Using a screwdriver with its tip wrapped in protective tape, remove the timing chain cover oil seal.
-