FUEL TANK REMOVAL
PROCEDURE
-
PRECAUTION
-
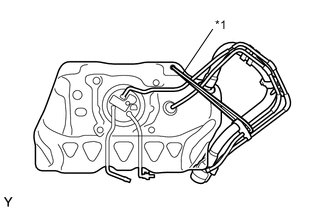
Text in Illustration *1 Cord When removing and storing the fuel tank assembly, arrange the fuel tank filler pipe assembly as shown in the illustration, and secure the fuel tank assembly using a cord or similar.
Note
According to the arrangement of the fuel tank filler pipe assembly during the storage, the fuel tank filler pipe assembly may become deform.
-
-
REMOVE FUEL TANK VENT TUBE WITH SENDER GAUGE ASSEMBLY
-
REMOVE FUEL SUCTION TUBE SET GASKET
-
DRAIN FUEL
-
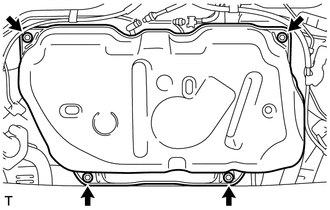
REMOVE FRONT NO. 4 FLOOR HEAT INSULATOR
-
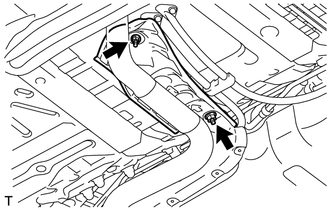
Remove the 2 nuts and the front No. 4 floor heat insulator.
-
-
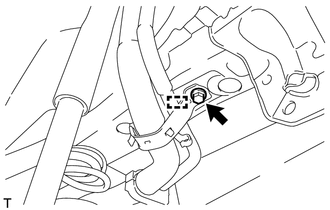
REMOVE FUEL TANK COVER VENT CASE SUB-ASSEMBLY
-
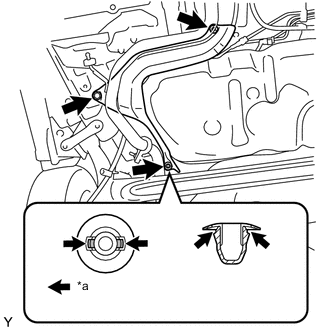
Text in Illustration *a Pinch Point Pinch and remove the clip as shown in the illustration.
-
Remove the bolt, nut and fuel tank cover vent case sub-assembly.
-
-
DISCONNECT FUEL TANK MAIN TUBE SUB-ASSEMBLY
-
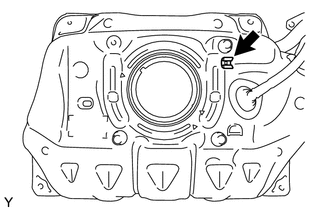
Release the checker as shown in the illustration.
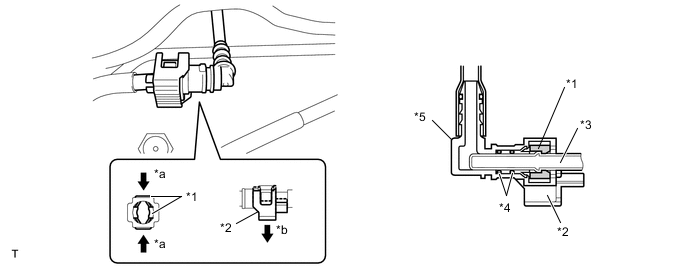
Text in Illustration *1 Retainer *2 Checker *3 Fuel Pipe *4 O-ring *5 Fuel Tube Connector *a Pinch *b Pull -
Pinch the retainer to release it as shown in the illustration and separate the fuel tank main tube.
Note
-
Check for dirt or other foreign matter on the parts to be disconnected and clean them if necessary.
-
The quick connector seals with an O-ring. Ensure that there is no damage or foreign matter on the contact surface.
-
Do not use any tools.
-
Do not bend or twist the tubes.
-
Protect the contact surface by covering it with a plastic bag.
-
If the connector is stuck, push and pull on the parts to separate them.
-
-
-
DISCONNECT FUEL RETURN TUBE SUB-ASSEMBLY
-

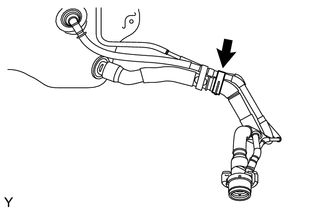
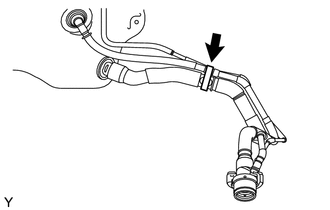
Text in Illustration *1 Retainer *2 O-ring *3 Fuel Pipe *a Lock *b Unlock Release the lock as shown in the illustration.
-
Pull the retainer and disconnect the fuel return tube.
Note
-
Check for dirt or other foreign matter on the parts to be disconnected and clean them if necessary.
-
The quick connector seals with an O-ring. Ensure that there is no damage or foreign matter on the contact surface.
-
Do not use any tools.
-
Do not bend or twist the tubes.
-
Protect the contact surface by covering it with a plastic bag.
-
If the connector is stuck, push and pull on the parts to separate them.
-
-
-
REMOVE FUEL TANK ASSEMBLY
-
Remove the bolt and disconnect the clip, and disconnect the bracket.
-
Using an engine lifter, support the fuel tank.
-
Remove the 4 bolts and the fuel tank.
Note
Make sure that the fuel tank does not fall.
-
-
REMOVE FUEL TANK MAIN TUBE SUB-ASSEMBLY
-
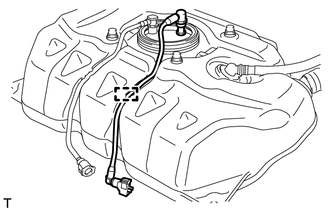
Disengage the guide and remove the fuel tank main tube from the fuel tank.
-
-
REMOVE FUEL RETURN TUBE SUB-ASSEMBLY
-
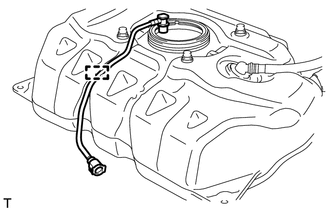
Disengage the guide and remove the fuel return tube from the fuel tank.
-
-
REMOVE FUEL HOSE CLAMP
-
Remove the fuel hose clamp.
-
-
REMOVE NO. 1 FUEL TANK FILLER PIPE SUPPORT
-
Remove the No. 1 fuel tank filler pipe support.
-
-
REMOVE NO. 2 FUEL TANK FILLER PIPE SUPPORT
-
Disengage the clamp and remove the No. 2 fuel tank filler pipe support.
-