FRONT BUMPER REASSEMBLY
PROCEDURE
-
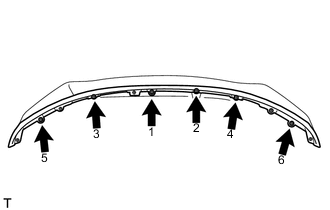
INSTALL FRONT LOWER BUMPER ABSORBER
-
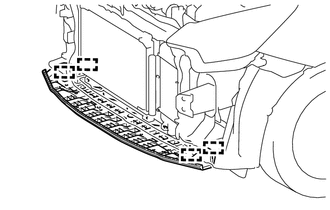
Engage the 4 guides to install the front lower bumper absorber.
-
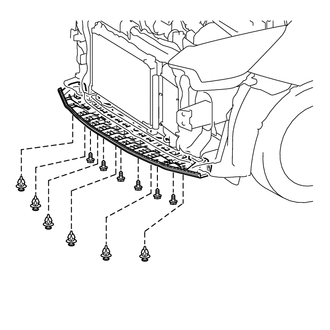
Install the 6 bolts and 6 clips.
-
-
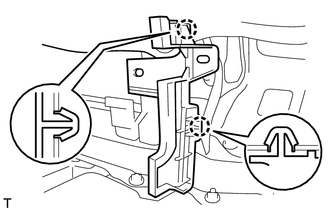
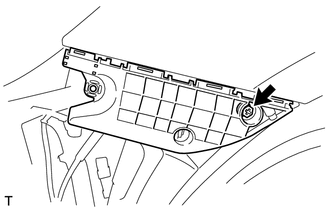
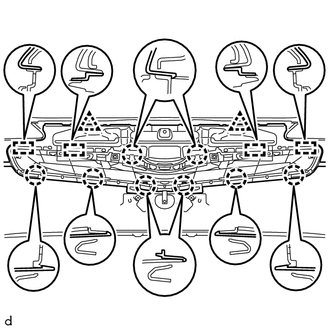
INSTALL FRONT NO. 1 BUMPER STONE DEFLECTOR BRACKET
-
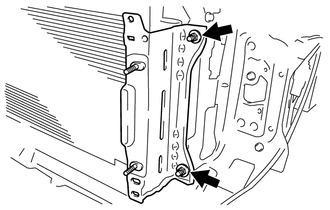
Install the front No. 1 bumper stone deflector bracket with the 2 nuts.
- Torque:
- 5.5 N*m { 56 kgf*cm, 49 in.*lbf }
Tech Tips
Use the same procedure for both the RH and LH sides.
-
-
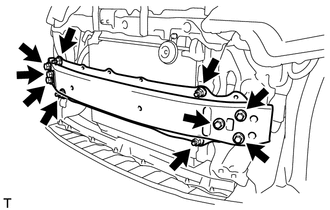
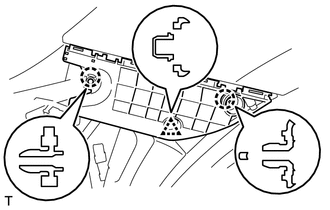
INSTALL FRONT BUMPER REINFORCEMENT
-
Install the front bumper reinforcement with the 4 nuts.
- Torque:
- 5.5 N*m { 56 kgf*cm, 49 in.*lbf }
- for nut
-
Install the 6 bolts.
- Torque:
- 40 N*m { 408 kgf*cm, 30 ft.*lbf }
- for bolt
-

Engage the 3 clamps.
-
Connect the connector.
-
-
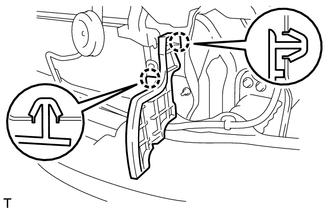
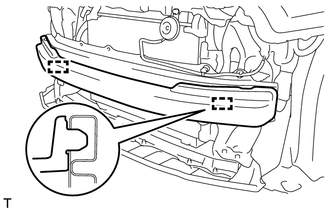
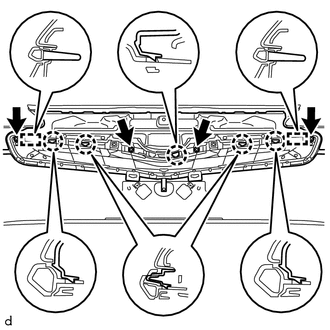
INSTALL RADIATOR SUPPORT EXTENSION LH
-
Engage the 2 claws to install the radiator support extension LH.
-
-
INSTALL RADIATOR SUPPORT EXTENSION RH
Tech Tips
Use the same procedure as for the LH side.
-
INSTALL NO. 2 RADIATOR SIDE AIR SEAL
-
Engage the 2 claws to install the No. 2 radiator side air seal.
-
-
INSTALL NO. 1 RADIATOR SIDE AIR SEAL
Tech Tips
Use the same procedure as for the No. 2 side.
-
CONNECT THERMISTOR ASSEMBLY
-
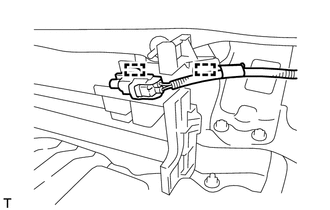
Engage the 2 clamps to connect the thermistor assembly.
-
-
INSTALL FRONT BUMPER SIDE RETAINER LH
-
Engage the 2 claws and clip.
-
Install the front bumper side retainer LH with the screw.
-
-
INSTALL FRONT BUMPER SIDE RETAINER RH
Tech Tips
Use the same procedure as for the LH side.
-
INSTALL FRONT BUMPER ENERGY ABSORBER
-
Engage the 2 guides to install the front bumper energy absorber.
-
-
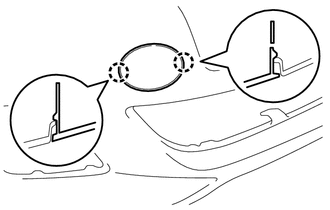
INSTALL HOOD TO FRONT END PANEL SEAL
-
Clean the attachment surface.
-
Using an infrared light, heat the double-sided adhesive tape remaining on the front bumper cover.
Tech Tips
Heat at 40 to 60°C (104 to 140°F) for 1 to 2 minutes.
-
Using a piece of cloth, rub the remaining double-sided adhesive tape off the front bumper cover while it is hot from the infrared light.
Note
Installing the hood to front end panel seal with any double-sided tape remaining on the front bumper cover may cause adhesion failure. Therefore, completely remove the double-sided tape.
-
Using a non-residue solvent, clean the attachment surface.
-
-
Install a new hood to front end panel seal onto the front bumper cover, as shown in the illustration.
Note
Thoroughly press the hood to front end panel seal to ensure that it adheres.
-
Install the 3 clips.
-
-
INSTALL FRONT BUMPER HOLE COVER
-
Engage the 2 claws to install the front bumper hole cover.
-
-
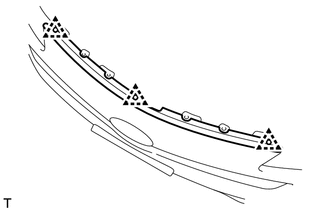
INSTALL FRONT SPOILER COVER
-
Temporarily install the front spoiler cover with the 6 screws.
-
Tighten the 6 screws in the order shown in the illustration.
Note
Do not overtighten the screws as the front spoiler cover can be deformed.
-
-
INSTALL LOWER NO. 1 RADIATOR GRILLE
-

Engage the 14 claws to install the lower No. 1 radiator grille.
-
-
INSTALL RADIATOR GRILLE (OR FRONT PANEL) EMBLEM
-

Engage the 2 guides and 4 claws to install the radiator grille (or front panel) emblem.
-
-
INSTALL RADIATOR GRILLE
-
Engage the 4 guides and 8 claws to install the radiator grille.
-
Install the 2 clips.
-
-
INSTALL LOWER RADIATOR GRILLE MOULDING
-
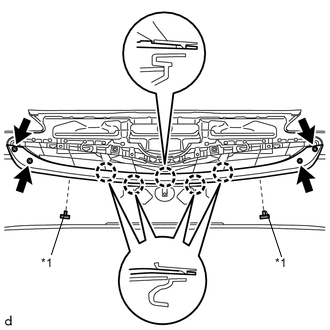
Text in Illustration *1 Outside Moulding Retainer Engage the 5 claws to install the lower radiator grille moulding.
-
Install the 2 outside moulding retainers and 4 screws.
-
-
INSTALL RADIATOR GRILLE MOULDING
-
Engage the 5 claws and 2 guides to install the radiator grille moulding.
-
Install the 4 screws.
-
-
INSTALL FOG LIGHT COVER LH
-
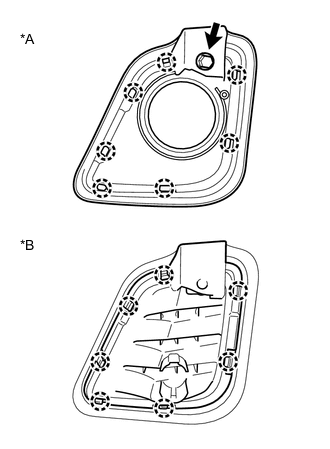
Text in illustration *A w/ Front Fog light *B w/o Front Fog light Engage the 7 claws to install the fog light cover LH.
-
Install the bolt (w/ front fog light).
-
-
INSTALL FOG LIGHT COVER RH
Tech Tips
Use the same procedure as for the LH side.
-
INSTALL FOG LIGHT ASSEMBLY LH (w/ Front Fog Light)
-
INSTALL FOG LIGHT ASSEMBLY RH (w/ Front Fog Light)
Tech Tips
Use the same procedure as for the LH side.