WINDSHIELD DEICER SWITCH INSTALLATION
-
INSTALL FRONT WIPER DEICER SWITCH (OUTER MIRROR HEATER SWITCH ASSEMBLY) (for LHD)
-
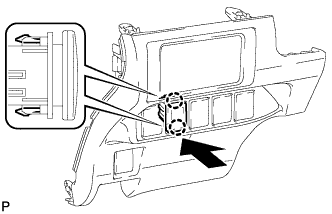
Engage the 2 claws and install the front wiper deicer switch (outer mirror heater switch assembly) as shown in the illustration.
-
-
INSTALL FRONT WIPER DEICER SWITCH (OUTER MIRROR HEATER SWITCH ASSEMBLY) (for RHD)
-
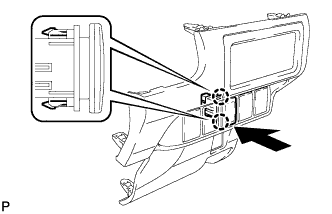
Engage the 2 claws and install the front wiper deicer switch (outer mirror heater switch assembly) as shown in the illustration.
-
-
INSTALL LOWER INSTRUMENT PANEL FINISH PANEL SUB-ASSEMBLY
-
Connect each connector.
-
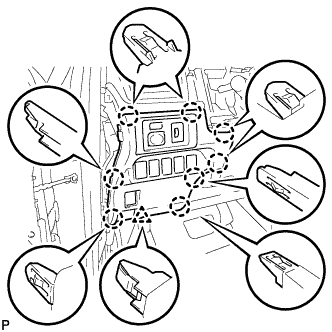
Engage the 8 claws and clip to install the lower instrument panel finish panel sub-assembly.
-
-
INSTALL INSTRUMENT SIDE PANEL LH (for LHD)
-
Engage the 4 guides, clip and 3 claws to install the instrument side panel LH.
-
-
INSTALL INSTRUMENT SIDE PANEL RH (for RHD)
Tech Tips
Use the same procedure as for the LH side.
-
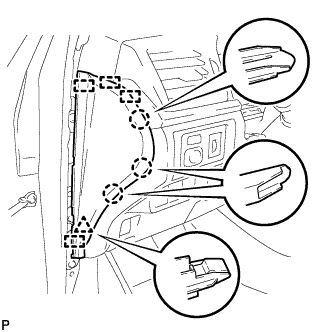
INSTALL FRONT DOOR OPENING TRIM WEATHERSTRIP LH (for LHD)
-
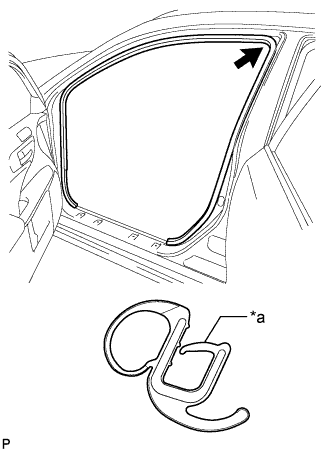
Text in Illustration *a Alignment Mark (Orange) Align the alignment mark (orange) on the weatherstrip with the protruding portion on the body indicated by the arrow in the illustration, and install the front door opening trim weatherstrip LH.
Note
After installation, check that the corners fit correctly.
-
-
INSTALL FRONT DOOR OPENING TRIM WEATHERSTRIP RH (for RHD)
-
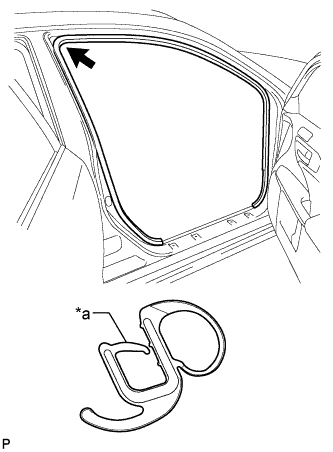
Text in Illustration *a Alignment Mark (Light blue) Align the alignment mark (light blue) on the weatherstrip with the protruding portion on the body indicated by the arrow in the illustration, and install the front door opening trim weatherstrip RH.
Note
After installation, check that the corners fit correctly.
-